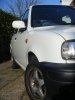
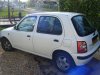
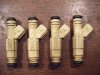
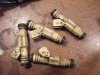
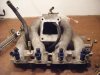
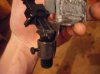
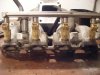
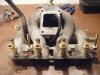
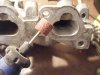
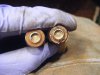
• Please only use these forums for blogs, they are not a discussion forum

Noddie's K11

you just pimped ur ride.. ur spare cars gt alloys on!! swop um ova..!

Agreed, those are really nice alloys!

Just a note Jamie, try not to use txt speak, the mods don't really like it and half of us can't get what people are saying ;)

Goddamit...second page...
 
yeah, i like the aloys too, got the centre caps for them aswell, they only thing is they are 13's so they wont fit over my gtir calipers (to be fitted when i get some bigger wheels), also, i cant really justify the rise in insurnace at the moment. does anyone know how much it puts your insurance up if you have aloys?

anyway...a small update:

i have sorted some more rust that i found in bottom of the rear door. i didnt know that it was as bad as it turned out to be, but i managed it...
here are some pics of the progress...

the rust holes
attachment.php


more of the big hole


trusty rust treatment (seems to work ok)
attachment.php


more treatment
attachment.php


filler (its like fiberglass paste that you mix with the hardener and just slap in) works a treat.
attachment.php


i put a piece of wire mesh behind the hole. i attached two pieces of wire to it so i could move it around and make sure it didnt fall inside.
attachment.php


well, i stopped taking pictures half way through the filling. but basicly after that i just filled it some more, sanded it down, and primered it (i am still to paint it in the propper white).
when i have painted it propperly i will get a pic up of the finnished item.

i have also been slowly getting on with the wiring loom for the hawk engine management. its a slow process when you are learning as you go.
 

Attachments

  • Picture 156 small.JPG
    Picture 156 small.JPG
    59.4 KB · Views: 715
  • Picture 154 small.JPG
    Picture 154 small.JPG
    97.6 KB · Views: 1,122
  • Picture 160 small.JPG
    Picture 160 small.JPG
    68.4 KB · Views: 1,117
  • Picture 162213 small.JPG
    Picture 162213 small.JPG
    104.7 KB · Views: 1,075
  • Picture 158 small.JPG
    Picture 158 small.JPG
    74.4 KB · Views: 1,083
  • small123.JPG
    small123.JPG
    66.4 KB · Views: 1,080
This arrived a couple of days ago!
came in gray/brown:sick: so a got out the rattle cans.
plastic primer, 2 coats of white, then 4 of laccer(sp). really nice and shiny.
and now i can drink hot chocolate on the move and not get it all over my trousers:D

attachment.php

attachment.php

attachment.php

attachment.php


p.s, im a man so i obviousely dont drink hot chocolate, i drink manly coffee:D
 

Attachments

  • cup holders small.JPG
    cup holders small.JPG
    45.2 KB · Views: 1,125
  • cup holders small2.JPG
    cup holders small2.JPG
    45 KB · Views: 1,124
  • white cup holders small2.JPG
    white cup holders small2.JPG
    60.6 KB · Views: 1,144
  • White cup holders small.JPG
    White cup holders small.JPG
    61.5 KB · Views: 1,143
Thanks guys:) i like it, not had chance to use the cup holder yet though, i will give a full rundown of their performance when i have.
yeah, the paint came out ok, the only thing is that the white is a bit reflective in the windscreen, its not so bad as its on the passenger side.
 
Cup holder review:D: wow, what a revelation! i dont know how i lived without them honistly. they make increase the pleasure whist drinking your hot beverage by aproximately 7 times. i would recommend them to anyone.

De-bumpstripped and gave her a nice T-cut the other day, also fitter the aloys off of the spare micra i had. will get some pics up soon.

Today i changed my T/B for a spare one i had as the power delivery was a bit lumpy and the spark plugs were indicating at a lean mixture. It runs really well now, its like i'v just added another 10bhp. but with one slight down side, the idle is not so good anymore:( she idles fine for a while, then the revs start to bounce around and eventualy the car dies.
Any idea as to what the problem could be? i have changed the IACV from my T/B to the one i just fitted but it hasnt really helped.
 
Just thought i would update with some pics of the car as it is now:
attachment.php

attachment.php

attachment.php

attachment.php
 

Attachments

  • De-bumped1small.JPG
    De-bumped1small.JPG
    57 KB · Views: 957
  • De-Bumped2small.JPG
    De-Bumped2small.JPG
    99.7 KB · Views: 960
  • De-Bumped3small.JPG
    De-Bumped3small.JPG
    71.7 KB · Views: 948
  • De-Bumped small.JPG
    De-Bumped small.JPG
    91.4 KB · Views: 962
Looking good mate (Y) I would lower and refurb the alloys next ;)

thats for the positive feedback:) the car is coming off the road in a month (when my insurance runs out) so that i can get some serious work done:) it will be lowered, and different aloys will be baught for it to fit my GTIR calipers under. but really, before i do bodywork stuff i want to get my hawk ecu working on the car, and my wideband installed (man the list is enless!)
 
Spent a couple of hours sorting out the rear brakes today as they are binding, (done one side). The plan is now to put it back on the road:D im really excited about having my micra back, i didnt realise how much i'v missed it untill i thought about getting it back.
 
did the other side today, and baught one of those universal fog lights to get it through the mot, fingers crossed the car will be on the road some time next week!:)
 
yeah, imo its the best mod for a micra lol.
went to its mot the other day, failed on on a couple of bulbs and some rust on the o/s inner sill, il get that sorted when the weather impoves (anyone know what thickness plate i should use 2mm?) then she can go back on the road:D
 
finnished the mot repairs today, couldnt wait till the weather clears up. the welding turned out to be a bit of a pig, used 1.2mm plate in the end, took me a bloody age to bend it into shape (should have bent it and then welded it in). looks a bit tatty as my welding/welder are pretty amature but it'l do the job. You'l never get better at anything enless you do it, thats how i see it, i'v gotta get good at welding at some point, cant be getting other people to do it for me forever. anyway, hopefully il get a retest tom morning before work.
When i get a place of my own im digging a bloody pit, im so fed up with being cramped under cars like a contortionist!!
 
nice to see your doing welding, i had never done welding before and decided to have a go at my sills, was very confident going into it and after getting the welder set up correctly i done an awesome job. was gutted when i put the car into the back of someone 2 weeks later and scrapped it:(
 
car passed the other day(Y)
think the maf sensor is going now though:( getting lots of hesitation at low revs/high load, so il re-solder that tom if i get chance.
iv just found my camera so il be taking some more pictures of stuff now:) blogs are well boring with no pics!
 
just bought a tech-edge wideband controler costing me over £350!! bleeding exchange rate! just gotta wait for it to arrive now!
its this one: http://wbo2.com/3a1/default.htm

also, iv made up a crank pully with trigger wheel welded onto it and a bracket for the sensor. forgot to get pics but will take some when i fit it to the car. this should get the standalone running right so i can get on with learning to map:D
 
Small update and some pics:)

well, got back last night from liverpool and a cga manifold had arrived (Thank you Frank!(Y)) so i cracked on with trying to fit my Volvo injectors (cant remember exactly what car they are from but its a T5 turbo somthing, they are around 350cc)

and here are some pics:

front view of my makeshift trigger wheel, runs perfectly true though so my only worry is the balancing of the welds (and yes i do know they look terrible, i think its got somthing to do with using argon gas (its alot cheaper:))
attachment.php


rear
attachment.php


this is the sensor bracket i made out of the 1.5mm sheet i had, i broke the plastic bracket off of the sensor so i had to make up a little metal one to hold it

attachment.php


attachment.php


CGA inlet mani as it arrived
attachment.php


attachment.php


The Volvo injectors
attachment.php

cleaned them
attachment.php


test fit the injectors (like a glove (Y))
attachment.php


the volvo injectors are slightly longer (8mm odd longer) so with the help of some washers the rail went strait on too:)
attachment.php


close up of the rail spacers
attachment.php


I did a little poloshing while i was there, get rid of some of the sharp edges:)
attachment.php


Micra V Volvo injector:
attachment.php

attachment.php
 

Attachments

  • CGA inlet mani.JPG
    CGA inlet mani.JPG
    91.3 KB · Views: 732
  • CGA inlet mani with volvo injectors and rail.JPG
    CGA inlet mani with volvo injectors and rail.JPG
    72.3 KB · Views: 726
  • CGA inlet mani with volvo injectors.JPG
    CGA inlet mani with volvo injectors.JPG
    71.3 KB · Views: 768
  • Volvo injectors clean.JPG
    Volvo injectors clean.JPG
    79.2 KB · Views: 764
  • Volvo injectors dirty.JPG
    Volvo injectors dirty.JPG
    80.6 KB · Views: 748
  • CGA inlet mani 2.JPG
    CGA inlet mani 2.JPG
    72.6 KB · Views: 715
  • CAS sensor bracket 2.JPG
    CAS sensor bracket 2.JPG
    49 KB · Views: 726
  • CAS sensor bracket.JPG
    CAS sensor bracket.JPG
    48.9 KB · Views: 743
  • rear of trigger wheel on pully.JPG
    rear of trigger wheel on pully.JPG
    61.1 KB · Views: 761
  • front of trigger wheel on pully.JPG
    front of trigger wheel on pully.JPG
    56.2 KB · Views: 755
  • Volvo injector rail spacers.JPG
    Volvo injector rail spacers.JPG
    51.1 KB · Views: 737
  • poloshing cga inlet mani.JPG
    poloshing cga inlet mani.JPG
    64.5 KB · Views: 754
  • Volvo V Micra injectors 2.JPG
    Volvo V Micra injectors 2.JPG
    57.4 KB · Views: 758
  • Volvo V Micra injectors.JPG
    Volvo V Micra injectors.JPG
    51.8 KB · Views: 723
yeah, seems to Frank(Y) Nis off here was running Volvo injectors but is now running aftermarket ones, so there is obviousely the option of aftermarket ones with this set-up aswell.

I have now found that the CG13 TB that i have doesnt fit the CGA inlet mani, the different hole spacing can be got around, but the IACV fouls on the injector rail, so i will now have to get a CGA TB and try to work out the plug wiring for my loom.

other progress:
I have been modifying the piece of plastic that goes under the centre console so that it will take my head-unit and then i can use the space in the centre console to fit my gauges(Y)
 
Iv been playing around, getting the cg13 TB to mount onto the new mani. the only way i could think to do it was to fix a plate onto the mani, then weld another plate onto that which has threaded holes in it to bolt the TB onto, it wont look pretty, but we'll see if it works. im abot half way there, and il get some pics up when i finish.
I also picked up a set of these http://caraudiosecurity.com/shop/product/products_id/9436/referer/rc_googleproduct.html from halfords for a song! (ex dis (not wired in)) cost me £15 so at some point il get that all wired up with my spare amp, yes i do realise that they are extremely ugly, i will find a way to hide them:)
 
i went through all this with the cg13 throttle body and cga inlet, just bought the cga throttle body instead but there expensive (£120) and where did you get those injectors? i need something about that size as i only have sr20 ones
 
i went through all this with the cg13 throttle body and cga inlet, just bought the cga throttle body instead but there expensive (£120) and where did you get those injectors? i need something about that size as i only have sr20 ones


+2 i could do with some the same ED fi you dont mind sharing the info mate?
 
the injectors are from a volvo t5 of some kind, i got them off ebay for like £30. i cant remeber exactly which car but i will get the number (bosch) off them when i get chance.

Update:
Well, i'v finnished to adaption. it doesnt look pretty (mainly because my welding is crud) but it will work(Y)

Here is the difference in footprint between the to TB's
Paper cut-outs.JPG
I then cut out two pieces of sheet with the cga3 footprint (two sheets because all i could get was 3mm and it needed to be thicker), and welded them together:
marking out on 3mm sheet.JPG
welding sheet together.JPG
sheet welded together.JPG

Bottom sheet ready to be bolted down to manifold:
bottom sheed done.JPG
bolt is down with gasket between:
bolting down top sheet.JPG
all snug:
top sheet bolted down.JPG

Then to grind back the tops of the bolts to make them flush with the sheed:
grind down bottom bolts.JPG

then to cut out two top sheets and weld together:
top sheet cut out.JPG

tapping M8 thread into top sheet: tap M8 holes in top sheet.JPG

one of the threads didnt work out so well (stripped thread) but luckely i could weld a nut on the bottom so its all ok(Y):
weld on nut to top sheet.JPG

I then welded the top and bottom sheets together...
which thankfully i forgot to get pictures of because my welding is terrible:D

i then tidied it up a bit with some of that chemical metal epoxy stuff and smoothed some of the rougher edges for better air-flow.
plates finnished.JPG

and here are some pics of it all together:
bolted up top.JPG
bolted up back.JPG
on engine top.JPG
on engine left.JPG
on engine right.JPG

oh, and a pic of the 6x9's
6x9s.JPG
 

Attachments

  • view down TB.JPG
    view down TB.JPG
    54.7 KB · Views: 225
  • using cardboard to cut holes.JPG
    using cardboard to cut holes.JPG
    44.9 KB · Views: 223
  • drilling to cut out middle.JPG
    drilling to cut out middle.JPG
    64.7 KB · Views: 197
  • open up cga TB.JPG
    open up cga TB.JPG
    47.9 KB · Views: 207
Last night i sprayed up that mani again so its all nice and silver.
But i spent most of the time strengthening my rear parcel shelf and fitting my new speakers and amp into it. Atm it looks a bit rough but the plan is to cover the wood with fiberglass and then paint it, and re-carpet the top.
Here are some pics:
 

Attachments

  • Speakers in parcel shelf (bottom).JPG
    Speakers in parcel shelf (bottom).JPG
    58.6 KB · Views: 218
  • Speakers in parcel shelf (top).JPG
    Speakers in parcel shelf (top).JPG
    47.4 KB · Views: 213
The wideband controler arrived today!:D
somehow i managed to avoid the £70 tax! and i worked out why it cost so much, i ordered the sensor aswell by accident (i already have one) so i have a spare now i guess...
 
Just finnished re-locating the battery to the boot, and wiring in the 6x9s.
The sound is ok, bit dull on the bass but it'l do, not bad for £15.
will get some pics up soon.
 
the pictures? i dunno tbh, it seemed pretty complicated, i still cant work out how to make them big on the screen... im sure someone will be able to explain
 
upload them onto you bebo or whatever you use, i then enlarge them onto a seperate window, highlight the page its coming from and in this post click insert image and put it there
 
Just finished making the temp exhaurst for the turbo setup. Its been good fun, and iv learnt some stuff which will come in handy when i make the stainless one.
here's some pics, its not perfect, but it'l do till i make the propper one.
the tube is 2" and the turbo flange was made from 10mm plate (bloody hard work!) the other bits (reducers) were done out of 1.5mm sheet i had.
picture uploading is hit and miss at the best of times, so here is a link to my facebook where i have uploaded them.
http://www.facebook.com/album.php?a...hp?pid=4593356&id=505344046&fbid=330930244046
 
Lets try again...
attachment.php

attachment.php

attachment.php

attachment.php

attachment.php
 

Attachments

  • HKS mani bolted up.JPG
    HKS mani bolted up.JPG
    109.3 KB · Views: 490
  • Cat pipe adaption.JPG
    Cat pipe adaption.JPG
    84.7 KB · Views: 486
  • Turbo and mani bolted up.JPG
    Turbo and mani bolted up.JPG
    94.8 KB · Views: 491
  • Cutting out turbo flange.JPG
    Cutting out turbo flange.JPG
    109 KB · Views: 492
  • Exhaurst finnished.JPG
    Exhaurst finnished.JPG
    54.2 KB · Views: 511
great work with the exhaust, where was the manifold from?

how much was that wideband you ordered by accident, migh be interested if its not too expensive.
 
Back
Top