• Please only use these forums for blogs, they are not a discussion forum

My facelift K11

hey euro what year is your polo/lupo springs from? and are they front/rear
Sorry, I can't remember Karl, was told they fit both polo and lupo if that narrows it down. And to be honest I wouldn't bother with them if I was you. Because they have a smaller diameter they have the possibilty of moving in the seat when the load is taken off, not by much as they are still compressed, but thats not good enough really, I cable tied mine to the micras rubber seats which would help against it moving, but it's still a dodgy way of lowering, safer than uncaptive cut springs imo. But I'm going to replace mine for cut(but still captive and mot friendly) rear springs soon for comparison. I would recommend you stick with springs made for a micra pal, or have a look at other better options.
 
Did you take speakers out and sound deadens around the speaker cut out? This will create a much better seal for the speaker and will produce deeper bass tones? Can't make out from the door if you have or not? Cheers
 
Did you take speakers out and sound deadens around the speaker cut out? This will create a much better seal for the speaker and will produce deeper bass tones? Can't make out from the door if you have or not? Cheers

Yeah took the speakers out, sound deadend that entire area back and front and folded over the speaker cut out. Then put an 8mm MDF spacer ontop of the deadening with more deadening folded over that through the cut out and onto the back again. Haven't yet fully given it a good test with some bass tracks, but should be better than before as I noticed an improvement just listening to the radio.
 
Been a while since I last updated, but I've not had much to write about 'til now, not that I've done that much either. Had a few other things that I needed to take care of first, like uni, which I failed:doh:

Wheels
Got some new wheels a bit ago to use over the winter months. Bought mainly for the tyres as the old ones were going bare. They're 14" Wolfrace 5 spokes. Not put them on yet as the stock steelies are a lot of fun in this snowy weather we've had, a little slippy with some tail-out action too, but still very much controllable. Has put alot of sports-exec cars and white vans to shame passing them on hills and at junctions as they just sit there spinning thier wheels.

So these are getting a fresh lick of paint while the old tyres still have some use, then I'll put 'em on next week.
When I got them:
5309315921_c4ef26b61b_z.jpg


After sanding:
5309315923_400e56b81a_z.jpg


Painted, on car: next week maybe.

Clear Repeaters
Have been looking for a set of these since about april, only thing on the car that's not blue, beside rear clusters, and stood out from the paint massively. Didn't want to spend £20 on new ones, so I played the waiting game:suspect: That didn't work so I bought some 2nd hand nissan terrano(?) stock or they might have been aftermarket ones, almost same size and shape but only a 5th of the price, connector at the back (the 3 prong screw-in thing) looks the same, but was a little different, but rotated it fits in well.

SI Dials
Another item I've been waiting ages for. Only seen about 4 SIs being broke for parts since spring, and either the dials have been sold or they're wanting £110+ for 'em. Thought sod paying that much, I'd rather go without the tacho or use an aftermarket one. But after an ebay search a couple of days ago I finally found a set, and got them with shipping for £15 -hell of a bargin imo. One tab was broken and a couple of bulbs were blown but other than that it was just a simple swap, no need for extra wires or anything. Only negative is that the displayed mileage has more than doubled:eek:, so I'm guessing it's the dial unit that stores the mileage as oppossed to the ecu which is what I've heard.

front:
5309315917_8e9bee87a0_z.jpg


back:
5309315919_9e66dc29c9_z.jpg


in car:
5309315931_d9dd37eb65_z.jpg


in car, lights on:
5309315937_acec731052_z.jpg
 
:eek: big update as my last posts didn't post :( Was nothing too interesting though so didn't bother to repost 'till now, bit of a copy'n'paste jobby too.

Pics of the car after xmas.
Quite like the height of the car now, I think it's sunk a bit since I put the springs on last year. Will have to remeasure but I estimate -50/55mm front with matiz rear springs, -40/45mm rear with cut front springs. Only on temperarly as corsa coilovers might be going on when I switch insurers, won't be 100% happy 'till the mudflaps scrape the ground :wasntme:

5339038966_7ec059c298_z.jpg


5339050706_afbf17534e_z.jpg


5339050710_077b4ca39c_z.jpg


And a photoshop I did just to tease myself:

5540317877_2ddac3c911_z.jpg


So anyway, winter hit the car quite badly, it's also the first one its seen as it usually goes into storage for a few months. So it resulted in some laquer peel under the rear window seal and since then it kept getting worse, I was never quite pleased with the rear as the smoothed wiper and lock wasn't quite as smooth as I'd like it and being a bit of a perfectionist I wanted to redo it, so I now had two excuses to repair the tailgate. Also colour-coded the original handle. It took a few days to finish and used rubbing compound and t-cut to bring up a mirror shine, it's nearly good enough, but it looks a lot better than before. Except I can't get the seal to go back in in one place :glare:

re-painted:
5479628312_02731814c9_z.jpg


before rubbing down:
5479628302_0b0c053051_z.jpg


Also colour coded the front mudflaps with the rest of the paint from the boot. Going to remove the rears at some point, or possibly replace with some shorter ones, may even try and cut these longer ones as that wont cost anything. And I finaly painted the 3rd brake surround black to match the parcel shelf.


Have fitted a new knob, it came off a pug 406 and with it being leather-like it doesn't get cold like the old knob did. Fitted a leather gear gaiter too, and worked on the custom gear surround a bit more, got annoyed as there were still imperfections so I stuck some carbon-fibre vinyl over it that I got for 99p of ebay, looks alright for now imo. Might cut off an inch from the stick as I think it's a bit taller now, but I may get around to DIY'ing a short shifter. Also painted the centre console black too.

5357063903_288b0fe914_z.jpg


5357063905_c5e99d2d1c_z.jpg


Would love to paint the rest of the interior black as well, but I don't have the time just yet, and it'll probably go wrong.
 
Over the last month I've been tidying and cleaning things, mainly the engine bay, but I did spend a couple of hours washing the body as it had been about 5 months since I last did it. What's ridiculous is that since then theres been zero bird crap on it, then within 24 hours of cleaning it, some birdy landed a massive one on the bonnet, happens every###in'time.

Anyway, there was a post not too long ago, but I can't find it now, about the carbon canister and how it's fairly unimportant, and with it in its original position it forces the ga16 airbox to one side. So I've removed its bracket and it's now hanging a little further down, it's still quite secure though as it can't go anywhere, but I may bend a piece of metal to be able to mount it before the MOT just in case, unless there's a way to remove it completely, only a couple of vacume pipes from the t/b to worry about by the looks of it.

carbon canister:
5479251353_93a7b6f696_z.jpg


before:
5332448987_34a8ef90b3_z.jpg


after:
5479251357_813b5cfb06_z.jpg


Also started some work on the ga16 airbox itself, as you can see it can't be a very effecient design at the minute especially as I snapped that curved ring that held the mesh on:
5385224191_a1667e15c5_z.jpg


So I've dremeled it and smoothed it out, have also bored out the intake hole, filled in that small unused hole, removed the fins from the lid, I kept most of the baffle as that was too difficult to get rid of, trimmed down the pcb filter so it doesn't restrict flow through the air filter and removed the mounting hole which I may reposition to fit the stock mounting bracket.

after:
5527376790_dfd1d21a5b_z.jpg


sanded off oxide crust from clips:
5527376780_173954fe30_z.jpg


Result isn't bad, more responsive than before. But one problem I noticed with the ga16 box over cg10 box is that there feels like there's no overlap between torque and power, with the stock cg10 box I had on you could accelerate smoothly through the rev range, but with the ga16 box there feels like a reduction in power around 4-5krpm. I'm hoping it can be remedied with the use of a thinner and longer air feed or a stock ga16 pipe. But don't want to sacrifice too much high end power as an 8krpm limit is fun :wasntme:


Have also tidyed up the power cables for the amp & central locking so it's just one insulated, covered and sleeved cable to a distribution box under the dash. Also wired up a couple of grounding cables attached from the battery to the dizzy and throttle body. All for no reason other than I was bored, had some extra wire, and was interested in if they'd be any affects with the better grounding.

5527376794_61d41ecae1.jpg


5527376802_e5009493dd.jpg


Results weren't really noticeable.


Also wire brushed and cleaned the grubby-looking head cover and exhaust mani cover plate, oven cleaner worked well. Will polish them up a bit if I get time.

5540491157_736d4c347e_z.jpg
 
Insurence renewel letter has come through, woo so thats 1 years no-claim bonus for me, and the price is going down yes? Nooo, its gone up nearly 40% grr
Done a little shopping around though and I can now get it slighly cheaper. Mods have become cheap too, with current&intended modifiations of, lowering, colour-coding, sports air filter, 1.3 engine transplant, sports mani and exhaust, alloy wheels, interior changes and dashboard changes, all quoted at only £80 extra over stock:grinning:
 
Have now owned the car for a year, yay!


So this is how it's looking now:
5479825838_83e7e6638b_z.jpg


5479825842_e37e57a47f_z.jpg


Pics were taken a few weeks back but I've still not got around to finishing the rubbing down of the tailgate. And does still need a good wash. So it still looks the same, but I'll give it a good going over when I've got a day off sometime.


Insurence is sorted, with 1 years no claims for £615 if stock, £635 with mods. Good, but still expensive.


Future plans, I guess, for the next couple of months, are to relocate the tweeters that are currently tucked in behind the carpet to the A-pillars, fitting an almera cup holder(depending on price) and the sportier-looking Si/2ndfacelift clock surround and a wraparound spoiler if I can find any.

Then after the MOT, I'll be fitting corsa b coilovers ultralites and a lhd rear light:p

May also look into some clever weight reduction at some point, ie removing sunroof mechanism, replacing glass windows for perspex and relocating battery. Still got plans for a reground inlet cam, headskim and l/w f/w to do first if I can source them. Quite a list but hopefully I'll get it done this year:glare:
 
Have now re-fitted the 1.0 exhaust cam, trying to squeeze some more mid-range power n torque from the engine, has worked well. Runs a lot smoother and doesn't need to be revved as much to pick up speed, will happily get up to 60mph faster than most people tend to do, without exceeding 4krpm. Bad points are that it seems to stop incresing in power above 6krpm, which is a compremise that's fine for commuting I guess. Fuel economy seems a little better too over last few days, due to needing less revs but will see at end of this tank.

1.3 left, 1.0 right
5541054376_373a0e11bd_z.jpg


1.3 in, 1.3 ex
5541054362_ddd10a1fdd_z.jpg


1.3 in, 1.0 ex
5540418115_36d07c3210_z.jpg


It's MOT time, nearly. Coming up in the next couple of weeks, and I'm a little worried:

1. Rear suspension might not be MOT'able, I measured how small I can cut the springs before they become uncaptive and added an inch, but didn't take into account just how much the springs sink/compress, so now when jacked up there's a bit of play, so will have to return it to stock. But then the rear will be stock and the front will be lower, which may play with the headlight projection a bit too much.

2. Emissions, last year it scraped by, failed the first test and passed the second, and since I put in the 1.3 cams there's been a petrol smell from the exhaust within the first 10-20mins of running. Should be alright if I give it a run around before hand and it's not sitting too long before the test.

3. Tyres, I've got 4 sets of wheels, but not 1 complete set that will fit&have enough tread to definately pass. Might have to run odd sized tyres front and back, if thats ok? 2x 195/45/16 on front, 2x 165/60/14 on rear. But hey, it might just balance out problem number 1 lol.

4. Carbon canister is loose, as I haven't been able to mount it, nor worked out how to remove it. Should I block off the throttle body vaccum pipes, remove them, or join 'em together. And what about the other pipe wherever that goes. Someone must have done this before, but search function's not working well enough.

Apart from that it should be ok:down:
 
Lot of work, thank you for sharing it !
I've also done the Almera N15 airbox mod, and like you, compared to the 1.0L stock airbox, I feel that I have to change gears a little higher on RPM than before to have full grip and acceleration.
Keep on doing good !
Seb
 
I've also done the Almera N15 airbox mod, and like you, compared to the 1.0L stock airbox, I feel that I have to change gears a little higher on RPM than before to have full grip and acceleration.
have you got the GA snorkle tho guys ? i think you get the same flatspots that you can get with induction kits, without it


Attachments

  • DSCF0448.JPG
    DSCF0448.JPG
    105.3 KB · Views: 1,428
4. Carbon canister is loose, as I haven't been able to mount it, nor worked out how to remove it. Should I block off the throttle body vaccum pipes, remove them, or join 'em together. And what about the other pipe wherever that goes. Someone must have done this before, but search function's not working well enough.

Apart from that it should be ok:down:

mine was loose for it aswell, they dont care.
 
have you got the GA snorkle tho guys ? i think you get the same flatspots that you can get with induction kits, without it
]

No, I keep searching ebay for 1 to pop up but never seen 1, n I don't do breakers. But some universal ducting should be alright I would have thought, just got to get the width and length right size?? The 1 I have's too wide n too short maybe.
 
mine was loose for it aswell, they dont care.

Oh, that's alright then, don't have to worry about it so much. I would have thought it would be a fail. Would still like to remove it mind, seeing as it's doing pretty much nothing apart from hanging there.


You've put some good effort recently (Y)

Car looks good, when are you going to put the alloys on?

Thanks:grinning:

Which alloys? I have a few:wasntme: Two of the Wolfrace ones will be going on in time for the mot 'cos I know at least two of them will pass, and two steelies I currently have on are borderline so they need swapping. The Ultra/minilites will go on front after I lower it as they'll be alot of arch gap if I don't, may put some revolutions on rear too. Was hoping to lower it this week with bobbletec's coilies, but looks like karl beat me to them:down: So that won't be for a while yet.
 
Looking good.

It'd look the absolute nads with wide steels. Love the satin black wheels, small caps and trim rings.
 
Any chance on info of how you moved the lock on the boot?

Fancy trying something like this myself!

Yeah sure, it's quite easy and don't know why more people have done it, symmetry ftw. But this is what I did, I should have took pictures of the process but nevermind, got a couple from afterwards.


First thing was to remove the lock and connecting rod, which is pretty simple I forget how it comes off though.

Then before you close the tailgate!:

Fit a solinoid to the catch, I used a cheap ebay boot popper kit but throw the switch away as they're crap and will break. You'll need to run a 12v positive fused wire from the battery in to the tailgate, did it directly from the battery rather than cig lighter so I can open it without having a key in ignition. Trickiest part is getting the solinoid to pop the catch correctly.

You can make out where I put it here, as that's the mounting bracket bottom left.
5385830182_7c2eba1aca_z.jpg


But to open it from the outside, I installed a second wire from the battery (actually, a connection block from 1st wire in footwell) to a key switch, for security, that I positioned under the handle. But since I've installed remote central locking I just use the key fob instead.

4902499382_93e0bcb93c_z.jpg


Quick diagram of the wiring I used:
5561983476_6d2dbc1840_z.jpg


Then you've got to fibreglass or weld the hole, or holes as I did the wiper at same time. I used fibreglass, started with a couple of bigger bits from the inside then you can layer it on top from outside. Then it's filler, filler primer, primer, base coat, then laquer, with a hell of a lot of sanding in between!
 
You can buy wellers new from Polly Motorsport, they are about the cheapest aftermarket wheel you can get. The prices they get advertised second hand are often morethan they cost new!
 
Polley motor sport? Polly motor sport is Norwegian. They seemed to be priced per wheel. but £70 per wheel isn't bad.
 
Yeah Polley Motorsport's not too bad, Midland Wheels is another good place for good cheap wheels, still too expensive for me, I like bargins:wasntme:


European Offside Tail-Light

Have been wanting one of these since I smoothed the tailgate to help with the symmetry of the rear, and I finally found one on ebay within my price range, excellent.

Fitting took about 10-15mins, spent most of it removing the black sealent which I reused for the new tail-light. That little pointy tool in the tool kit came in very handy to fit between the body and light to piece it and spead it on afterwards, always wondered what it was for, was that it??:laugh:

As the new unit was brand new and out of the box it was gleaming compared to the older nearside, so spent a good 30mins polishing it up, starting with a scotchpad and whitespirit, then 800grit sandpaper, 1200 grit sandpaper, rubbing compound, t-cut, and finished with a couple coats of polish. The difference from before was amazing, not quite as shiny as the new unit, but close enough.

5569081152_71cf097b68_z.jpg


Does need a red bulb fitting for the foglight now, I've got a led one in the post so it should still look white when not in use. May still get around to blanking off the exhaust hole, which should complete the look of the rear, but I just can't be arsed, too much effort for too little gainfwn exhaust trim it might be
 
very nice work pal, i really like this k11.

as for the boot popper, you could have ran it off your rear wiper, so when you wanna open the boot you just flick the rear wipe function and it opens, saves all the wiring hassle. thats how i used to do all of my mates cars, cheap popper kit off ebay running off the rear wipe. (Y)
 
Thanks for the comments guys:blush:
Wiring the solinoid to the rear wiper would be good trick for a few people, but I don't mind going a little further for something more complete.


Result on the 1.0 exhaust cam is pretty good. With both 1.3 cams in I used to average around 30/40 mpg depending on the time(rush hour). On the same journey with the same driving style, but with the 1.0 exhaust cam I seem to be averaging around 35 in rush hour, and 50 when not. Which is pretty good I think. But I still might put the 1.3 back in, but retard it a notch maybe, I need a little bit more power:wasntme:


Forgot to mention I got an alarm fitted over winter after seeing 3 people, each at different times, peeping into the car, who then run off when I start walking towards em. So f#ck knows how many's peepin when i'm not around:suspect: Anyway, it's just a cheap generic one but I've fitted extra power wires and slightly hidden it to reduce the chance of someone poppin the hood and cutting it's power.

A couple of other mods I've done thats slipped my mind as they were done so long ago was the beesting style aerial as the stock one is soo long, and the suede effect cowel.


Fog-light Bulb
Just fitted a '36 red led' bulb from ebay, but basterd seller sent the wrong type of connection, but I made it work, except it totally does not work, only the faintist bit of red light gets through the lens and it's much less brighter than rear lightsgrr Didn't even bother to take a pic it was so s#it. So thats not going to be good enough to pass my mot which means it's no good.

So it's back to original, or... is it possible to use red repair tape on it to pass mot do you think??
 
Passed the MOT today first time around, which I'm quite stoked about, thought atleast something would fail!

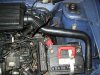
In prep for the mot I removed the carbon canister which was hanging without its bracket due to the larger ga16 airbox. So I joined together the two hoses that went from the throttle body to c/c. The one hose from the gearbox/gearbox area I left open near that existing open-ended hose clipped to the airbox, and the bottom hoses I just removed. All seems fine to me. I also forgot to refit the breather hose from head cover to airbox, so that was left open, but heard nothing about it.

Also swapped around some wheels to get the best tread. The tyres I was using are fine but wearing on the edges a bit so I just played it safe. But these Wolfrace wheels I've got came off a golf, and I thought they were aftermarket, but they're not. So the centre bore was too small, but I had some spaces laying around from when I used one to counteract the panhard rod shift on the rear, but couldn't put them on the front as the diametre's so big it overlaps rubbing the calipers - ran fine but wether it was good enough for the mot I dunno. So I put back on the 16" Stroseks for the fronts, and stock 13s on the rear. Forgot how much I like them 16s, they make the car look lower when it's actually higher thanks to the reduced arch gap and tyre wall!:p

Stock 13"
5610913062_baa2615a3c_z.jpg


Wolfrace 14"
5610913092_d1e8b99511_z.jpg


Strosek 16" (pic taken a while back)
4903922065_38713e5f12_z.jpg


Left the cut springs on the rear as I couldn't get the stock(uncut) springs back on - too long! But still passed ok, got an advisory for them as they apparently become unseated when jacked-up, but they only become unseated for me when jacked-up and I lever them out with a big screwdriver though. But hey, they passed!

Here's a pic of the cut front spring against the stock rear.
5610913106_b8bf28d895_z.jpg


So while I had the car jacked-up I checked out the damage caused by the lowering. It's nothing major just the sound-proofing/rust-protection stuff being being scraped off, couple of dents on the cat bracket and flange, and tufts of grass and twigs lodged near the downpipe. Mechanic also mentioned about the gearbox had been hit, or is close to being hit though which is a little worrying.

Doesn't look too bad in the photos.
5610913128_c3ae4ba7df_z.jpg


Replaced the 'super' 'amazing' 'bright' s#ity led foglight bulb with a proper, cheaper, red bulb. Which is a little brighter and much more red is being shone through the lens. I wasn't sure if it would pass, but mechanic didn't take notice, said it was fine. And you can't really see the red bulb either so that's good too.


Last week I did a bit more work on the tailgate, just needed a polish really, but I decided to go over a couple of patches again with sandpaper and rubbing compound, only I picked up 1500 grit paper instead of 2500 and went straight through the laquer in the first few seconds leaving a rough flakey finishgrrgrrgrr Not much you can do about it then, other than sand all the laquer off, but I gave it another coat of laquer and blended it in. It looks, well s#ite really, but I can't be arsed with it anymore, perfection is hard to achieve, and it's only really noticeable if your looking for it.

Can't see it at all here eitherfwn
5610913046_4fe76042a9_z.jpg


And I have now relocated the tweeters to the A-pillars, just popped the trim out and cut a 30mm hole in each and glued the tweeters in from behind. And threaded the wires down to the component connection boxes in the kickpanels.

5610378903_7507d26b43_z.jpg


So now the MOT's out of the way, and I saved some cash as I didn't have to fix anything, I can get on with some more stuff. Would still like to go lower, and quicker too, but I won't be spending much as usual:wasntme:
 
nice job on the mot
you always got some good plans,im going with the 16"s too

That's the k12 alloys iirc isnt it, should look sweet when done up, i prefer small and wide but if you can pull off 16s like yours can, why not eh.

And yeah i'm quite pleased about the mot:grinning:
 
main idea is to polish em out to mirror and tuck the tops in with camber,so he can drop low
but just ideas so need to liven em up a touch:grinning:
 
did u really see an improvement with the 1.0 exh cam? as i have one sitting about which i could make use of?

I wouldn't say it was an improvement, just it made the power band a little lower and smoother. With both 1.3s in I had to really rag it to accelerate to keep it in power, with just the 1.3 inlent and stock exhaust cam(as I have a 1.0 engine) theres just no need to rev above 6krpm, and will happily drive at 30mph in 5th.

So it's a bit of a compremise, sacfrifice a bit of top-end for fuel economy and comfort. Think i'm averaging around 40mpg, which isn't bad to say it's drinking like a 1.3 due to the 1.3 inlet cam.

But I think you could get a similar effect by retarding the exhaust cam, so I might put the 1.3 ex cam back in but 1 notch out, so hopefully have more power, but still get a smoother power band, but I don't know if that will work out too well to do it yet!
 
Got kinda bored with the 1.0 exhaust cam, it was good in a way but I missed revving it and it was slightly more difficult to overtake too, so out it went and I put the 1.3 back in. Which has got my 0-60 down to a much better level and overtaking is alot easier too. Doesn't quite have the pulling power though, drove it fully laden with a full tank and three passangers and just thought it would have been smoother and better with the 1.0 ex cam.


So while I was re-installing the exhaust cam I painted my rocker/cam cover. Just out of bordem and curiosity really. Painted with a high temp black spray paint, nice n subtle.

Removed 'L' pipes for breather hoses, and unscrewed black ignition-lead clips. Used a lid cap to cover the oil filler cap area, and golfballs to cover the spark plug holes, only masking tape was on the black plastic hose connector I couldn't remove.
5628477657_c2c9516133_z.jpg


Dried a little paler and to a matt finish.
5628477661_2a80f9eac6_z.jpg


Removed paint from the letters with a screwdriver and installed.
5628477667_1192ff854e_z.jpg

Wanted to paint the exhaust heat shield too but one bolt is rounded and won't budge.


Swapped my grill for a spare set I had which have been colour coded with the centre bar painted black.
5632619792_df8f3dfda8_z.jpg

Just thought I'd see what it looked like, and have a bit of a change. Not that much different than before though.


:eek: Look what I got through the post:

Franks offset panhard rod bushes, thanks Frank(Y)
5628595765_f38355f439_z.jpg

Not fitted them yet, planning on going a little lower first.


Hooded Reepers light weight flywheel, thanks Hooded(Y)
5631843688_d9c3421484_z.jpg

5631843690_73ec67a0be_z.jpg

Weighs in a 4.5kg, apparently. I make it almost 5kg, but I'll assume I'm wrong 'till I try something better than 10year old kitchen scales:laugh:


And here, should be a pic of some corsa coilovers.fwn
24hour delivery my arse, it's been nearly a week and I don't have them, have read abit about fkautomotive parts not turning up too:down:
 
...cardboard cardboard cardboard cardboard cardboard cardboard cardboard cardboard cardboard cardboard cardboard cardboard cardboard cardboard cardboard bubblewrap bubblewrap bubblewrap bubblewrap bubblewrap bubblewrap bubblewrap bubblewrap bubblewrap bubblewrap bubblewrap bubblewrap bubblewrap bubblewrap bubblewrap ...flywheel:)
 
I got lowz:p

5655011391_fc6b757ed4_z.jpg


5655011361_e8aacc94ac_z.jpg


5661709251_0179ba6041_z.jpg


5652949377_c096df6f83_z.jpg


They're FKautomotive Corsa B Street coilovers

Adjustable, so I can lower it so low its undriveable! but I settled for a little higher than that:p But it's still quite low and would scrape the curb driving off and onto the drive, as well as every other mound in the road and I even had a flipflop get stuck under the front bumper driving home, so I've settled at the ride height above. Although it may have a sunk a little bit since.

So now the top of arch is about 30mm above the rim on the stock 13"s steelies. But with them being tucked in so far you can still turn like regular. Corners now don't exist as there's very little to no body roll, so that's fun! Ride comfort at the minute is bad as the springs on the rear are far too long and the shock sits at it's highest. Comfort from just the front coilovers alone is really good, not bouncy as it was on stock shocks as there's little movement, but it's still soft and glides over most bumps. I'll be cutting the rear springs in about half, they should still be captive and should lower to about the same as the front hopefully.


To fit the fronts first I had to remove the original shocks, and retrieve the topmount.
Had to then remove the thrustwasher from the coilover spring mount.
5650383956_8ab6ea2789.jpg


And place back onto the coilover, important note is this top spring mount is to sit over the rod and not sit ontop.
5649867097_f2fc09987f.jpg


Need to space the top of the shaft, I used m12 washers, I ended up needing another 4.
5650411804_c4de32ce25.jpg


Over them was the micra thrustwasher.
5650411796_a0e5f833f7.jpg


Followed by micra top mount, after filed to 12mm.
5650411782_41628b6794.jpg


tightened with m12 nut. Making sure the top spring mount is clear and over the shaft, and your spacer's big enough that you don't run out of thread.
5650383998_5340f665f0_m.jpg


Fastend with m12 nyloc nut on top.
5650383982_4c3485e6e4_m.jpg


Also needed to file the lower mount holes, I opted for the top one as to keep the bottom hole a solid unadjustable hole. I also went for the most camber given by these coilovers, athough it does look like more could be got from them if I filed outwards. Did need to file more off but did this on the car with the bottom hole bolted to the mount.
5650411770_7b13f4012c.jpg


The rear dampers took a little longer, and again, neede to remove stock one for parts first.

Corsa damper from coilover kit.
5660294363_988edd1d4b.jpg


Add the plastic disc it came with.
5660285495_3312009fab.jpg


With the rubber cover and built-in bush, over the top.
5660285479_5eba53956f.jpg


Metal washer supplied.
5660285473_13f7c67593.jpg


Micra top.
5660285471_025a3e23fd.jpg


One half of corsa bush.
5660285469_ddb88befa5.jpg


Second half replaces micra bush within the boot. I'll be replacing the nuts with nyloc ones soon.
5661709245_5d05e8ef51.jpg


Damper extension.
5660294381_9d4ce62211.jpg


But before I can fit them , the metal edges on the lower bush needed to be filed flat, and the m12 bolt replaced with a m10.
But now three wheels lift off the ground while jacking up one corner:laugh:


^^^^^^^^^^
All of this above is not a diy guide, the corsa coilovers I have and the stock dampers I have can and do differ to other peoples, so I do not recommend you copy the above, but I thought it would be atleast a bit more educational to those thinking of doing something similar. :blues:
 
Fitted Franks Panhard Rod offset bushes, thanks again Frank(Y)

Original bush was a ballache to get off, ended up having to use a drill to mess up the rubber while spraying wd40 in it, then refitted it without the washer so the bush was stuck behind the nut, then with a big tug it started to move then popped completely off, which caused me to scrape my arm on the exhaust which was nasty.

5661709257_60847c182f_z.jpg


Hope I got it on the right way:wasntme:
 
Good stuff. Thats fapping low.

Tuck is indeed the new poke*. narrow high offset 15's or 16's with tiny tyres might look rather good up in the arches like that.

It could have a kind of narrowed beam air-cooled look to it,

4991380002_large.jpg


569258.jpg


*I've never been very fashionable
 
Don't put anymore ideas in my head mark:p Do like those pics though, but don't think it would work with my micra, have you got a pic of a micra like that? might suit a primer finished one for a half assed, half finished look.
 
:laugh: mini heart-attack over, was not looking forward to redoing that. And I picked up on the edit so I copied and pasted it in for our amusement:p
 
love the little guide dude with the coilovers! are they the ones from the websitme i posted on my blog? if so i may be able to find your little guide very closely :) cheers dude

mind if i ask you a little more when i get them?

car is looking ace by the way!

and would the camber bolts work too? as my front stick out a little bit and would look silly so a little arch roll at front and camber will be good!
 
Got the coilovers from Venom Motorsport off ebay, think they import and sell FK goods n such, not sure what link your talking about Will, but mine are the budget 'street' coilovers. You should be able to copy most of what I've done with most corsa coilovers, I'd have thought. And I guess I should mention that I copied this and this anyway.

The camber you can get from the shocks themselves is quite alot, quite hard to tell with my wheels, but it should easily be enough for your wheels I would have thought, but I guess you could use camber bolts as well if you need to. I'm going to need to increase my camber even further if I fit my minilites(which I believe stick out more than yours) but I'm going to slot the hole 1-2mm further instead.

And yeah if you need to ask anything, go ahead, but you'll probably find you won't need to:grinning:
 
Back
Top