• Please only use these forums for blogs, they are not a discussion forum

Hoodedreeper's K11 v3

hoodedreeper

Ex. Club Member
Déjà vu...

Some may remember me, some may not. Heres a small introduction :)

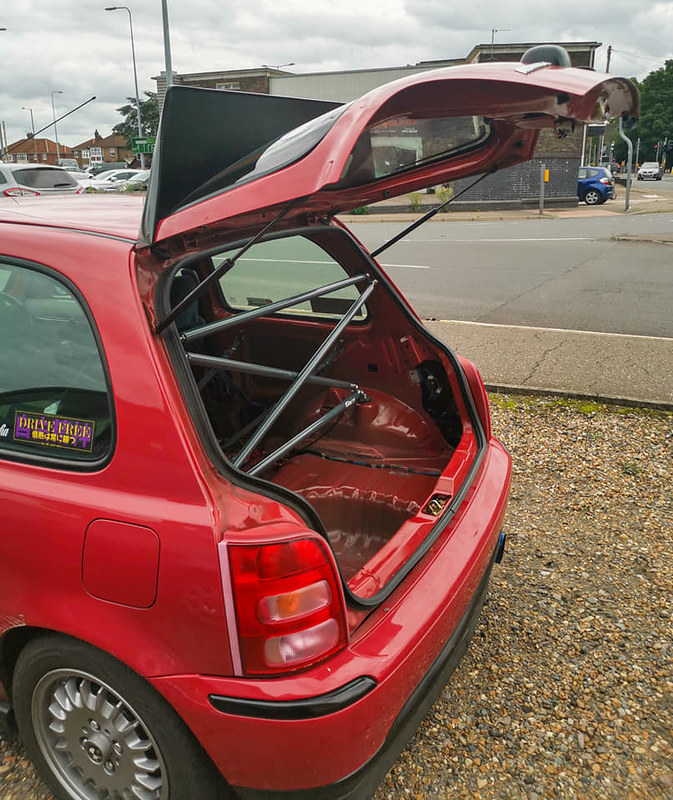
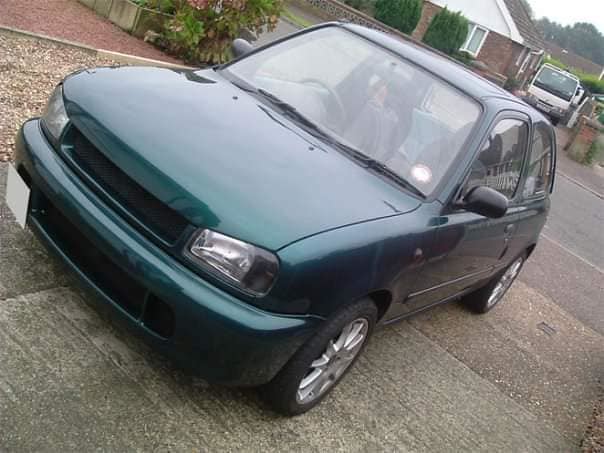
My name is Chris aka hoodedreeper, i'm 30 from Norwich,Norfolk. I've been a member of MSC for quite a few years. I started off with a green 1.0L pre-facelift K11 which started off well until an RTC ended its life. Here's a photo of it in its prime

49960939571_69d0e54a91_z.jpg


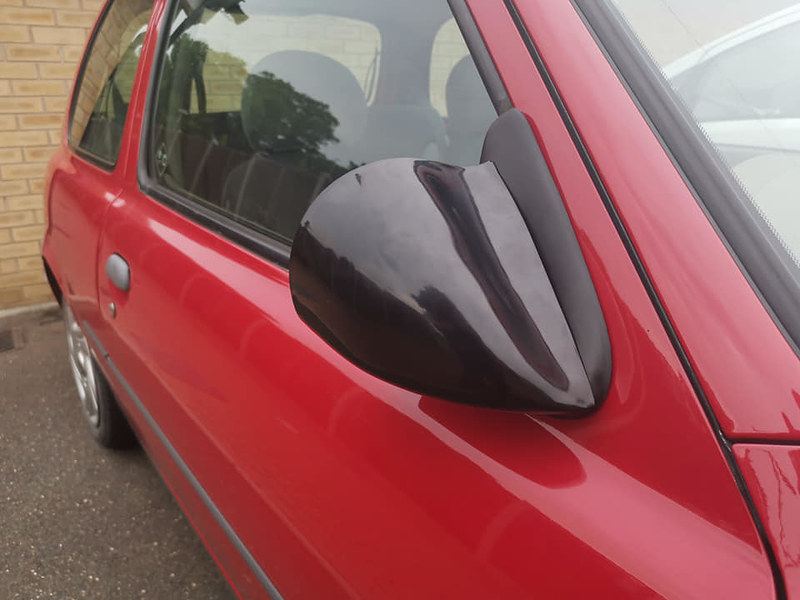
I then moved on red 1.3L facelift which I owned for 5 years and stripped for parts in 2013.

49960939516_3a985bfcee_c.jpg


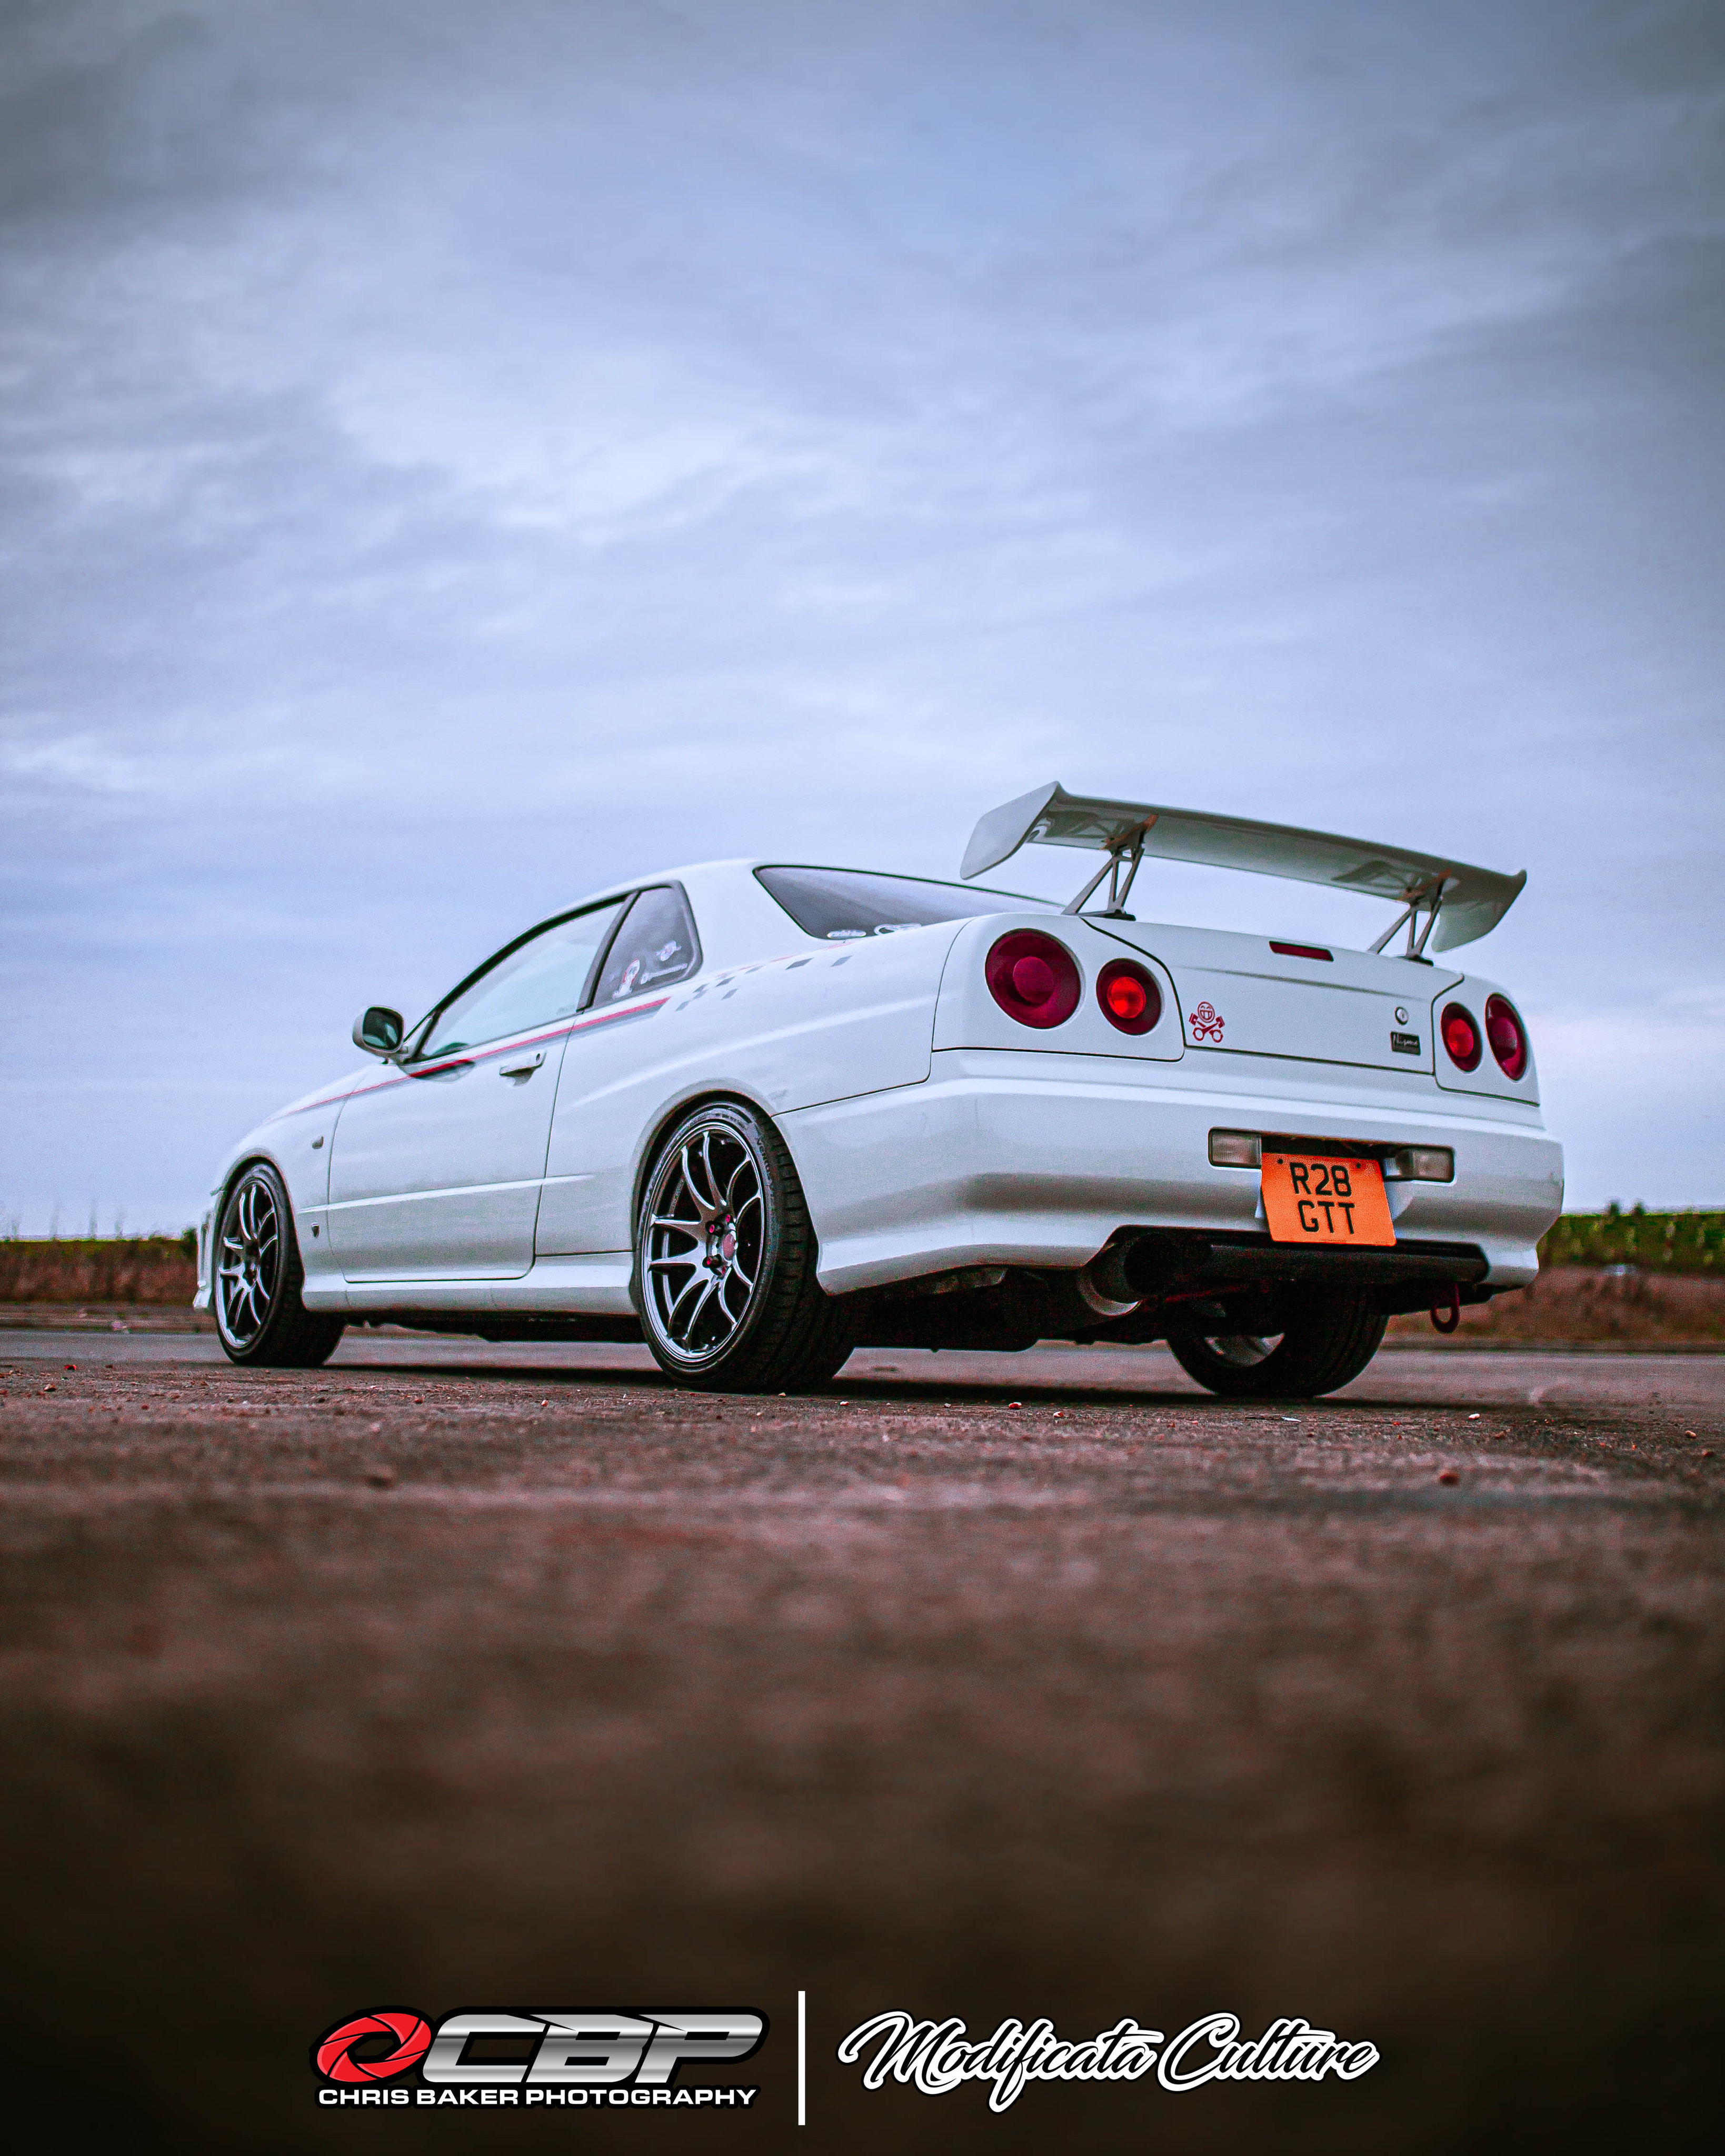
I then built 3 MX5s since then before moving to my dream car, an R34 Skyline 2 years ago (build threads for all of these can be found in my signature)

49611019247_5101a60577_4k.jpg


Me and Lu (my other half) were chatting awhile back, talking about how much we missed the red Micra, how we wanted a car that we could (ab)use and not worry about getting scratched or dented.

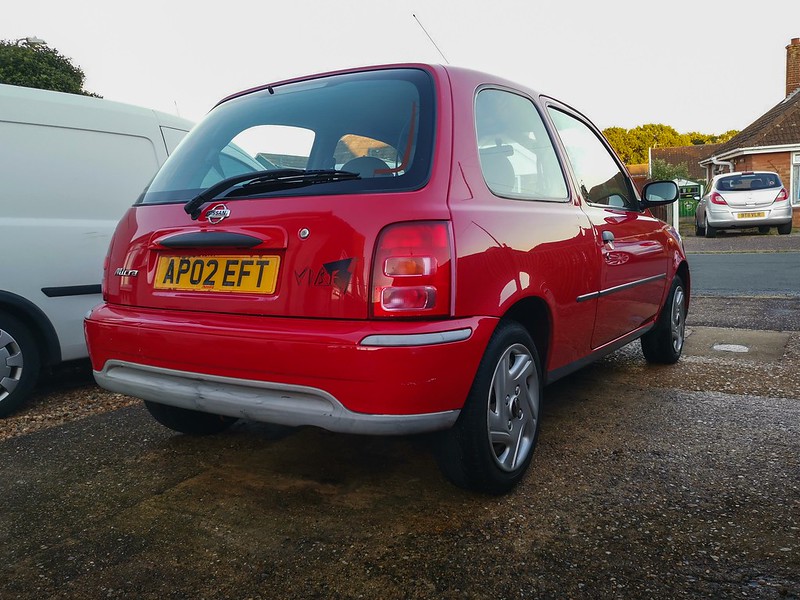
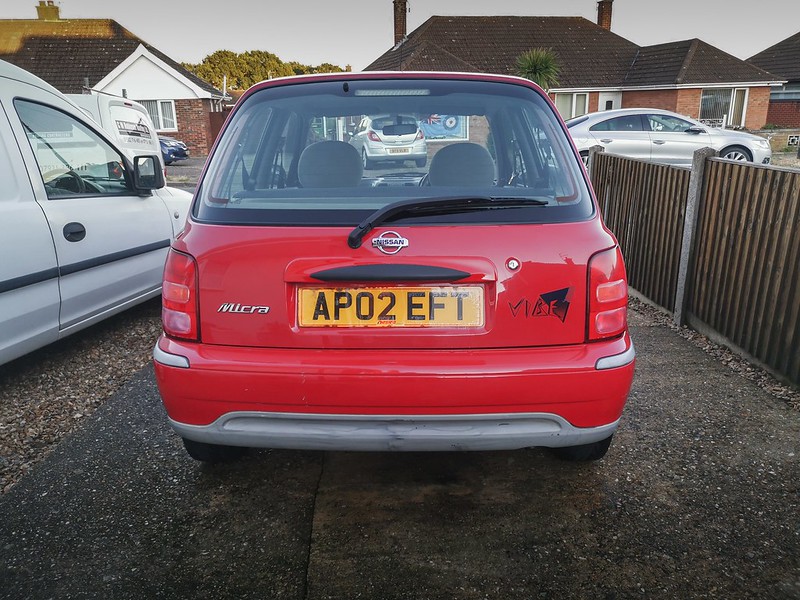
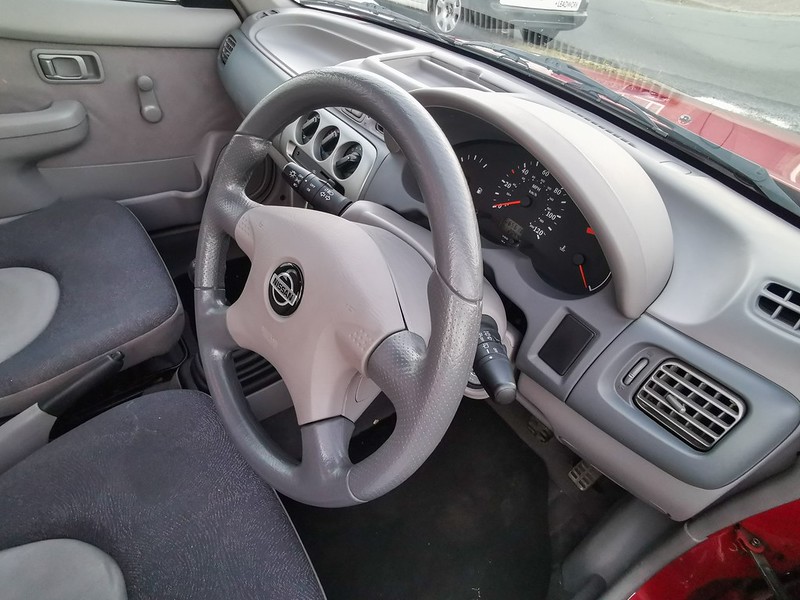
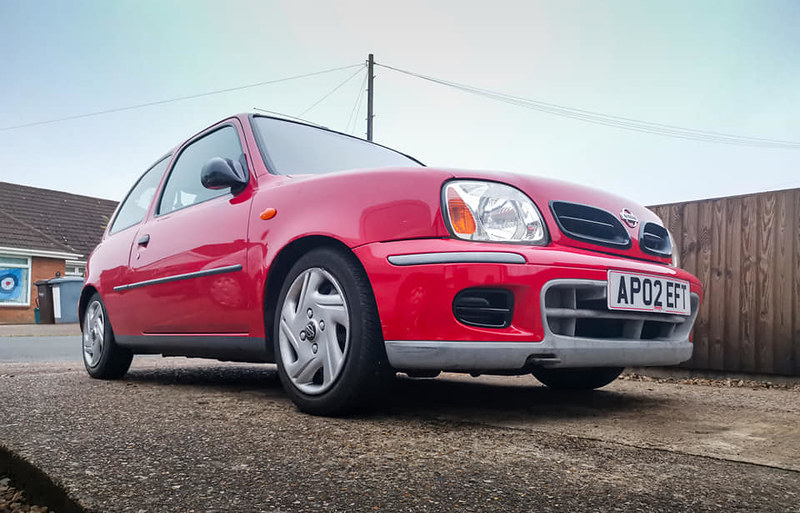
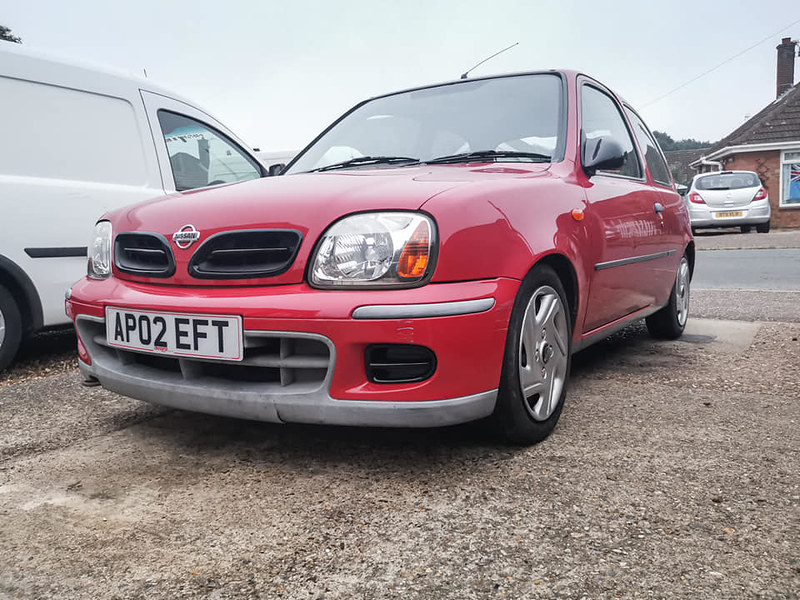
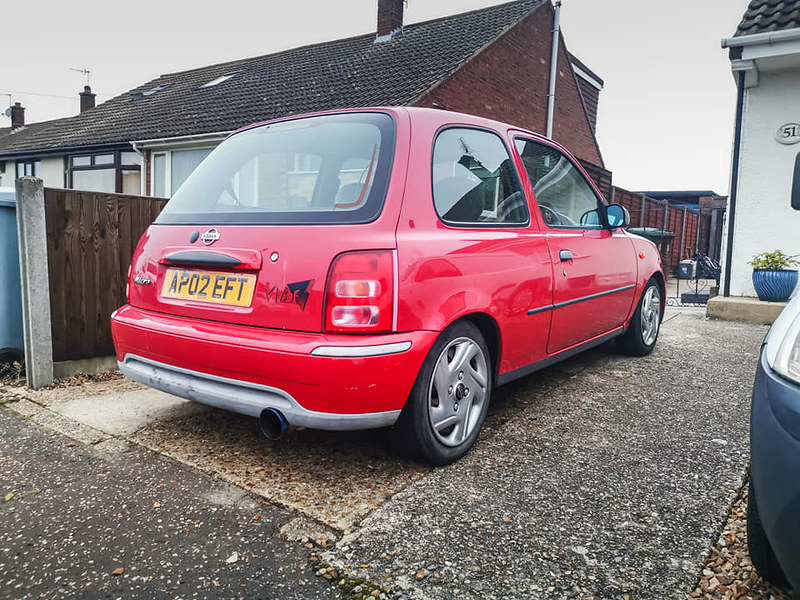
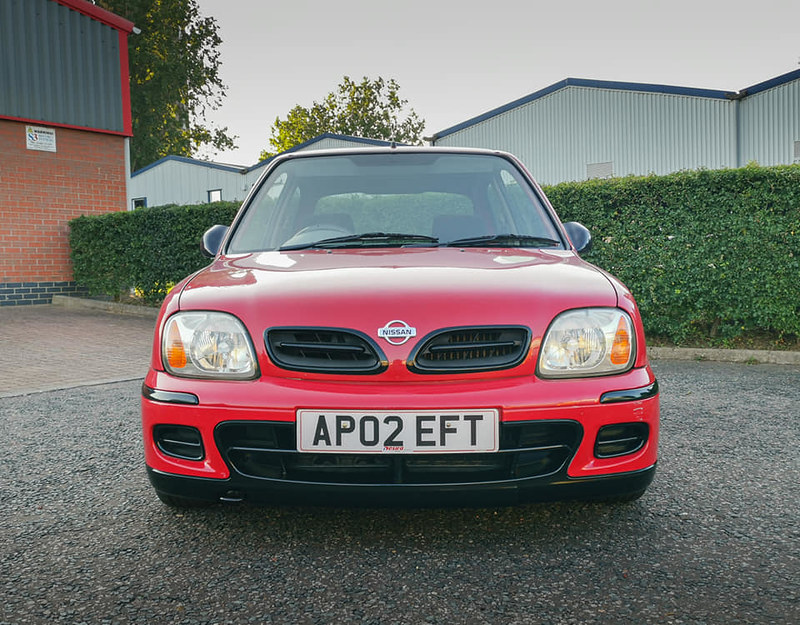
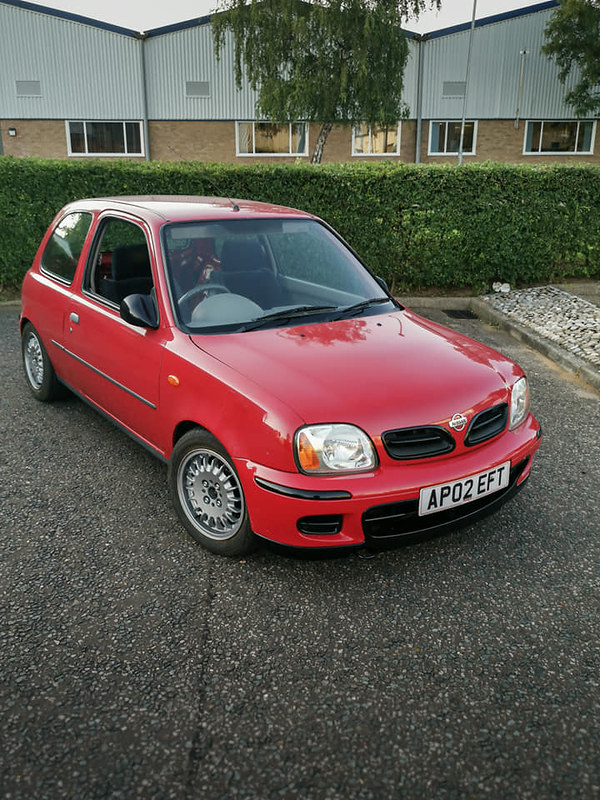
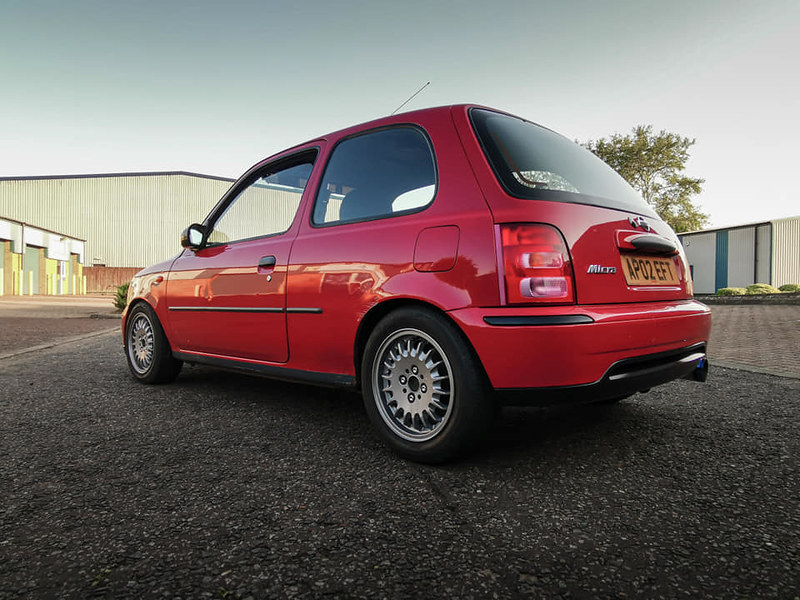
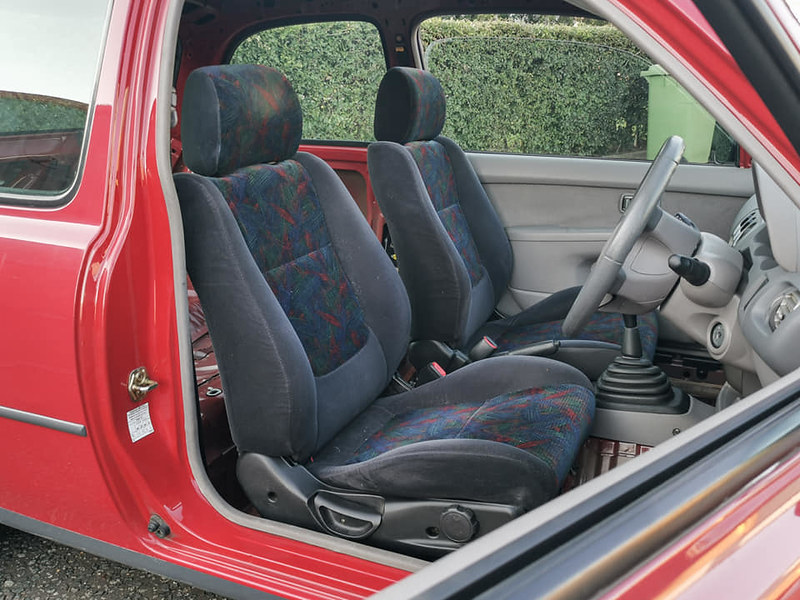
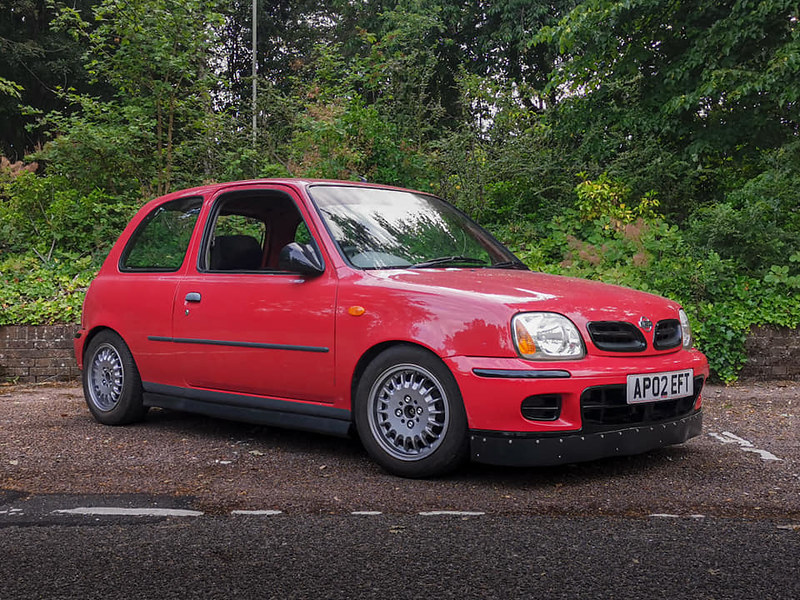
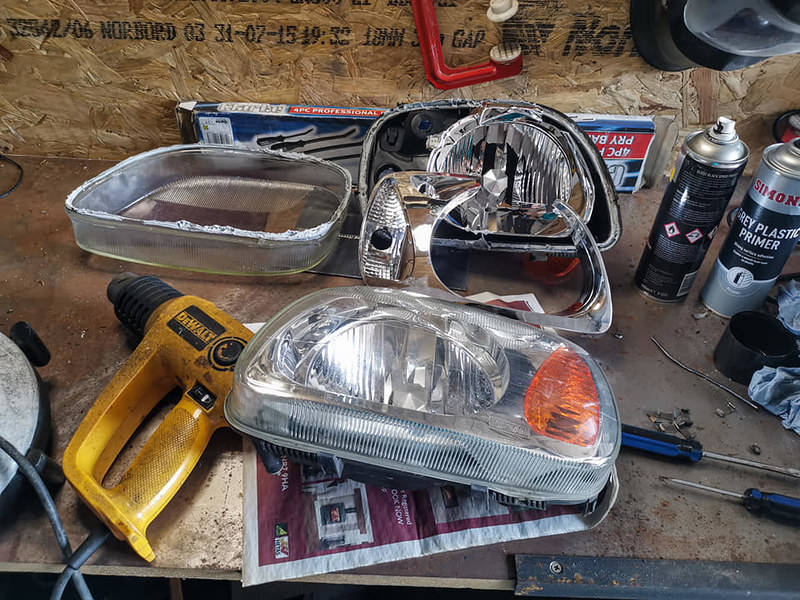
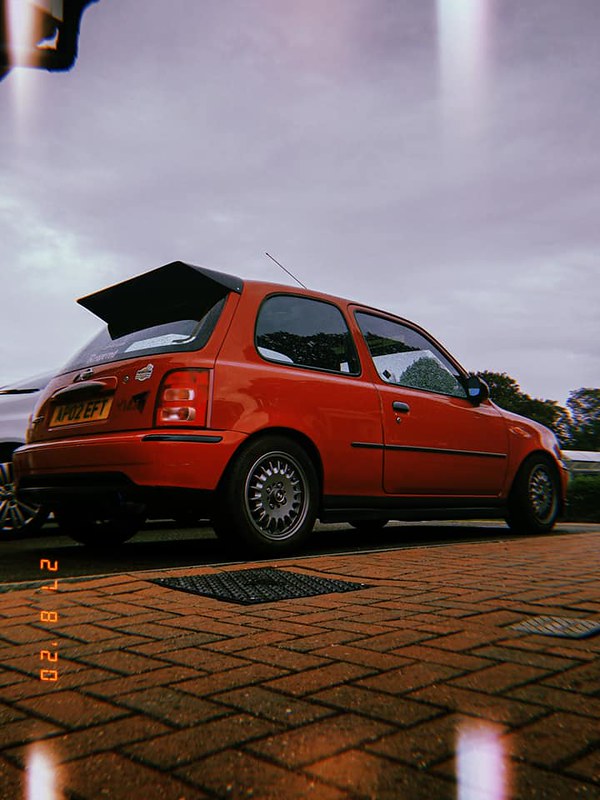
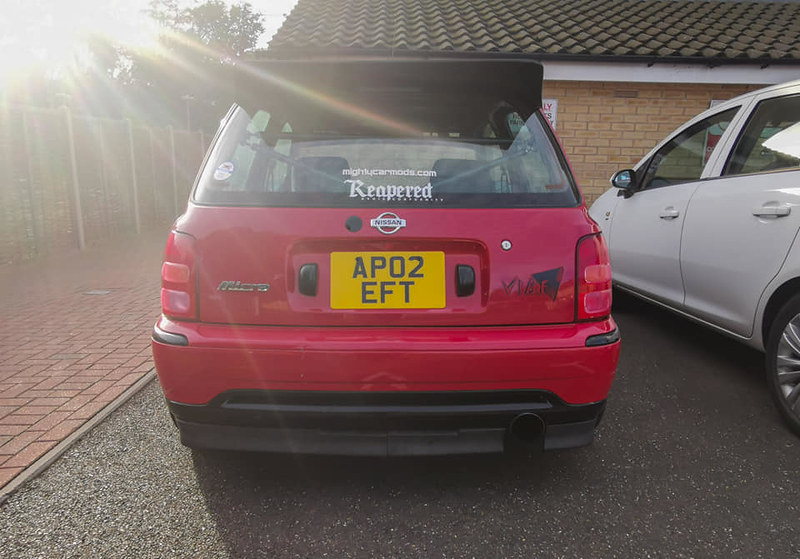
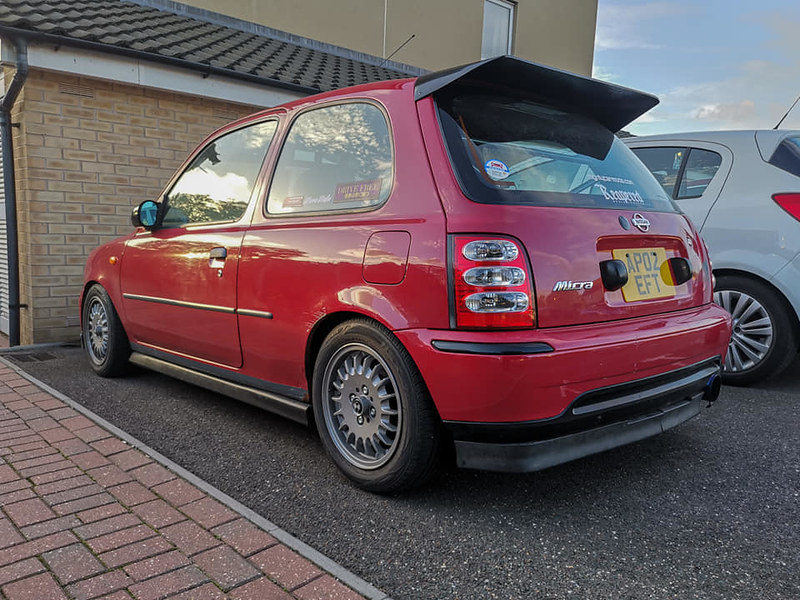
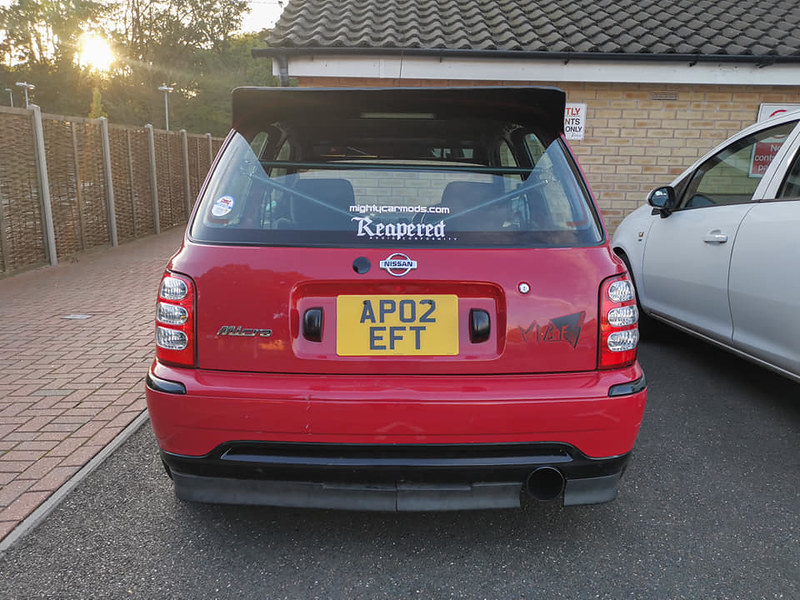
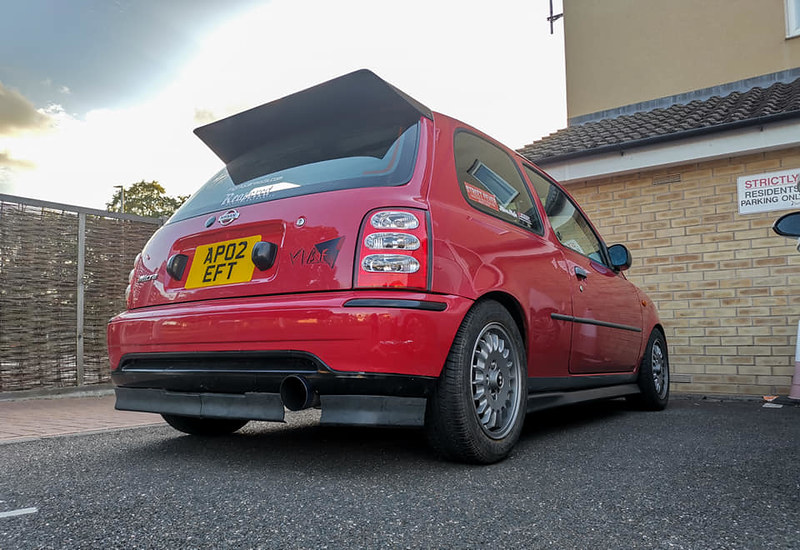
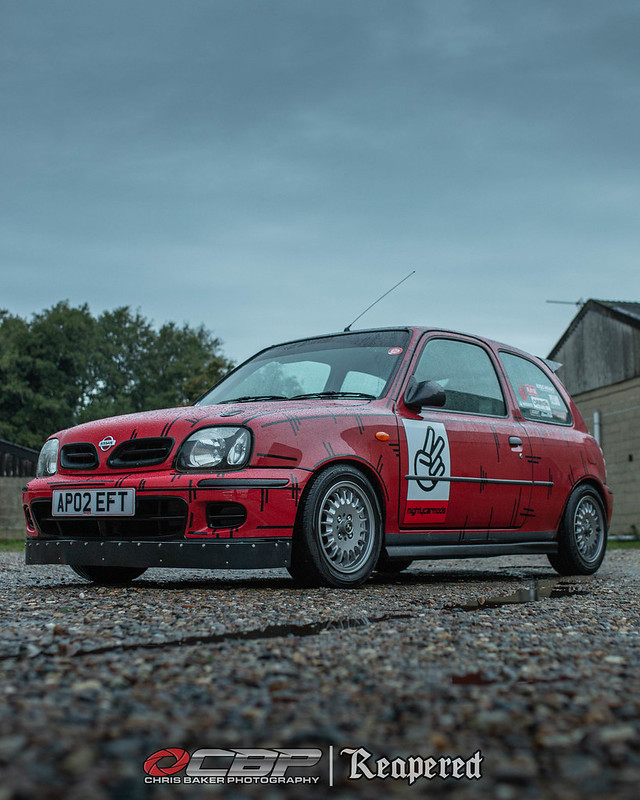
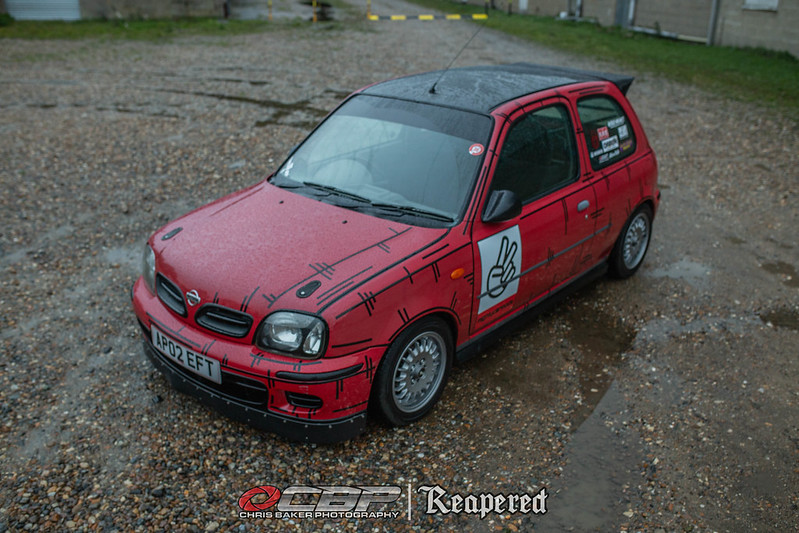
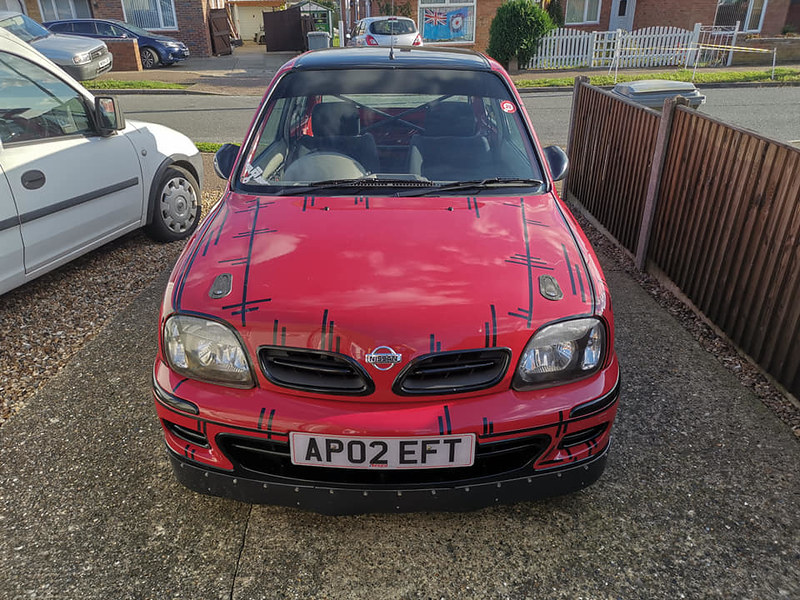
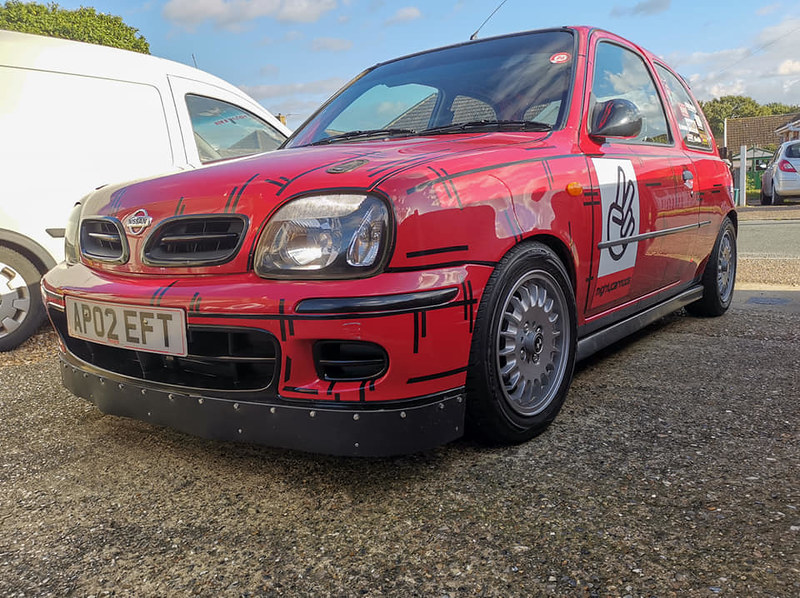
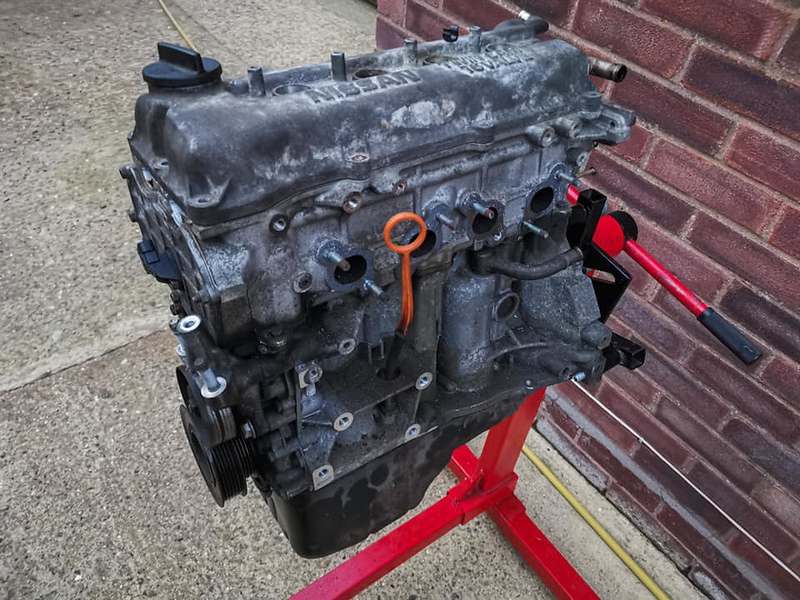
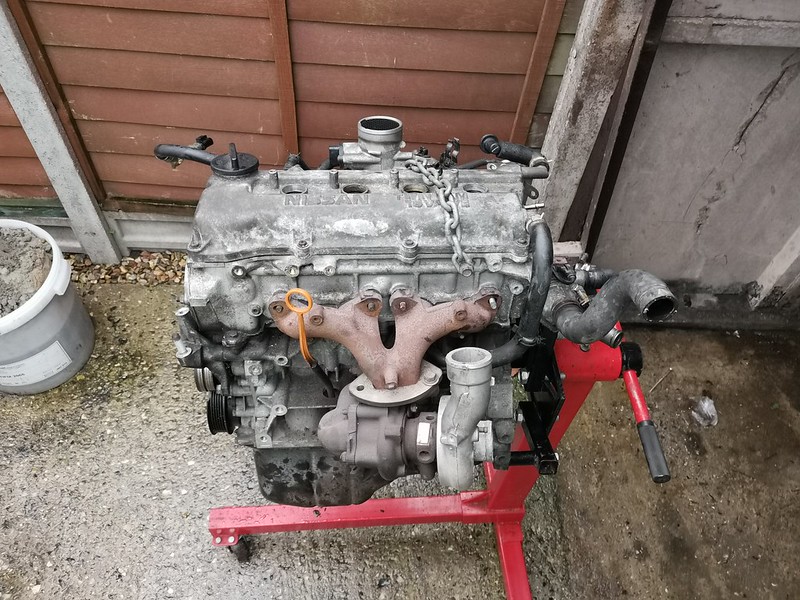
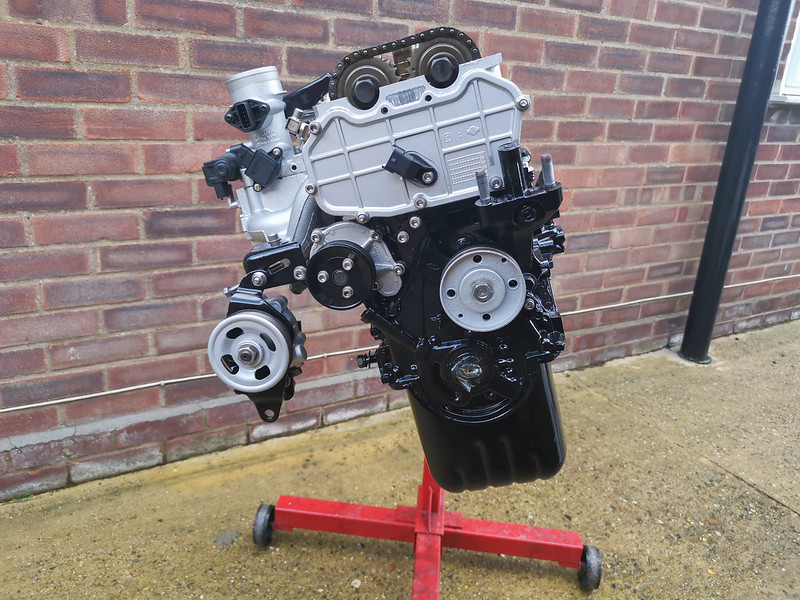
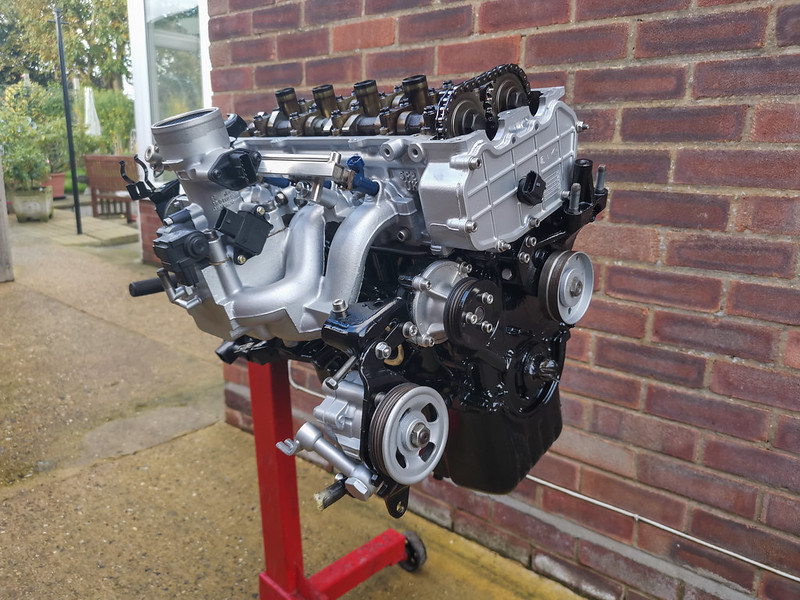
We found this 2002 Facelift Facelift K11, 998cc with a whopping 58bhp of untamed power (sarcasm). Being a Vibe trim its extremely basic, I'm not even bothered about the manual windows, tin top roof, no AC or anything else ?‍♂️

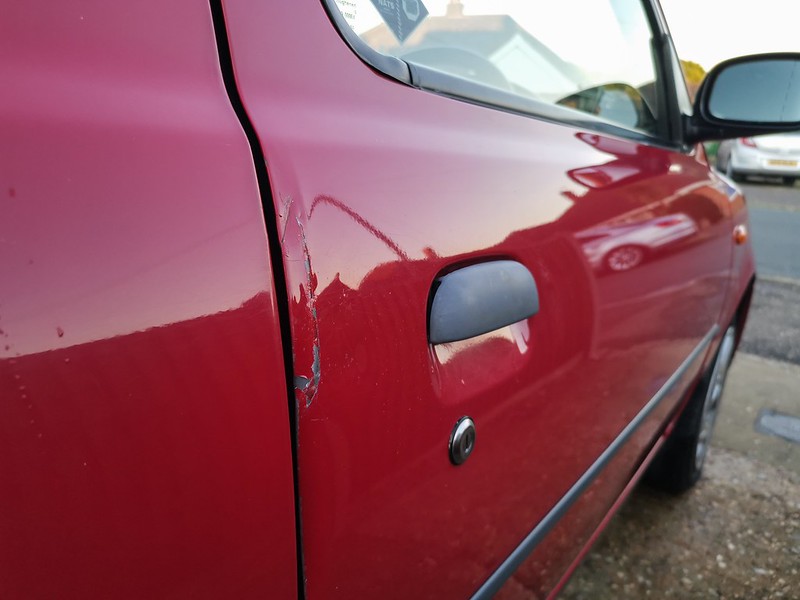
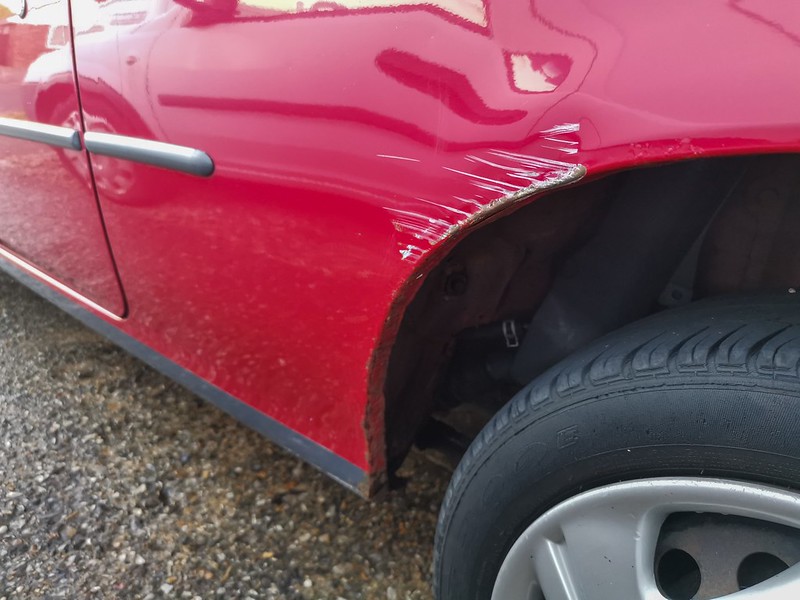
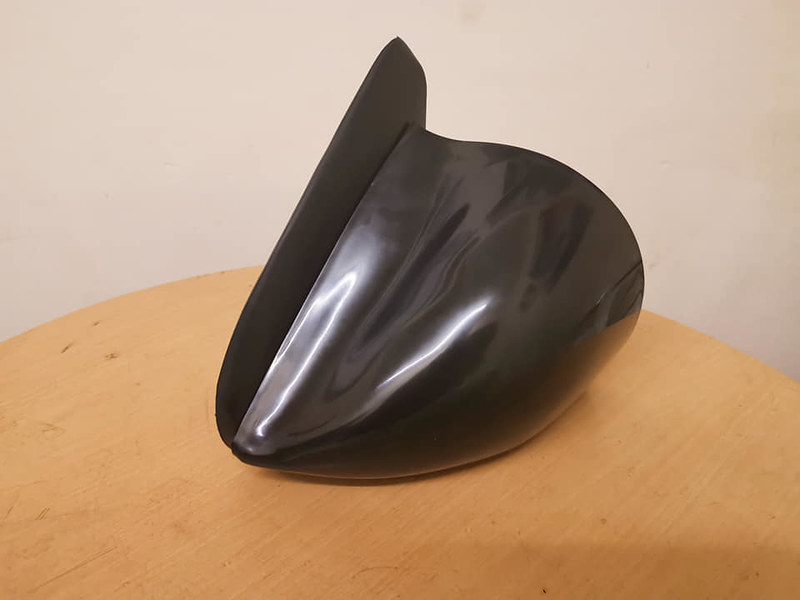
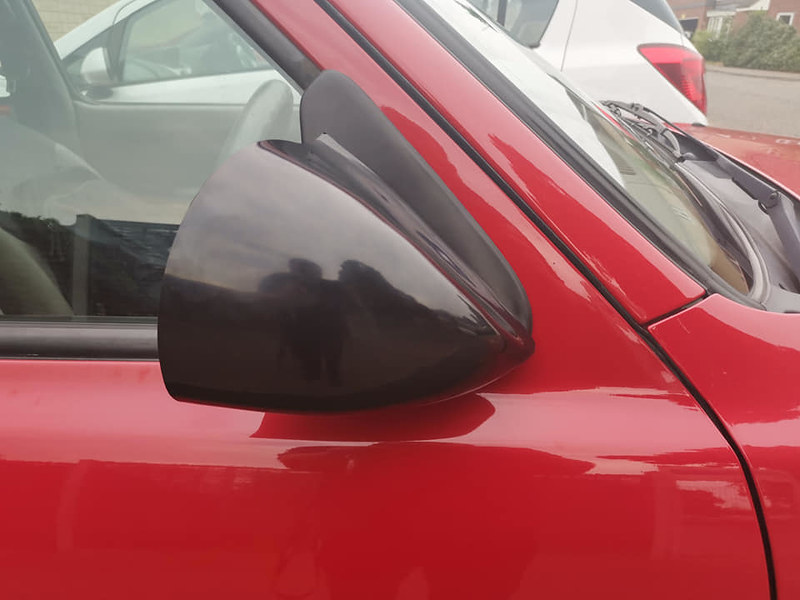
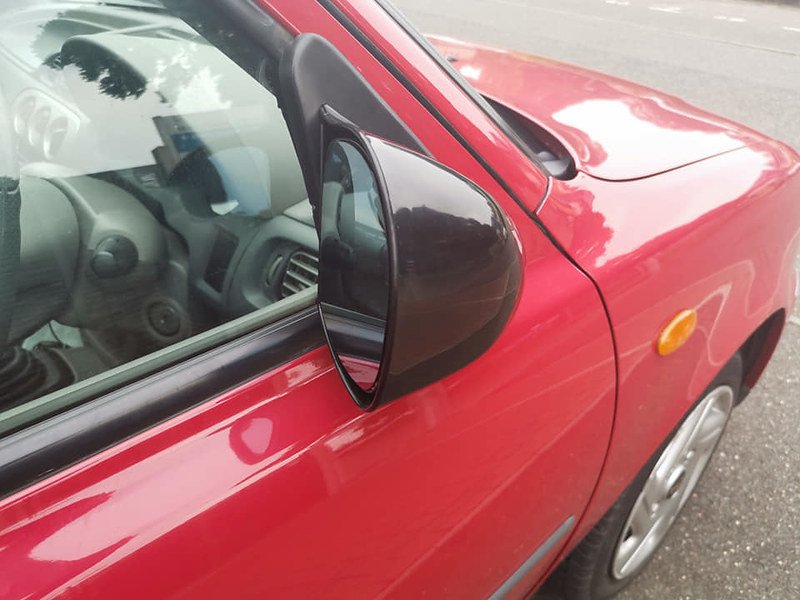
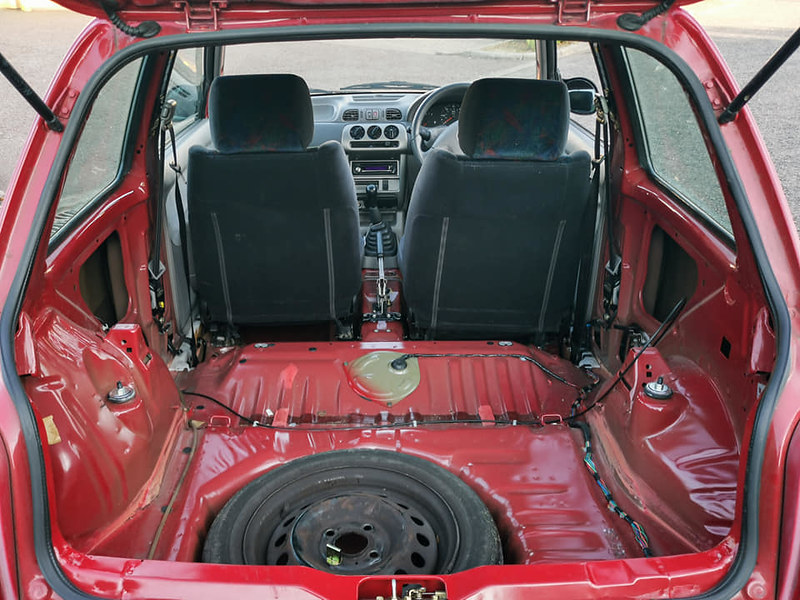
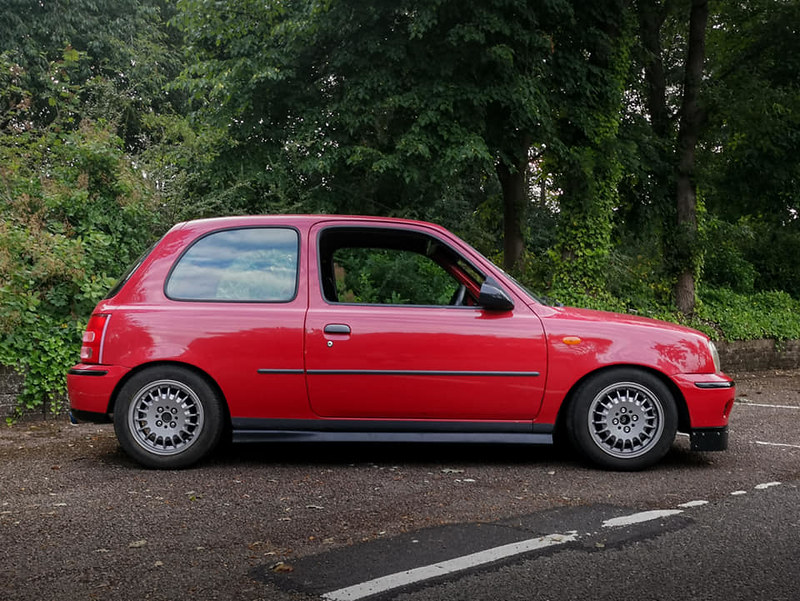
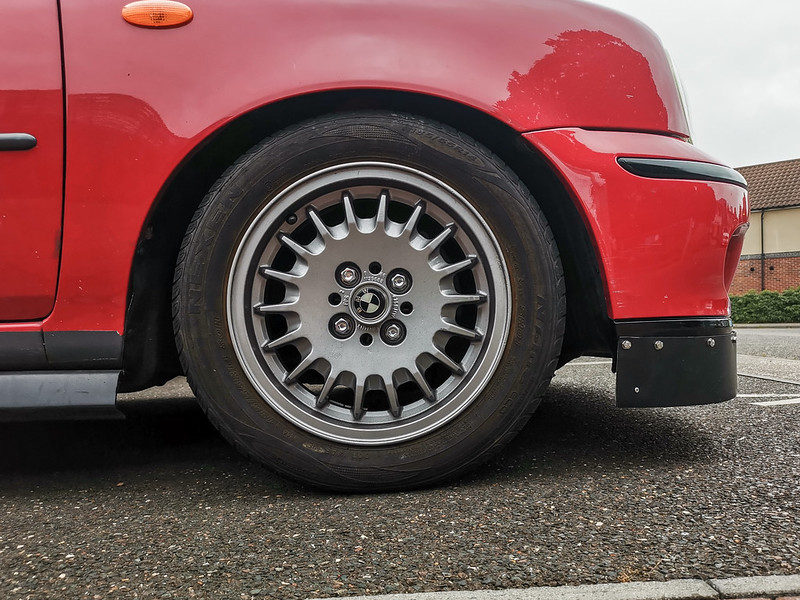
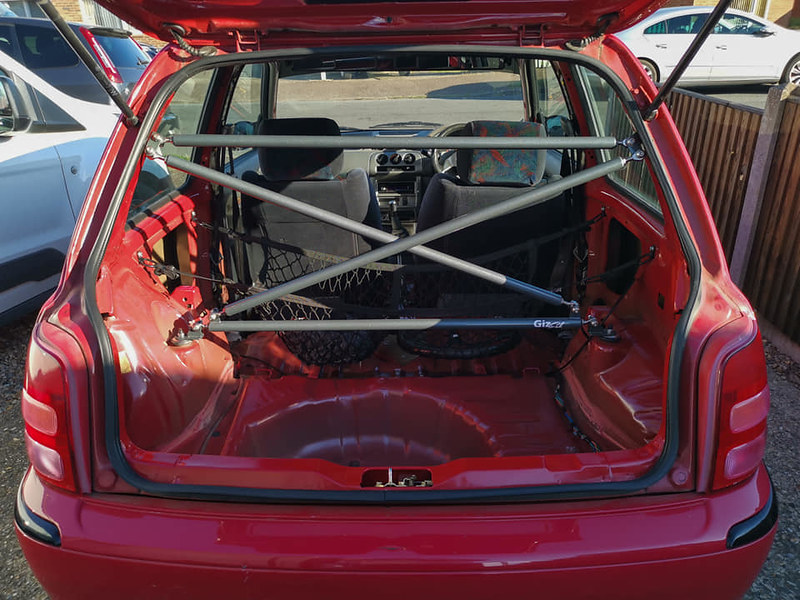
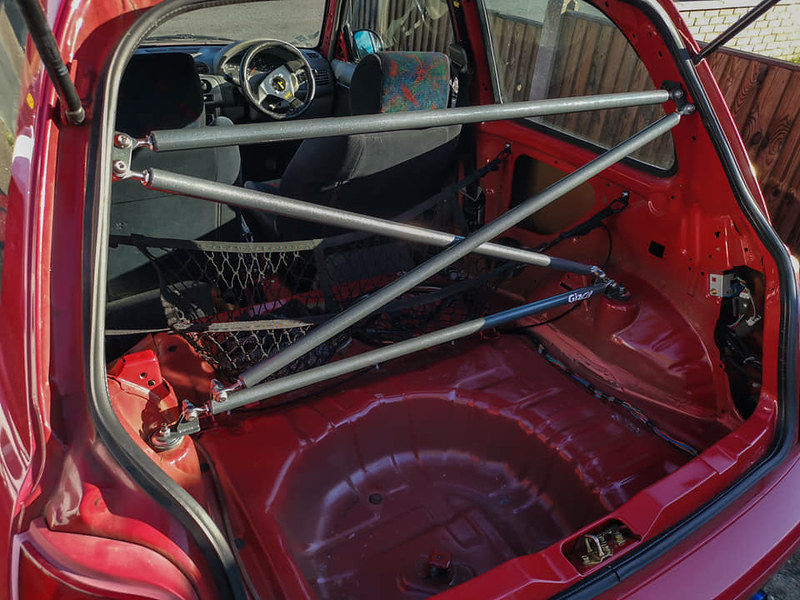
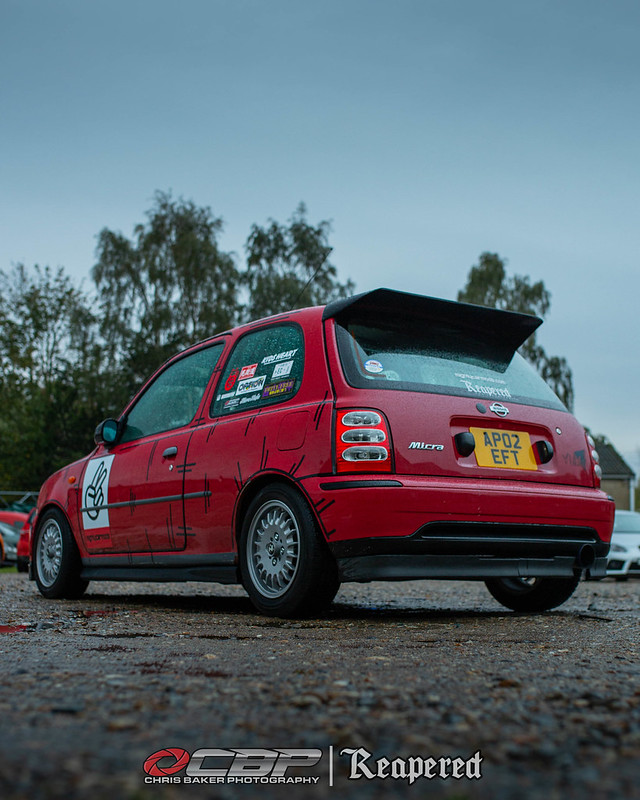
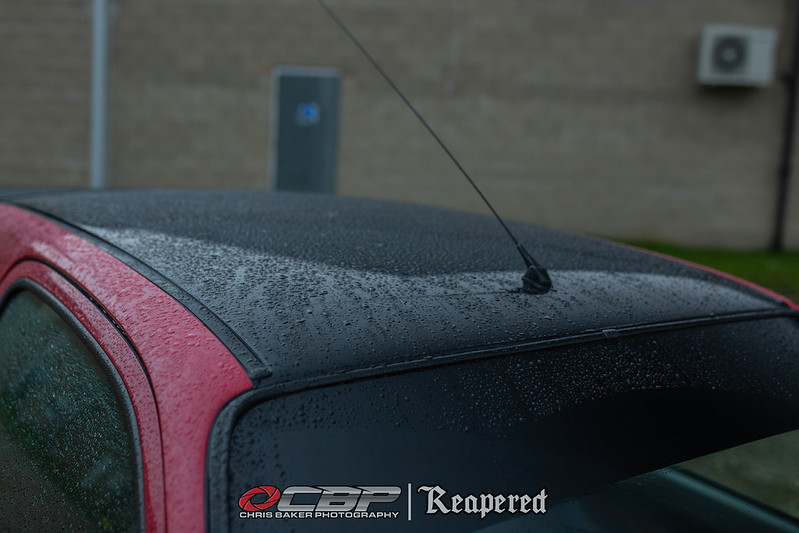
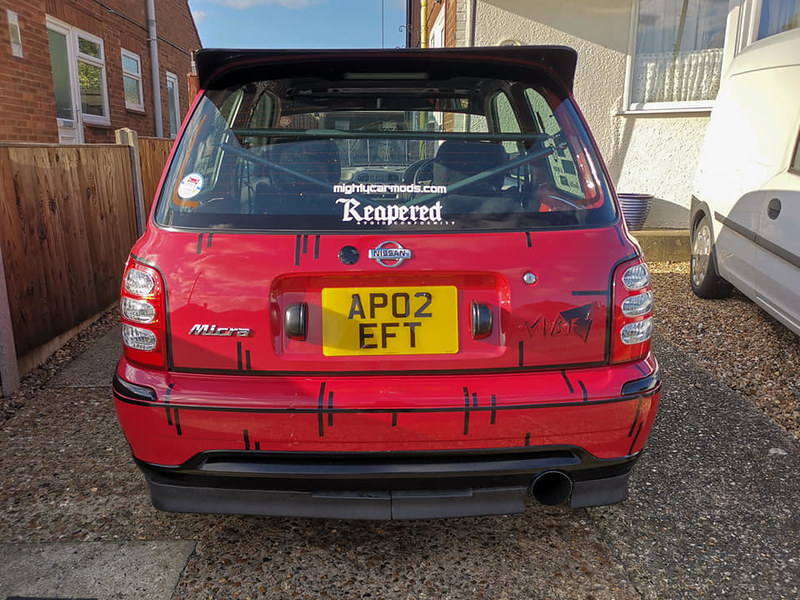
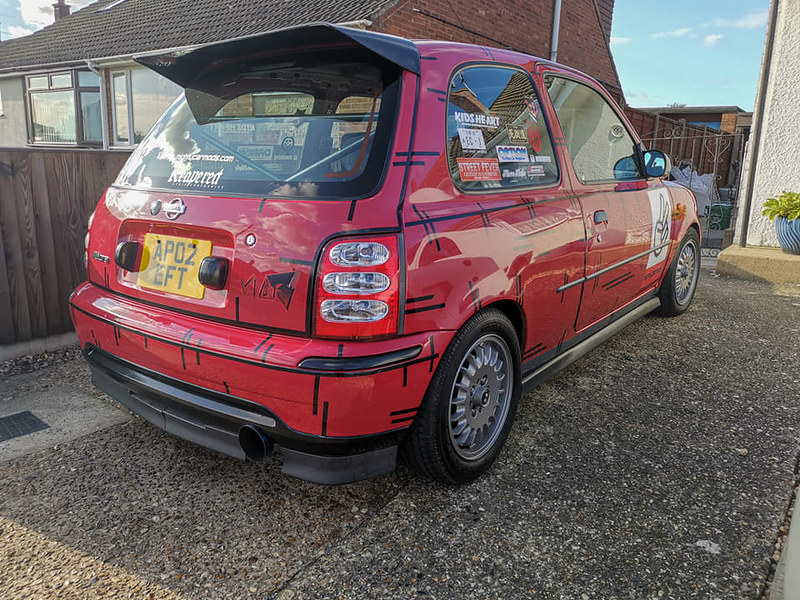
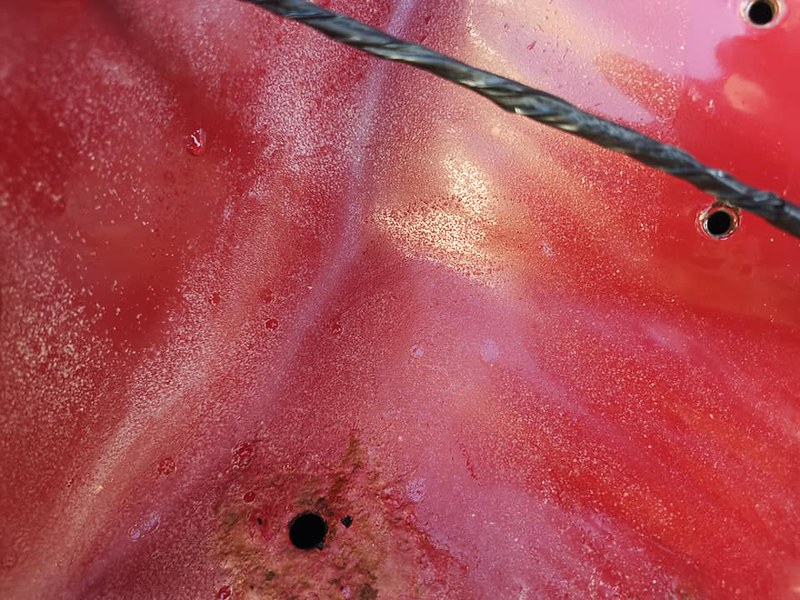
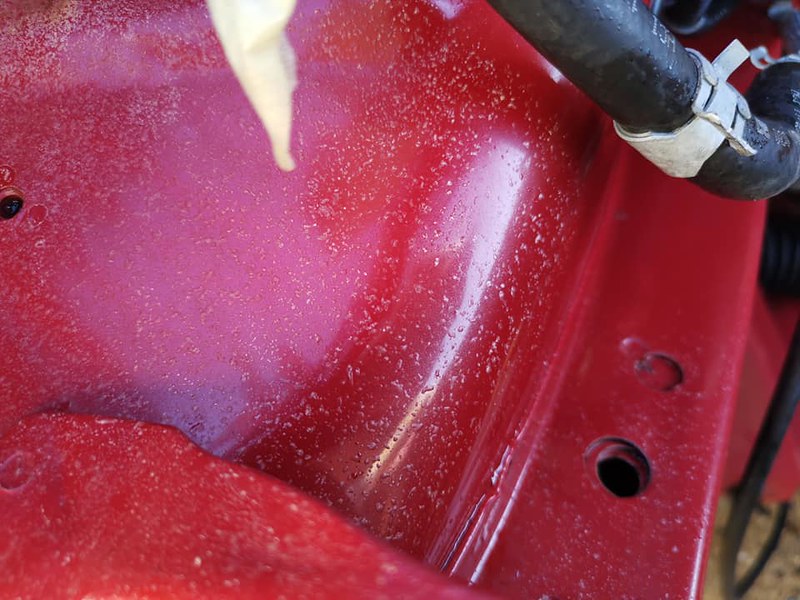
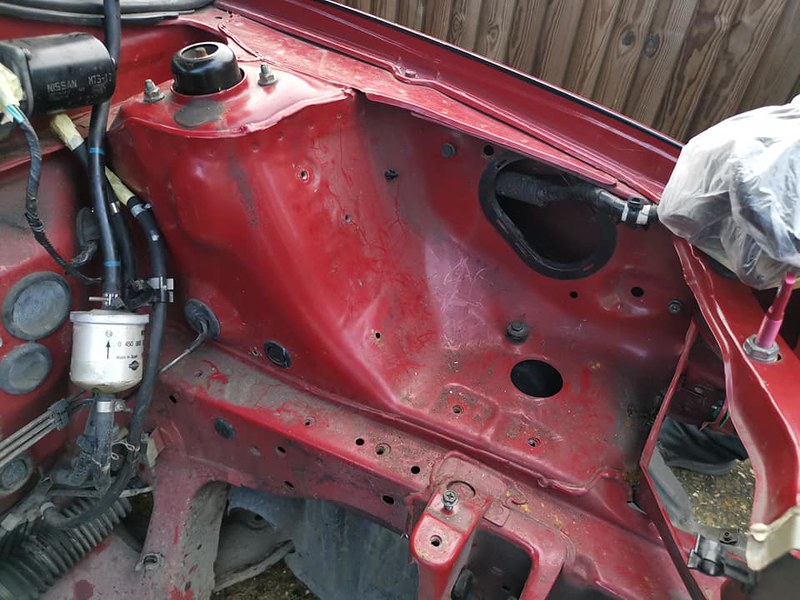
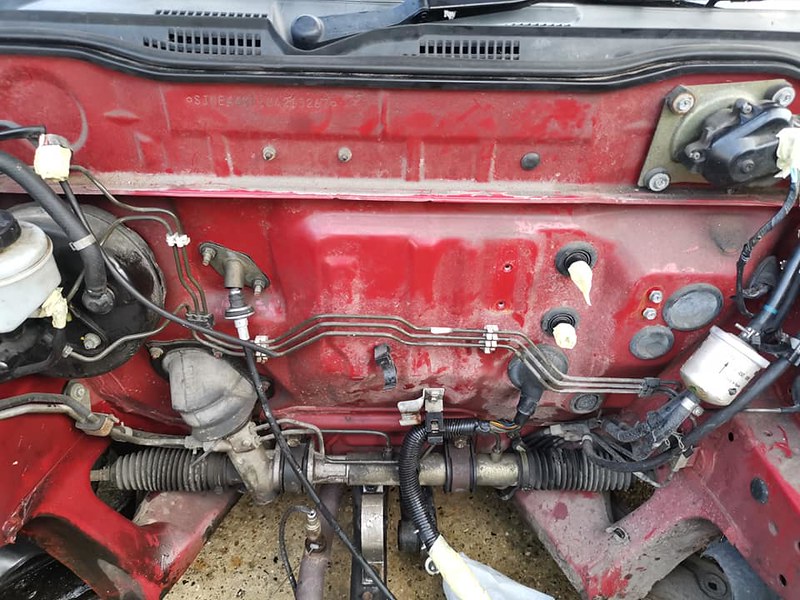
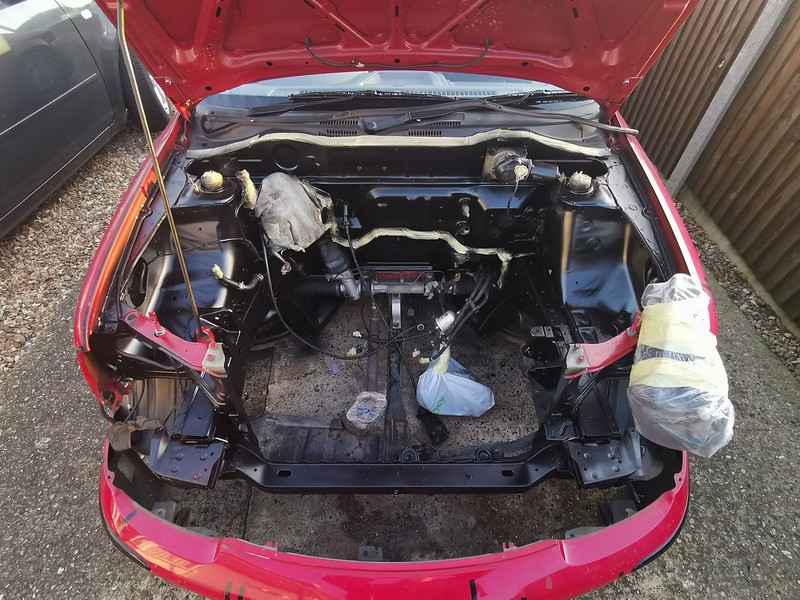
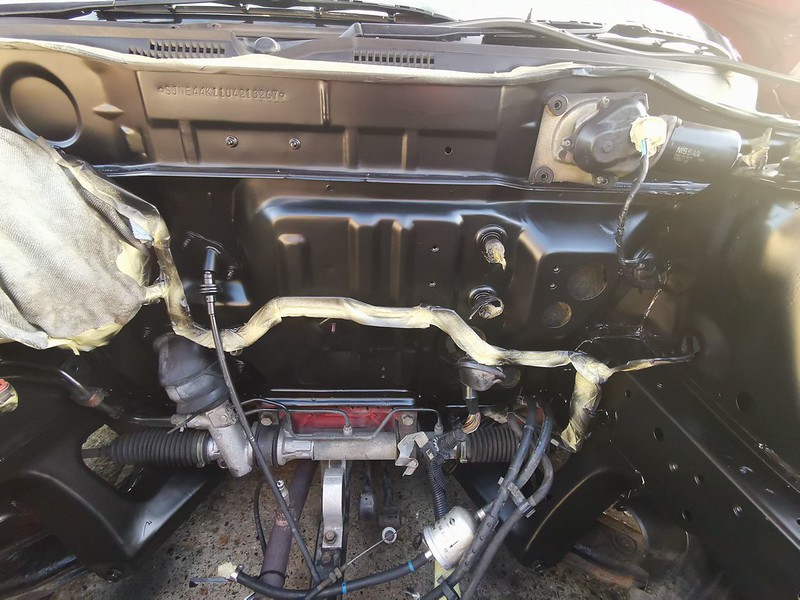
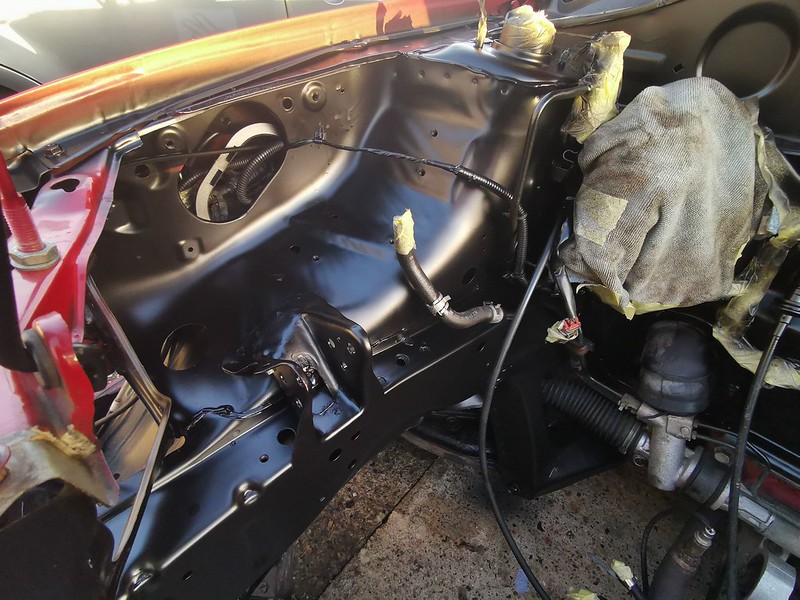
Overall its in pretty decent condition for 65k miles. The odd scrape, dent and mark. Some attention will be needed on the N/S RR arch as it's bubbling and heading towards the sill corner. The sills themselves and cross member are very clean which is a bonus. Although don't let the photos mislead you, the car is very pink

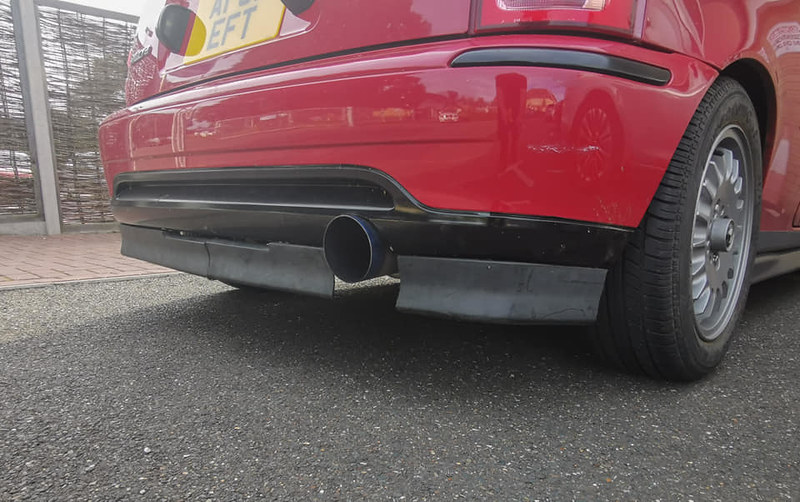
It serrrriously needs lowering, mainly to reduce the horrendous body roll.

I've got an MOT booked for tomorrow, so that will give me a good idea of the overall condition.

49960861766_50a13bda89_c.jpg


49960365363_b96d88e037_c.jpg


49960364288_6828fdf11d_c.jpg


49961145672_b18872c158_c.jpg


49961145852_42e2800797_c.jpg


49960862241_3b4e34802c_c.jpg


49961146592_0c86e0ffc2_c.jpg


49961146047_423d95799f_c.jpg


49961146342_a895a3c9c0_c.jpg


49960364763_7292006ec6_c.jpg


49960862066_fcd47c932c_c.jpg
 
OP
OP
hoodedreeper

hoodedreeper

Ex. Club Member
Thank you :) Its nice to back!

Unfortunately this one wont be to the same standard as the previous build, as the R34 will take priority.This isnt to say everything will be bodged because it wont be, it just wont have as much money ploughed into it.

We're off to a great start (not). Failed the MOT on rear inner sills and track rod end which are in the process of being sorted.

Advisories were minor oil leak and 3 tyres. The wheels are getting changed so pointless replacing the current ones
 
Not that bad for a fail then
I know what you mean on the money to priority ratio, I'd love to drop loads into my k11 but I have other things to finish
 
OP
OP
hoodedreeper

hoodedreeper

Ex. Club Member
The clutch was changed about 6 months ago but the pedal is extremely stiff/heavy. While the car was in the garage they noticed the clutch cable is new, with it disconnected the pedal moves freely. So the clutch will need replacing sooner rather than later as I cant stand driving it like this much longer lol

When looking at the car the engine had a rattling noise, sounded like a pulley bearing or exhaust heat shield. I removed (more like ripped off) the downpipe shield which made zero difference. I held a screwdriver to my ear and searched around the pulley area, coming to the culprit....the alternator. Despite the pulley having very very minimal play, something isn't right inside.

Working in a Motor Parts store, I was shocked at how expensive they are (even with my discount). Found a refurbished unit with a 2 year warranty on eBay for £67 delivered so that should be here next week.

Hopefully after those two, it'll be plain sailing from there and the modifying can begin
 
OP
OP
hoodedreeper

hoodedreeper

Ex. Club Member
Popped over to visit Clodo to collect some K11 March nipples and lowering springs. We got chatting about the car and the clutch pedal issue. She kindly adjusted the cable and suggested greasing the springs on the pedal arm. Got home from work today to do it and it's cured the problem (got a squeek but I can deal with that) While I was there I did the other 2 pedals too as the throttle pedal was a little bit stiff too.

While the tools were out I also replaced the heater resistor so that's another thing ticked off the list.

I've also ordered a pair of Corsa B shocks at work and Matiz rear springs are on their way from ebay, which means we can finally get it lowered! Just gotta wait for the Gizfab adjustable panhard rod before I can make a start.
 
OP
OP
hoodedreeper

hoodedreeper

Ex. Club Member
On the previous K11 I had some DTM mirrors fitted with what seemed to be one of the very few sets of base plates in existance. Having failed at finding them again I was on the hunt for alternatives. I came across a website which had a large selection of photos of mirrors and I came across VW Golf MK3 base plates which looked very similar. A friend had some M3 style mirrors and baseplates for a Golf, a quick test fit confirmed I could do something with them to make them fit.

Abit of cutting and drilling and these were the results. Not a 100% fit but they're pretty close

50002243913_61bcbefa06_c.jpg


50003019837_b65f3f1249_c.jpg


50002243893_815bc34301_c.jpg


50002243858_b537fd6047_c.jpg


50002243888_330416c8f0_c.jpg


50002762681_6d09ddf008_c.jpg


Finding some wheels that suited the car and being cheap seemed a tricky task. Doing a search on google,Facebook and the forums I came across some examples of BMW E30 14" bottletop wheels. I managed to find some locally for a total sum of £40.00, winner! A friend is currently sand blasting them then I can get them painted. Originally we thought white, but the spoke design would make keeping them clean a nightmare. The second choice was a gun metal grey, silver may be too plain/boring.

Also found a set of 185/55r14 locally from a friend which saved us alot of money

50003019897_de36152ac0_c.jpg


With all of the parts finally arriving, it was time to finally lower the car. Alot of people tend to go with Corsa B coilovers, but I didnt like the idea of drilling/filing the top mount holes on the car. So we went for the Daewoo Matiz set up instead.

This compromises of Mk1 Daewoo Matiz 35mm lowering springs (rear only) on front K11 shock absorbers. The rears are Corsa B KYB shocks with 're-engineered' K11 lowering springs. I've read of people complaining about the rear springs being too soft if you use the originals, thats why we went for lowering springs instead.

50020300846_67bb47ca3e_c.jpg


I ran into some issues along the way, sadly it wasn't all plain sailing. Firstly the driver side inner CV joint popped out. Secondly the upper nuts on the rear shocks wouldn't undo due to the centre spinning in the locking grips. In the end I cut the shock to get them out, made abit of a mess in the boot (oops). The last thing was the collar from the original panhard rod was seized on the car and took alot of grinding to get it right.

50019767613_b1a34ac343_c.jpg


Browsing through the Facebook pages and market place and I found a universal back box made to fit the K11. Being quite impatient I drove almost 2 hours to go collect it. Being a second facelift the rear bumper doesnt really have an exhaust cut out, so the backbox sits lower than the others which made fitting it that little bit more tricky. But we got around it and my bumper cutting even surprised me!

50020300891_22a3726b27_c.jpg


50020300841_15d8fe28da_c.jpg


I also made a start on painting the chrome and faded plastics, starting with the bonnet grilles and fog light covers.
 
OP
OP
hoodedreeper

hoodedreeper

Ex. Club Member
Its been a busy few evenings working on the car. The lower trims and corner bump strips got painted gloss black to match the grilles and fog light covers

50048225456_cf33642007_c.jpg


50047664413_ca1840869d_c.jpg


The 14" BMW Bottletop alloys finally received a coat of paint. One of them isnt the great of conditions so I'll be on the look out for another one in the future but for now it'll be fine. A friend sand blasted them for me and I used Holts Simoniz Wheel Steel paint for the colour

50047664443_e155989e04_c.jpg


50048225301_205d1c3a71_c.jpg


50048225401_8689ae7da1_c.jpg


The BMW centre bore is 2mm smaller, so my options were to get them machined or use spacers. I had a pair of 3mm and 6mm spacers in the garage so I went with this route.

50047664593_3d72bb3145_c.jpg


50047664468_1692f074b8_c.jpg


50047664618_ac94ae13ee_c.jpg


50048225536_c2686b1760_c.jpg


The interior has been stripped, the front door cards will stay on until the new flat aluminium ones are made

50048481247_301d6fcb0d_c.jpg


50048225486_fcbd8fa5b1_c.jpg


You may have noticed the seats have changed. We've also fitted some Almera GTi seats :)

50048225441_fe45255d5c_c.jpg


The front two mounting holes line up spot on. The rear outer mount requires a plate welded on and a new hole drilled. The rear inner mount uses the OEM Almera bracket which needs trimming and drilling in the centre to line up with the OEM Micra mounting hole on the transmission tunnel.

I forgot how crap the DTM mirrors are for visibility (but they look cool). To help improve this a friend kindly donated a 5 panel wink mirror for the build. It takes some getting used to but its a vast improvement

50048225426_d78eefed89_c.jpg
 
After searching on here for which set ups use, its a combo that was recommended so went with it? I should have measured them before fitting them

Fair enough. I've got amax -30mm that I took one coil off the front springs. I was thinking about taking another off each corner but was worried it might bottom out the shocks
 

MaxK11C

Micraless
Moderator
Social Brand Manager
How did I miss this! Welcome back Chris, been a while since I’ve seen a Micra thread with your name at the top. I’ll be watching this closely.
Great to have you back
 
OP
OP
hoodedreeper

hoodedreeper

Ex. Club Member
Small update

With the interior stripped and the sun visors replaced with the 5 panel wink mirror, it got quite dangerous when it came to driving during sunset. A friend helped me fit a sun strip which should solve this issue

50084167426_9a2eaa9c0d_c.jpg


I decided to make a DIY front splitter made from garden edging, the idea came from a Mighty Car Mods video. Originally it was riveted on but the bottom edge was too wavvy. So I made some aluminium plates to go behind to give it some rigidity, for it to still be wavvy. **** it it can stay like it lol

In the end I had to use stainless M6 bolts because the holes opened up too much for replacement rivets

50084167636_489a00ae1e_c.jpg


I was on the search for some MG/Rover side skirts to modify to fit, mainly because I knew what they looked like on the car but the cheapest pair I could find was £65 shipped. Thats when a friend contacted me after she saw a facebook status of mine, saying don't buy any she may have some in the garage. After a search she found a pair of Civic EK skirts she said I could have for free, winner!

I cut about 6" off the front and kept the sweeping edge just like the original fitment on the civic. With the skirt flipped upside down, I then had a flat edge to use to mount against the sill. The passenger rear arch that has the damage now requires more work. I was tapping the sill to see where the solid metal was and my finger went through.....oops! Luckily the skirt hides the hole for now, I'm waiting for a friend to give me a quote for the arch to be cut out and another welded in its place, along with the sill.

50083584568_3e11c590e4_c.jpg


With the front and sides now sitting lower, the rear bumper needs something to match. I remembered a Seat Ibiza Mk2 Facelift front splitter follows the shape/lines of the rear bumper really well, as I first discovered it on the previous car. It seems these are harder to come by nowadays but luckily my local dealer can still supply them new. That'll come a little later as I've got other things I'd like to do first

50084403757_0c1ecdbf78_z.jpg


When I purchased the E30 bottle top alloys they only came with 2 centre caps. I managed to find 3 more for the grand sum of £20 posted, so those were sprayed and some monochrome BMW badges were fitted to finish them off. If the wheels didnt have BMW in the casting we would have gone for something else, I quite like them with the 'proper' badge.

50083588003_033271ecab_c.jpg


Another Facebook bargain was an S13 HKB steering wheel boss for £20 posted. I wasn't planning on changing the steering wheel so soon but at that price I couldnt turn it down. I couldnt have the boss just laying around un-fitted so I borrowed a Nardi wheel from a friend's Impreza GC8 that he had spare. Its not the cleanest of wheels but it'll be fine until we buy our own

50084170921_9d840828c3_c.jpg


I couldn't find a full set of matching counter sunk bolts so i had to improvise with some normal M5 bolts
 
OP
OP
hoodedreeper

hoodedreeper

Ex. Club Member
The first update in this post isnt very exciting but it's one of those little jobs that needed sorting.

With the Almera GTi seats fitted, the stock fuel/boot release lever wouldnt fit next to the seat. I relocated it to the opening behind the seat where the rear door card would have been and made a bracket to support it.

50115770796_55b77c2688_c.jpg


There's probably a way of mounting it nearer the front, but for now it'll do :)

50115200108_ceafb84cc8_c.jpg


With the interior stripped it was time to address the front door cards. The fabric had started to lift from the backing (its incredibly thin, I'm surprised its lasted this long). The bulky door pockets and handle didnt suit the theme of the car so something had to be done.

On the previous K11 build and my first MX5 I made my own carbon fibre door cards, which turned out quite well. One thing I've took forward from the MX5 version, is to reuse the top crash pad. This still makes the doors flow into the dashboard and finishes off the doorcards nicely.

Keeping things on a budget, I went with 1.5mm aluminium which was supplied by a friend at a very good price (2x 1200mm x 600mm sheets for £37.00). Fixings were 4mm and 4.8mm rivets (only because I ran out after doing one door, oops). Unfortunately they've suffered some damage from the file,angle grinder and rivet gun (passenger side is the worst).I'll probably cover the marks with some stickers to cover them up until I can re-do them

50115770781_b598e02f10_c.jpg


The day we got the car we talked about the route it would go, taking heavy inspiration from the previous build (not wanting a replica). We decided to go with a Kanjozuku theme, which is ironic because it struggles to get upto the national speed limit let alone any form of late night activity haha

The first thing was a window net, easier said than done on a budget. You can buy 'proper' mounting kits, but majority of them attach to a roll cage. Thats where I had to adapt and use inspiration from other cars whether its track, auto cross, rally or drag.

50115998427_50cc214ded_c.jpg


For starters, I ordered the net too big. I say too big, its the correct width but because the door curves quite alot towards the A pillar the top is too long. I made 3x L brackets rivetted to the door/doorcard with a hole on the other side. A piece of 6mm round bar cut to length is fed through the brackets and net and is secured on by an R clip either end. The top is alot less 'engineered' by using an elastic bungee cord. I cut down a P clip and mounted it in the middle, this stopped the bungee cord sagging in the middle

The rear received similar treatment with a TRS helmet net I had saved from the last car. I bolted 40mm D-Rings to where the door cards would have been which gave the anchor points for the net. The rest is pretty self explanitory :)

50115998402_43108f5a3a_c.jpg


Lastly for this update is splitting and painting the headlights

With the headlights removed it was time to split them. Alot of people use the oven but I went with a heat gun instead, mainly because I have a little bit more control :) With the glass lenses removed the insert popped off and the orange indicator lens was removed too.

50115771226_cf41a441bd_c.jpg


Its made such a difference to the overall appearance, its definately a must do modification for all K11s

50115998907_f69119ea2e_c.jpg


Just need to paint the badge on the bonnet now and the front end is pretty much done. What about some canards? lol

50115200568_b7d54c1dbf_c.jpg


50115200543_cef419ccdb_c.jpg


I've got some chrome bulbs on order to get rid of the orange completely
 
Do you know if your S13 steering boss is for a non airbag column. I only ask as the steering bosses I find listed for my k11 are the same as s13 with airbag. However non airbag s13 is half the price and I dont want to be paying £40 just so it switches off the airbag light which I can easily do myself for pennies
 
OP
OP
hoodedreeper

hoodedreeper

Ex. Club Member
Do you know if your S13 steering boss is for a non airbag column. I only ask as the steering bosses I find listed for my k11 are the same as s13 with airbag. However non airbag s13 is half the price and I dont want to be paying £40 just so it switches off the airbag light which I can easily do myself for pennies

I honestly don't know I'm afraid sorry
 
OP
OP
hoodedreeper

hoodedreeper

Ex. Club Member
Here's quite a large update :)

Gizfab X Brace installed

50311975753_bd2eae0a90_c.jpg


50311975613_4b428ee5d9_c.jpg


Another item from Gizfab was one of their Devil Wings. This was something I wanted to fit as soon as we got the car and would help with the Kanjo look.

50312889367_0296fd46f0_c.jpg


50312889372_bda2cee62d_c.jpg


Browsing FB marketplace and eBay every day for a new steering wheel started to get tedious. I ended up posting a FB status and a friend messaged me saying he's got a 300mm OMP wheel for sale. Although it's slightly smaller than I was looking for, its quite nice to drive with. Also managed to get some rev counter clocks so installed those at the same time

50311975613_4b428ee5d9_c.jpg


I had a pair of K11 March number plate lights hiding in my garage for awhile so it was time to fit them. The original boot handle holes will get welded when the NSR arch gets repaired, for now some tape will do

50312644936_d3cde6229a_c.jpg


You may have spotted the new rear lip. After struggling to find a Seat Ibiza splitter to copy the last K11, I needed to find an alternative. A friend breaks and builds Volvos and he had a 940 lip spare. Some chopping about later and it fits surprisingly well

50312644956_4a157a0321_c.jpg


50311976433_6b5210d0af_c.jpg


Filled the passenger door card with some stickers to cover up the damage

50312722961_8e807b93f2_c.jpg


I noticed the boot spoiler had started to catch on the roof, despite no signs of catching when we originally fitted it.

50311976533_1a2e3551e0_c.jpg


I measured up the overall length of the gas struts and searched through a supplier's book at work to see what would fit. It seems K12 struts are 50mm shorter and should do the job.

50312817892_aa5315ffed_c.jpg


Theres less head room now with the boot opened, but the spoiler no longer catches, thats something I can live with :)

50311976568_0ae9d01d64_c.jpg


50311976418_89d8d779ce_c.jpg


Another item on my to-do list was to change the tail lights. Alot of people tend to fit the March prefacelift or cabriolet lights. I was very close to buying some cabriolet until I saw a photo of some Kouki March lights which had been split, inner coloured lenses removed making them red and clear.

I spoke to Andrew from Micra Mafia on Facebook who had stock of the stock kouki lights and placed an order. While I was waiting for them to arrive I ordered some chrome bulbs. Although now having them fitted, I think i'll need to order some LED stop/tail as the tail light element isn't very bright

50311976233_8dd75121cc_c.jpg


50312644906_27d8f323aa_c.jpg


50311976368_a4a78c5869_c.jpg


50311976248_0b356355f2_c.jpg
 
OP
OP
hoodedreeper

hoodedreeper

Ex. Club Member
A few updates rolled into one

I'll start with the most obvious one from the first photo...the kanjo door boards. This was one of the things I wanted to tie in the kanjozoku style and it happened to be one of the last things lol. You'll usually see the osaka kanjo hand or hockey mask but with the car not being a Honda I wanted something different, and who doesn't love Mighty Car Mods?!

50413467282_ce1feaa359_c.jpg


50412616343_fdfcf57ff7_c.jpg


50412616248_bbda5d1d66_c.jpg


The next change was an experiment. I had seen on Facebook some posts from a page called KBMER who are graffiti artists. The first post was of a blue 350Z painted in an Initial D style and it really caught my eye. A few more cars followed including an NB Miata, Civic and an RX7 FC, these guys feature darker patches for shadows/shading and made it look more realistic.

My issue was, I didn't want to commit to painting the car incase I didnt like it. So i purchased some 12mm pin strip vinyl from work and gave it a go. I posted the photos on Social Media and the comments were very positive with a few suggestions.

50413312281_4c8ec88129_c.jpg


I left the pin strip on the car to see what it would look like with the door boards and I think I can pull it off

50413466462_ef93964ac0_c.jpg


KBMBER uses ink markers to create the lines and the whole car is then clear coated. Again, clear coating the car is a large task for a drive way build, plus theres no going back. I'll stick with the vinyl for now and see how it goes.

50413466312_f93fb8abdc_c.jpg


50412615678_50a32196e4_c.jpg


Norfolk based company Wylde Wraps UK supplied and fitted the door boards, while the car was there they also vinyl wrapped the roof gloss black. This is the reason why the Gizfab spoiler was painted black and not colour coded

50412615868_19e7ae2d76_c.jpg


50412616013_619734de56_c.jpg


The last big change was the fitting of some aerocatches that I borrowed from my old MX5 carbon bonnet. The bonnet took quite alot of cutting just to gain enough access to fit them, its not the prettiest of jobs but the car is far from perfect haha. No real reason to why I fitted them, more because I had them laying about and I was bored

50413310886_c6bef92b42_c.jpg
 
OP
OP
hoodedreeper

hoodedreeper

Ex. Club Member
I got round to finishing the pin stripe and it looks much better now its all the same IMO. I had to re-do most of the passenger side as I wasn't happy with it. Dont get me wrong, this is far from perfect and I'm sure its gonna lift in places over time but its a cheap mod for the time being :)

50498748171_51791ff2e9_c.jpg


50498748501_8f4a1e3ce4_c.jpg


50498748421_f5f9f1c482_c.jpg


50498748826_dce8e0d0c3_c.jpg


50498037273_6a494873dc_c.jpg


50498748736_1848a1c28e_c.jpg


50498899197_2b8c69ee79_c.jpg


An engine swap was always on the cards, sadly nothing extravagant as an SR20 or GA16 but the CG13 or CGA13 from the K11. Fitting a CG13 1.3 Distributor wasnt straight forward as it'll have to be a mix and match of both engines (1.0 coilpack head, 1.3 distributor bottom end and a mixture of the timing chains from what I can gather).

I held out for a CGA13 1.4 from the later coilpack models as it'd be a direct swap. Luckily Chloe's other half Lee was breaking his due to the CVT box going wrong. Spent one Sunday removing the engine and stripping the car while we had the hoist and it was ready to come home.

50498739756_f9ee5252cc_c.jpg


50498026493_0651258041_c.jpg


50498888687_1f65cea95f_c.jpg


50498025793_38402260a9_c.jpg


50498890107_b1428faceb_c.jpg


The following Wednesday I got the block stripped down minus the crankshaft pulley and idler pulley (they've been removed since) ready to be wire brushed,cleaned and painted.

50498990047_e6ea6ac99f_c.jpg


50498989942_4154b74422_c.jpg


50498125653_4ab8a156ed_c.jpg


50498125588_c116ec017c_c.jpg


The rocker cover was removed to check the condition of the top end and it's pretty clean considering its got 105k. The car was originally a 1 lady owner who had a Nissan Service pack on so its been looked after :)

50498740036_e8ba6595b1_c.jpg


The sump was recently removed so I could clean the oil pick up and check everything was good. Took awhile to remove the original sealant but some fresh VHT RTV was applied and the sump bolted back on.

I've done a whole heap of work but didn't want to bombard the thread with boring photos, including some upgrades :D But you'll have to wait for the next update to find out
 
OP
OP
hoodedreeper

hoodedreeper

Ex. Club Member
When I collected the engine I also bought a Garrett T2 Turbo and DIY manifold. I giggled like a little child and the thought of making choo choo noises from my rusty ****box. Thats when I dug deeper into the conversion....

50423998178_2b0b71eb2a_c.jpg


These engines aren't the most renown for being strong when boost is applied. Some engines have lasted years some within a week. The ringlands are the first to go and with the uncertainty of how long they'd last I'd need to factor in a bottom end rebuild.

50423998488_a331b41170_c.jpg


The next largest piece of the puzzle was engine management. I was relying on using a Nistune board, but they're not available for the coilpack ECU. Piggyback units like the Det3 and E-Manage Blue are perfectly fine but they dont come about very often, then its finding a mapper local who can do it. The other option was to go full standalone i.e Omex,Megasquirt,Emerald, Link etc which would require a full rewire.

Although this option isnt an inconvience cost was a big factor. Can I justify spending £600-£1000 on management plus the cost of everything else? I said all along I wasn't going to boost it because I have the R34 for power/speed. I guess caving into peer pressure and curiousity got the best of me.

I decided not to go down this route because of the costs to make it reliable. Yes you can do it on the cheap, but finding the 1.4 engines is becoming more difficult and I dont really wanna be replacing the engine every month.

The turbo and Manifold sold today (17/10/20)
 
OP
OP
hoodedreeper

hoodedreeper

Ex. Club Member
Spent a couple of days cleaning the block up and painting. The engine was pretty clean to begin with so luckily I managed to skip the degreasing stage. I used various wire brush drill attachments to clean it up and plenty of brake cleaner to get rid of the dust. With everything being aluminium it cleaned up really nicely.

50520413083_f0c0767b7f_c.jpg


The bottom end and sump was painted with Smooth Black Hammerite aerosol, while the head had the same treatment but with Smooth Silver. I've used Hammerite for years and never had it dry this glossy, how long that stays like that is anyone's guess.

50520412978_7b4f7632b3_c.jpg


50521314482_81c1b55392_c.jpg


I've replaced all of the sensors, waterpump and thermostat while everything was stripped. Not necessary by any means, but I know its all fresh and new

50521314382_25127c2028_c.jpg


I've done my best to remove everything I can and paint it. Again, all of the silver is the same Hammerite spray but the black is Holts Simoniz Tough Black aerosol. Its covered just as good as the Hammerite and it was quite abit cheaper (another bonus of selling it at work)

50521314127_27db8251cf_c.jpg


50521136176_2ef8a9f128_c.jpg


50520412828_7d8f444a87_c.jpg


I've also replaced most of the original nuts/bolts with Stainless allen cap versions. I've been recommended to use Nord Lock washers instead of normal flat ones. Never heard of them but it came from a close friend who's a perfectionist when it comes to this sorta thing so I trust his judgement.

I need to remove the alternator (only a couple of month old), PAS pump/Alternator bracket and Crankshaft Pulley from the 1.0L engine and swap it over before this gets fitted. I'll also paint any other bracket on the car and replace the hardward with stainless as and when I get to that stage.
 
Wow! You don't muck about!

Yours is a better example of my sh*tbox, the same colour(s), model and year! I have spots of rust on the top and a clean underneath though!

I had been eyeing up those bottle tops but something about them made me not like them and I can't put my finger on it! Now I've seen yours I'm kind of liking them!

If I were to get some I think I'd get them refurbished by a shop and have them fill the little holes between the wheel bolt holes. Then I'd look to get some stickers made up to kind of copy the O.Z Racing wheels but with my own wording. It would be similar to yours but not the same then.

I followed your old car's build on here without being a member and saw your magazine article. It was awesome mate. Is it still around?

Kirkynut
 
OP
OP
hoodedreeper

hoodedreeper

Ex. Club Member
Its been a busy few days off work haha

The bottletops could do with a proper refurb but wanted to keep the costs down. I'm still toying with changing them but still unsure.

As for my old car, I have no idea if any parts are still kicking around. The engine was used locally in an junior oval car and the shell was scrapped.
 
OP
OP
hoodedreeper

hoodedreeper

Ex. Club Member
Spent yesterday (Wednesday 28th) taking the car apart ready to remove the engine. I managed to do everything except remove the drive shafts in an afternoon. A friend is coming over on Sunday with an engine hoist to help finish the removal.

50545623682_430b3468d9_c.jpg


With the unpredictable british weather and limited days off I had to make do with the best of what I had, but when it comes to paint work that can become abit tricky. All I had was a dusty and cold garage to spray in, with the help of a heat gun I managed to pull off a reasonable finish.

50545487506_c7deda0ba5_c.jpg


We decided on BMW Atlantis Blue

50545487536_d4790ecec8_c.jpg


Unfortunately I didn't have the time to properly fit it to the engine but couldn't resist a quick photo

50545623637_1d4da9a6c4_c.jpg


Depending on the time and available daylight, I'm hoping to get the remaining brackets etc removed from the engine bay once the engine has been removed and have the whole bay degreased and rinsed. This will be the decider whether the engine bay gets painted or not, although it probably will because theres a scabby patch on the drivers side which is in plain sight :( Would be a shame to fit this engine and the ****ty engine bay lets it down.

Oh and I need to vent my anger with the courier MyHermes. Purchased a Janspeed Manifold and exhaust system from a known breaker at the end of September. It should have been delivered on the 17th Oct, it went back to the depot and no updates happened. They're now saying its damaged and are refusing to deliver it, been instructed to contact the seller. Contacted him and it seems almost impossible to get through to them.... *sigh* They're also refusing the give me the local depot details so I can collect (found out where they are, and are litually 5 minutes down the road)

I reeeeeally don't want to refit the stock manifold but until its resolved it looks like I'll have to :(
 
OP
OP
hoodedreeper

hoodedreeper

Ex. Club Member
So an update on the MyHermes nightmare....

The tracking showed the parcel was unable to be delivered and to contact the seller. Spoke to the seller who had rung them and was told the packaging was damaged. He struggled to get back in contact so I tried, to which they were quite reluctant on passing on any info at the beginning. Turns out it had arrived at my local depot with the packaging damaged and THE WHOLE EXHAUST was missing!

I updated the seller and I received a refund almost instantly, I can't fault him for that, it was beyond our control :(

The exhaust was the last piece of the puzzle for the engine swap,especially as its one of the first things you see when you open the bonnet. So I contacted Eden at Gizfab and asked what the lead time was for one of his 4-2-1 Manifolds, which is 4-5 weeks. The manifold and front pipe were more money than the complete system I had originally purchased, but this is made from scratch and will be a much better quality stainless than the Janspeed. This gives me plenty of time to get the swap going and luckily its the last thing I need to fit. Here are some photos from their Facebook page.

50574281677_37cf61468b_c.jpg


50574148846_eb6723f350_c.jpg


Last sunday my friend came over to help remove the engine, it all went pretty smoothly to be honest. Removing 90% of the parts a few days prior certainly saved us alot of time, especially while dodging the rain showers.

50574266692_8ab9002825_c.jpg


Remembering where everything goes will be a task in itself...haha

50574266732_1cc8c65498_c.jpg


Heres the rust patch I mentioned in the previous post. I thought about fitting an oil catch can, but the inlet/outlets are facing the other side of the bay which isnt ideal. I started off with a degrease and rinse to see what I was facing and it cleaned up pretty well. Thats until it dried and I was left with this

50574184001_9e6ff26dcf_c.jpg


50573438703_20c9fee9cf_c.jpg


50574184016_c11b9f9ab4_c.jpg


There must have been something on the surface because the rest of the engine bay was fine. It would scratch off with my finger nail, but that affected area was very smooth, my finger would skate across with hardly any effort. I was limited with what products to try, the first was vinegar...nope...next was brake cleaner....nope. Hmm.....

I wanted to avoid painting the rusty area for the fear of not being able to match the red, but this was now the reason to do it. I sanded the area with 150 grit wet and dry and it removed this weird degreaser 'stain' and also helped remove the loose corrosion. Various grades of wet and dry sandpaper later the area was now prepped ready to be treated. Once treated and everything masked off it was time to paint.

I went with Holts Simoniz Tough satin black for 2 reasons. The first was the satin finish would contrast nicely against the gloss black and silver engine. The second being I used the gloss black version to paint all the parts for the engine, so I know the coverage and finish was going to be very good.

Here are a couple more photos before the degrease

50574266602_c31d08158d_c.jpg


50573389428_3d5289967d_c.jpg


A couple of coats later and its looking pretty good. The outside temperate was dropping as the sun was setting, so I didnt have much time.

50574133306_654d1ae8f3_c.jpg


50574133376_72a1ef1dd9_c.jpg


Theres a few patches that need another pass over, one or two areas will be quite tricky to get to, mainly behind the brake servo

50573389358_9fb1325226_c.jpg


Yes I'm aware I've missed a bit above the steering rack, but you're not going to see it ;)

50574133566_1ef3dc48d6_c.jpg


Theres a couple of runs here and there but it was never going to be mint lol

Today (06/11/20) I collected the flywheel from the machine shop, a very fast turn around which was nice.

Next up is to paint the gearbox, once that's done I need to get the engine back in on the mounts which will be the hardest part for me. Everything else can be done as and when.
 
OP
OP
hoodedreeper

hoodedreeper

Ex. Club Member
Spent a few more hours on the spare engine yesterday.

As a temporary measure I painted the stock exhaust manifold in VHT Black and half fitted the alternator (may have lost the lower bolt oops)

50600615122_72ca1e6781_c.jpg


Rocker cover and coilpacks fitted (very happy with the colour choices)

50600615162_d1293335e5_c.jpg


Refitted some of the coolant and fuel hoses. I need to order some replacements as a couple got cut during the initial removal by a friend. He thought they were the same as the 1.0, turns out they're different.

50599751858_086c5daffa_c.jpg


50599751878_6e063f9f79_c.jpg


50599751903_fb94acdbb1_c.jpg


The gearbox got a lick of paint too. The original plan was to paint it Smooth Black to match the bottom end and sump, but with the engine bay being black too I needed some more contrast

50599751813_63d31180ca_c.jpg


I've got a new crankshaft sensor to fit too which will be refitted once the engine and box are back in the car

50600498241_f9f7fd3e83_c.jpg
 
OP
OP
hoodedreeper

hoodedreeper

Ex. Club Member
So today was finally the day we get the engine back into the engine bay,woohoo!

The first job was to get the engine on the hoist and bolt up the flywheel,clutch and gearbox. Followed by the starter motor (forgot to clean/paint this oops! but you can't see it luckily), engine to gearbox braces and the battery/alternator/starter motor wiring loom.

50618797427_6bfab13fee_c.jpg


With the front and side mounts bolted in place we jacked the driver side up to gain alittle more access to the central brace to re-attach including the rear gearbox mount and gear selector.

50618690206_ea63b99d18_c.jpg


Next up was the wiring loom. Unfortunately without extending and tucking there's not much you can do with this. We started off by plugging in the coilpacks and injectors and fitted the rest as we worked down the loom.

I'll be trying to tidy it up a little bit more, I may be able to move some stuff and cable tie it in a different position. I won't know until I start I guess

50618797377_56677e1cb2_c.jpg


New fuel filter fitted and the removal of the carbon canister (just need to sort the last remaining hose) helps tidy up that corner. Battery tray was also refitted but need to give the fuse box a good clean.

50618690381_bb7fce121a_c.jpg


Can't do much with the brake servo or PAS lines so that corner will have to stay as it is. I'll look into a replacement PAS reservoir as they all discolour and look crap. Failing that I'll see if I can find one of those sock covers big enough to cover it up.

50618797202_ae64da9c7e_c.jpg


Driveshafts have been refitted too. Passenger side inner joint had no grease, it was more like really thin oil. That was cleaned out, both inner boots repacked with fresh grease and new clips.

The top slam panel and front brace needs to be painted

Awaiting delivery of a lower radiator mount rubber, PCV seal for the rocker cover and a coolant hose. Once they're here I can refit the radiator (purchased a new one for an Auto which are slightly thicker than the Manual ones), adjust the throttle and clutch cables and refill all of the fluids.

Then fingers crossed it doesnt leak fuel,oil or coolant on start up lol
 
Wowsers! You really motor on with your projects!

Do you need a more efficient radiator? I have had a scan gauge on mine with the old leaking and mucky radiator and the new one and it takes ages to get to 92' for the fan to kick in and once it does it brings the temperature right down to 89' in no time at all.

I know my thermostat is opening fine as I've felt the rad pipe go from cold to hot.

Kirkynut
 
OP
OP
hoodedreeper

hoodedreeper

Ex. Club Member
Wowsers! You really motor on with your projects!
Kirkynut

I like to get stuck in straight away, no time like the present! This 'budget' build has certainly gone WAAAY over budget (as always) and its nice expanding my knowledge even on a platform I've already experienced.

Do you need a more efficient radiator? I have had a scan gauge on mine with the old leaking and mucky radiator and the new one and it takes ages to get to 92' for the fan to kick in and once it does it brings the temperature right down to 89' in no time at all.

I know my thermostat is opening fine as I've felt the rad pipe go from cold to hot.

Kirkynut

I've got a new CVT radiator ready to fit as they're slightly thicker than the manual version. Just waiting on a replacement lower rubber mount to arrive then it can be fitted
 
I happen to have a Ga16DE radiator for a Nissan 100NX (low and not much air inlets) and it won't warm with k11, it is cardboarded for this and feeling lower hose. So a larger radiator perhaps gives worse fuel economy (been there), depends how hot lower hose gets and extreme valve cover heat is a hint. Of course known good thermostat is a mandatory but you can end up with a never hot lower radiator hose and that is not good. Hint, 85 degrees Celcius, look up how bad this feels on human skin, it is below very painful but it is not you can hold it for long
 
Thank you :) I do have a couple of March owners follow me on Instagram but not much as been said from them lol

Yes I only have met one Japanese dude that has English quite good so that might take a while but they will dig this. I also have seen what they won't dig, want to hear? Will be constructive criticism without compliment :)
 
OP
OP
hoodedreeper

hoodedreeper

Ex. Club Member
Sunday 22nd November

50646261402_766c46f401_c.jpg


Spent a couple of hours in the afternoon on the car. Unfortunately I couldnt do much until parts arrive but I managed to tick off a few smaller jobs

50645421048_ca6672d817_c.jpg


Fuse box and plugs cleaned
Battery tray fixed down
Battery earth fitted
Earth points cleaned to bare metal and fitted
Coolant hose/wiring clips fitted
Alternator tensioned
Exhaust manifold bolted up to front pipe
Slam panel loosely fitted
Label cable tie tags removed
Injector and Coilpack plugs cleaned
Wiper motor refitted

50646261367_2d073f2b0d_c.jpg


50646261337_4d875fe71f_c.jpg


Today Wednesday 25th November

50645420948_d7e981e75f_c.jpg


It was certainly a roller-coaster of a day *sigh*

Finished painting the top of the Slam panel
Filled the gearbox with fluid
Fitted the radiator, fan and hoses

Laid on the floor to tighten the last jubilee clip, noticed the floor was wet. Gearbox oil was pissing out because the driveshafts weren't pushed in all the way ? Threw some sand down to help soak it up

50645420983_555d7598d1_c.jpg


Removed and refitted the driveshafts, made a nice 'pop' as I pushed it in this time round. Refilled with another litre of fluid and so far no more leaks ??
Refitted the radiator (was easier to refill with it out of the way). Also fitted the new coolant expansion tank

50646261267_e423b0a58b_c.jpg


Next wednesday should see the last remaining jobs done and hopefully its first start up
 
Radiator looks quite big, you can get 70 degrees from lower hose to engine? That is to my best knowledge what is not too cold. Not sure I missed something, running a bit leaner solves that perhaps :D
 
OP
OP
hoodedreeper

hoodedreeper

Ex. Club Member
Radiator looks quite big, you can get 70 degrees from lower hose to engine? That is to my best knowledge what is not too cold. Not sure I missed something, running a bit leaner solves that perhaps :D

Paul (pollyp) recommends this Radiator and it worked faultless on his turbo set up, I trust his advice and judgement :)
 
Top