• Please only use these forums for blogs, they are not a discussion forum

Hoodedreeper's K11 v3

OP
OP
hoodedreeper

hoodedreeper

Ex. Club Member
Today I wanted to get the last remaining jobs ticked off the list and hopefully turn the key.

50672609678_65353564eb_c.jpg


First job was to fit the Almera N15 GA16 Airbox and air ducting. I found some 51mm reinforced air duct in the garage that I purchased for the supercharged MX5 but never got round to using it. I ordered a 73-51mm silicone reducer and I had some 50mm stainless tube spare to make a joiner. The ducting fits perfectly in the hole behind the coolant reservoir which was a bonus.

50673340251_3a71ea7470_c.jpg


I also fitted a freshly painted strut brace, no idea on the brand as there are no markings on it. I bought it from Chloe along with the box because I knew it would clear. Some stainless M10 bolts finished it off a treat

I wasnt happy with how awful the OEM PAS reservoir looked, so I ordered a Mishimoto item along with some male adapters and elbow fixings because I needed them facing downwards. I made a bracket because the bolt holes were different, turns out the hoses were quite alot different than I had originally planned. I switched one fitting back to the original but due to the length of the hoses its now moved the tank approx 90 degrees, making the new bracket redundant.

I'll keep the new bracket and make a triangle bracket and hope one mounting bolt on top is enough for support.

50672594113_b1c400a63f_c.jpg


With the engine oil, PAS and coolant now filled it was time to start it up. It didnt quite start first time (more like 3) but it started none the less. A couple of issues...

- The idle is currently around 1500rpm, thats because I couldnt check until the engine was started
- Exhaust manifold is blowing (I picked a gasket from work which 'looked' correct, turns out it wasnt. The correct one will be ordered tomorrow)
- Engine Management Light is on

I used my OBDII reader and it came back with

P1605 - A/T Diagnostic Communication Line

Because the engine and ECU are from an Auto model, the ECU can't see the CVT Controller. Fitting a 1.4 manual ECU would solve it, but its finding one with the key and transponder

50673423697_4610081df1_c.jpg


By this point it had gotten dark and started to rain. I managed to get the headlights and bumper refitted just to 'finish it' off.

50672593828_03e07cf5fd_c.jpg


My to-do list is now:

- Adjust throttle cable
- Make a bracket for the PAS reservoir
- Make a bracket for the airbox
- Make a bracket for the air duct
- Paint any bolts that weren't replaced with stainless
- Fit arch liners and undertray
- Replace exhaust manifold gasket
- Test drive
 
Do some restarts to help learn ecu, happened to me, new clutch but worn maf yes bogs and yes smelling clutch several starts later back to normal
 
OP
OP
hoodedreeper

hoodedreeper

Ex. Club Member
So today I sorted out the PAS reservoir bracket and made a bracket for the airbox, but the breather hose coming off the rocker cover is very very close to the mounting hole so I've left that for now.

Adjusted the throttle cable leaving the airbox off incase I needed to adjust it more....car wouldnt start even with some throttle. Perhaps the throttle cable was too slack, so checked again and had it so there was barely any slack....nope it stiill wouldnt start.

We had a pretty sharp cold night (not sure if there was any frost but it was certainly cold enough to) perhaps the harsh cold had gotten to the battery? The battery was replaced the day I started to strip the engine bay, having put it on charge before the previous update I knew the battery was in good health. I tried jump starting it to rule out the battery, it had plenty of cranking but not firing.

I disconnected the 1.4 auto ECU and key transponder and refitted the original 1.0 ECU and transponder, it fired up straight away.

This was mind boggling. The car started and ran numerous times 4 days prior, got upto temperature and cooled down when I was checking for leaks etc etc The only thing I had done was adjusted the throttle cable?!

Either something is fried inside the 1.4 auto ECU or something has happened to the NATS (Nissan's factory immobiliser)

The Engine Management Light is back, we know it can't be CVT gearbox related because its a manual transmission ECU. Plugged in my OBD2 reader and no faults are found, cleared the code and the light disappears. Switch the engine off and read the ECU again, no codes found....bizzare

Anyway....

With the car running I got it moving for the first time and parked it on flat ground to check the fluids. A small top up and we're good to go for a test drive. I drove round a 1 mile radius, temperature stayed half way, EML still on but I'll ignore that for a second. Shifting gears around 3k while I bed this new clutch in but its changing gears smoothly and the clutch bite is good.

50687859501_1952231b94_z.jpg


Parked up outside the house to check for any leaks and there wasn't any. This gave me an opportunity to finally clean the driveway of transmission fluid

50687933647_04a596e6d0_c.jpg


I didn't fix the leaking exhaust manifold because I received confirmation of shipping of the new Gizfab 4-2-1 Manifold, woohoo! I'll persevere with the blow until the new one gets fitted next week at work.

50687103713_bb1ae24412_c.jpg


50687852336_e8197a0852_c.jpg


The engine bay still needs some tidying up and some paint touch ins but its now running and driving and those things can come as and when (I've got an R34 to fix next)

50687933667_c28cb65c84_c.jpg


50687103798_0f075f8016_c.jpg


Now to get some miles on the clock and get this clutch bedded in. Its gonna be torture not putting my foot down properly especially when the new manifold goes on but it'll be worth the wait!

Next up... brake upgrade (I've got the parts I didnt want to bed a clutch and brakes at the same time)
 
OP
OP
hoodedreeper

hoodedreeper

Ex. Club Member
Got it plugged into a Snap On machine this morning and it brought up P0443 Evap Purge Control Circuit Fault

The carbon canister has been unplugged and removed, so will need to find a way to loop the circuit or at least see if I can remove the sensor from the canister and leave it plugged in (if that'll work)
 
OP
OP
hoodedreeper

hoodedreeper

Ex. Club Member
I made a bracket to support the air duct hose. Its a tempory thing until I can find someone with a riv-nut tool and I'll look into moving it to the suspension turret (will need to check the hose for shape/fitment at that position)

50703592012_8d35c48923_c.jpg


50703506576_1dc2f687ca_c.jpg


The final piece of the engine bay puzzle finally arrived, my Gizfab 4-2-1 Manifold and front pipe

50702771193_ff21d3573c_c.jpg


50703592727_138756bf89_c.jpg


50703507136_cdc960e2e1_c.jpg


First impressions, the quality and workmanship is second to none. Picking up the box I wasn't expecting it to be so light! The quality of the welds are top notch, every piece truely is a work of art.

Fitment was very good, the only issue we encountered was the 2nd lambda boss was directly under the driveshaft. I spoke to Eden at Gizfab and he said they've been using the same jig for 2+ years with no issues. He's offered to make me another front pipe with the lambda boss further back. Excellent communication and customer service.

The noise....oh the sweet...sweet....asbo noise haha This thing is LOUD. Not obnoxious loud, somewhere between Honda Civic and straight pipe haha The de-cat and design of the manifold has certainly perked things up with the driving experience and instantly noticed a difference.

Its certainly made the car very nostalgic, a throw back to the previous Red K11 with the noise and driveability, instantly putting a huge smile on my face.

I just hope its within the track day decibel limits
 
OP
OP
hoodedreeper

hoodedreeper

Ex. Club Member
I went for a drive to take some photos that weren't my from my phone (for anyone curious on what I use,Canon 6D, Sigma 35mm f1.4 Art)

So this will be a photo dump as I got abit carried away haha

50741073621_371ca57be2_c.jpg


50741073691_9796db0bb9_c.jpg


50741073521_d507bf882a_c.jpg


50741073421_5dd89ecc30_c.jpg


50740337183_37a12d9c81_c.jpg


50740337103_c453673ed6_c.jpg


50741073156_5ae230f1c9_c.jpg


50741073051_72bdd5db74_c.jpg


50741073011_6d34752126_c.jpg


50741176472_a4cac75015_c.jpg
 
OP
OP
hoodedreeper

hoodedreeper

Ex. Club Member
I purchased an eBay short shifter a few months ago but was waiting for the exhaust to be changed to do so. While the Gizfab 4-2-1 Manifold was being fitted I also installed this along with a new stock middle section.

50779435097_20a8af6e50_c.jpg


Installation was straight forward with the help from Leadfoot's video on youtube. Although the washers provided weren't enough I had to purchase some thicker ones.

50778557673_0b1cbb5ea4_c.jpg


If anyone reading this is planning on fitting one, make sure you thread lock the bolts to prevent them coming loose.

Its made such a difference with the driving experience, it was certainly worth the £44 and half an hour on a ramp .

50778557658_7d1fdfbab3_c.jpg


Another eBay purchase was this badge, couldnt help myself lol

50778557638_3d9d205901_c.jpg


50779434997_eac8c18ed8_c.jpg


A friend contacted me asking if I'd be interested in some wheels that he had on his Reliant Scimitar SS1. At first glance they looked like Wanatabe, but upon closer inspection they're stamped Enkei on the back, in a 14x6j ET38 fitment.

50778557593_dd80201a48_c.jpg


I just need to find some centre caps which seem tricky to find. The bore is 63mm but I'd like taller caps like on the Minilite wheels

Tyre size is more baloon-y with the side wall slightly taller being a 185/60r14. These will do for now and still suit the car IMO

50778557523_d184acdc5f_c.jpg


50778557553_69beccafe2_c.jpg


After weeks and weeks of searching, I FINALLY have a 1.4 manual transmission ECU,key and receiver. The car has been running on the 1.0 ECU which has been fine for 90% of the time. It would occasionally be lumpy or hold back (like a minor misfire) when pulling away.

With the car hoping to see a track day next year, I felt I needed the correct ECU to make sure the fuel/ignition is correct. I know the Bosch ECUs will self learn to an extent, but its for peace of mind :)

I was very very close to sending the 1.0 ECU to Tornado Systems to have their chip installed, it may be a path I'd consider down the line but for now I'm happy with how the car is running.

50779322896_4605877e5c_c.jpg


I'd like to get it on a Dyno at some point to see how many ponies have escaped over the years
 
OP
OP
hoodedreeper

hoodedreeper

Ex. Club Member
There comes a stage with every car build I have where the car is looking really good (perhaps perfect in some eyes) and nothing needs to be changed or altered. Then I get an idea in my head, become determined to carry out said idea(s) thus ruining the car completely. Sometimes it works in my favour and it works and looks good, other times not so much and I live with regret until I do something about it.

For example, I admit the Purple MX5 looked its ABSOLUTE best when the wide arches,garage vary taillights, mazdaspeed bumper and Work Meister S1s were installed. It was simple, stylish and looked stunning. Then I got bored and decided to do the aero and chassis mount wing (cue the idea in my head)

Anyway.... its now got to that stage with the Micra build

50825416403_c3a9356f72_c.jpg


I decided to fit a prefacelift front end haha (some may recognize it)

50826258142_55e7735e65_c.jpg


50826258172_36736a915c_c.jpg


Lets rewind to the fitting process

With all of the facelift panels removed, I started with fitting the bonnet (hood) along with the front wings (fenders). With these in place the headlamps bolt in and you'll always have great fitment around the edge of the headlamp.

50825416303_1bcf255209_c.jpg


I couldnt resist a comparison photo between the two

50825416353_637a996e22_c.jpg


Removal of the original wings was straight forward until it got to the bottom where it bolts to the sills. Both sides had suffered severe corrosion and there was no chance of removing them with a socket. With the help from the angle grinder I cut the wing off leaving the flat piece with the bolts still on the car. A little while later I got the bolts off and was left with two holes ready for the new wing to be bolted on.

To fit the bumper the front mount block box things needed trimming on the outer edges

The prefacelift bonnet catch was fitted and the aerocatches removed for the time being (unsure whether to refit them or not)

Next job was the headlamp wiring. The facelift units have seperate bulb holders for the indicator and sidelight. Where as the prefacelift uses a single plug to feed power to both lights.

50826258262_5c09e0de88_c.jpg


I used some waterproof plugs we sell at work to make an adapter loom

50826162406_cae1d993ab_c.jpg


50826162356_d3b2f158df_c.jpg


I also copied the same wiring to the facelift lights so they're both interchangable (not that I plan on swapping back, but you never know)

The side repeater wiring needed swapping too which is just 2 wires each.

And there we have it, a front end swap :) This isn't the final form, theres more to come :p
 
OP
OP
hoodedreeper

hoodedreeper

Ex. Club Member
With the hope of attending a couple of track days this year, I wanted to help prepare the car abit better.

The first add on were some aftermarket gauges. A friend had 2 sets of 3 gauges for sale, 60mm Pro Plus with smoked lenses and 52mm Motor Meter Racing with white faces. I originally went with the 60mm purley because they're larger and easier to see.

I didn't get off to a great start, first I snapped a sensor in the sump plug adapter so ordered a replacement from eBay. That arrived so I installed the inline radiator hose as it was easier to access than the two oil sensors. The gauge would power up but wouldn't show any reading. I tried wiring it differently, nope still nothing. I swapped the eBay sensor with the other sensor supplied and it worked. I'm guessing the replacement has a different ohmn rating and/or the scaling is different.

I turned my attention to the oil temp and pressure gauges. With the oil drained and the filter and OE pressure switch removed it was time to fit the T piece. Access was limited and I could only turn the spanner a 1/4 turn, flip the spanner around and do another 1/4 turn, it felt like forever. My hands were cramping up because of the cold and I was getting fed up of it not tightening. I checked the T piece and it had slight side to side movement....oh no!

I removed the T piece to be greeted with some aluminium on the threads....crap!

50967398597_359d8c1efb_h.jpg


I knew I had damaged the thread on the block and fixing it was going to be a real headache. Knowing it would leak with oil on the first start up I refitted the pressure sensor and fitted the sump adaptor instead.

Got the temp sensor fitted and wired in, filled the engine with oil and crossed my fingers a puddle of oil wouldn't appear as soon as I turned the key. RESULT! No leaks! After letting the car idle for some time the gauge hadn't moved at all. I understand the sump will read a cooler reading, but surely the needle would move at least a millimeter?!

The next day I put the car on the ramp at work and cleaned up the earthing point, hoping it was a bad contact, and it was. Hurray!

My friend dropped off a replacement sensor he had ordered online along with the 52mm gauges. This time I tested it externally with a cup of boiling water and the 52mm gauges connected to the car battery. I then did the same to test the new sensor with the 60mm gauge to make sure that read fine too

50966665043_2573eb1a74_k.jpg


Now it was a decision of which gauges to use. The 60mm were already wired in, but the wiring was messy because each gauge needed to be wired indivually. I used a 6 way fuse box which also allowed me to have all of the earths share the same point. The quality of the 60mms seemed cheap and I couldnt find any info online about them.

The 52mm felt heavier in weight, looked and felt better quality too. One thing I liked about them, was you can daisy chain link them meaning you only need to wire in the positive and negative once.

I decided to pull all of the existing wiring out and fit the 52mm gauges (minus the oil pressure gauge)

50966588733_130bb588f4_c.jpg


50966588713_1cfce22418_b.jpg


50966588753_b16e2c433c_z.jpg


50966588813_3a44453281_b.jpg


50966588783_44b3f03f28_c.jpg


Who knew fitting gauges would become such a head ache haha. At least thats all sorted now
 
OP
OP
hoodedreeper

hoodedreeper

Ex. Club Member
A throwback to when I fitted the side skirts, I discovered the N/S/R sill was rather soft, having poked a 50p size hole when finding a solid area to mount the side skirt. I also had the O/S front and rear jacking points cave in on me, not ideal! So it was time to sort the sills out.

My friend Kevin who helped me remove and refit the engine offered to weld the sills for me. So today (Sunday 21st Feb) we went over a unit he has access to to start the work.

After some poking and scraping with the flat head screw driver we were left with this

50967409992_13d7be48fd_k.jpg


50966600223_4afe99503e_k.jpg


The jack had slipped on the N/S/F sill when I was doing the driveshafts during the engine swap so this was the most challenging part of the day. Unfortunately no photos of the damage.

The O/S/F jacking point lip had just folded up but was still solid overall.

With the N/S/R sill opened up you could see the corrosion had really set in

50967302546_ba60921ea6_k.jpg


50966600078_c6ecdd7415_k.jpg


You'll be pleased to read I've finally got an arch repair panel on its way, unfortuantely Kev isn't confident doing bodywork welding so I'll need to go else where to have that done.

50967302701_73941fd384_k.jpg


With the plates welded in, treated,primed and undersealed its looking much better.

50967410137_1a6bb62469_k.jpg


50967302621_f6a0cbc5dc_k.jpg


50967410067_18ff4ba71b_k.jpg


50967302656_9eba3808c6_k.jpg


50967302671_92a7fa98ac_k.jpg


50967410027_84762badae_k.jpg


Its not the prettiest of repairs but its strong and looks much much better than it did before.

We put the front end back on, unfortunately the N/S/F sill which caved in still isn't a great fitment with the wing (abit better than before though) so I'll have to worry about that later
 
OP
OP
hoodedreeper

hoodedreeper

Ex. Club Member
Back in October I bought some Almera N15 1.6 calipers. These are a single piston caliper with 252mm vented discs,compared to the K11 single piston caliper with 234mm solid discs

50990296007_046bf1591d_k.jpg


With the brakes stripped off I wire brushed the hubs and shock absorber body down ready for a lick of paint. I also replaced the lower suspension arms as the ball joint dust covers had started to split and the bushes had seen better days.

I was going to go with Mtec dimpled/grooved discs and their pads but went for a cheaper option for now.
I managed to get a pair of Pagid discs from Euro Car Parts for £14.28. Along with some Blueprint brake pads for £20.00 that I got from my work.

The current pads didnt have a huge amount of material left and the discs had a lip too (yes i know i could have gotten many more miles out of these)

50989493428_bfcb5b4510_b.jpg


50989493448_ba9e65a5a1_b.jpg


I also purchased a pair of new hoses but I couldnt crack off the brake pipe union, so I'll leave those for another day.

Believe it or not I have never bled brakes before so it was a great time to learn. Much easier than I thought, dont know why I had put it off for so long!

With everything bolted up it was time for a test drive. Instantly I heard a rotational scraping noise.

50990295967_70af44c723_k.jpg


Turns out the pad retaining clip was catching the end of the disc

50990183146_a48c600b1f_k.jpg


50989483643_1df4f38c1e_k.jpg


Nothing the angle grinder couldnt sort

50989483543_e6b0f8fe65_k.jpg


Got everything back together, took it for a test drive and no more noise

50989483573_29aafb0e31_k.jpg


(These were before the test drive, the discs were cleaned once assembly was completed)

50989483573_29aafb0e31_k.jpg


50990295907_b483503d58_k.jpg


Next job for the front is to remove the arch liners, clean and underseal the arches to finish it off
 
OP
OP
hoodedreeper

hoodedreeper

Ex. Club Member
In January I ordered quite a few items, some were made to order and with this on going pandemic things were a little slower than usual.

The first to arrive is the most marmite purchase. This was the whole reason I did the pre-facelift swap, JUST so I could have this bumper.

Blackflag-Labs were the suppliers, initially a 4 week wait for manufacture which then had an additional 4-5 weeks for delivery due to complications their end. Long story short, they changed from using a courier (broken body kits) to using 2 hired drivers who ended up leaving. The company who manufactured the bodykits were also arranging with the deliveries. After being told numerous times it would be delivered on X day, to then TNT delivering it on X day, a friend ended up collecting it for me.

51036593168_c6ff9521f4_h.jpg


Anyway, onto the fitting :)

I started off by making a template of the bumper on some sheet steel for an under tray. This will also help take any damage if I scrape or catch it.

51036593583_3c8484977f_b.jpg


51036593078_f2e5358ee0_b.jpg


With the shape roughly cut out I then fitted U fasteners/spire clips (what ever you wanna call them) around the edge and marked the holes ready for drilling.

51037422942_2f40257723_b.jpg


51036593153_8c82d47100_b.jpg


I made the centre support out of some 25mm box section and angle iron (spare shelving from work haha). It was just too short to reach the middle of the bumper so made a bracket from the same sheet steel.

51037319306_a646e99e32_b.jpg


51037319421_7e47e025d3_b.jpg


The lower section needed trimming to clear the bonnet catch support

I need longer bolts for the undertray but theres enough fitted to stop it going anywhere. It needs trimming a little bit to help clear the exhaust manifold, other than that its spot on.

51036593248_82551469b0_b.jpg


51036593198_efbb5e34eb_b.jpg


I've just ordered these

51037436732_30cfd22ba0_b.jpg


The sides that mount to the wings need the hole bringing further in. The top contour line on the bumper should follow the grille/wing line. Because of this new mounting hole it pulls the corners in a little bit.

51036593113_20bbd63e18_b.jpg


51037319556_338ea8d5f9_b.jpg


51037319356_530a6b5cfb_b.jpg


Sadly nothing I can about that.

Next job is to remove the bumper once the new bolts have arrived and start attaching the mesh fixings. All of the brackets and the undertray will be painted too

Once I'm happy I'll start the prep ready for paint

51037319206_bb4f8bd411_b.jpg
 
OP
OP
hoodedreeper

hoodedreeper

Ex. Club Member
A few weeks ago I asked my friends if anyone had a 15x8j ET0 wheel I could borrow to test fit. A friend said he had some from a Civic EK which I could use. With the wheel mounted, I was pleasantly surprised how well they fit but they had too much stretch for my liking.

51069363206_99cd08a479_b.jpg


With the wheel size sorted I ordered the wheels I had my eye on, Autostar Classic. I also got my hands on a scrap 195/50 tyre to fit so I could check for fitment and clearance.

51069363186_e3ed5af92a_b.jpg


Uh...something isn't quite right

51068658798_d7568a8545_b.jpg


Turns out the wheels I had borrowed were infact 15x8.25j ET20...doh! Thats what I get for not checking the back of the wheels I borrowed before spending money :(

The wheels were put up for sale and sold within a couple of days *cries*

Inbetween flicking through yahoo autions, facebook market place and eBay I decided to carry on working on the Impul bumper.

The undertray and brackets received a coat of Tough Satin Black (same paint I used for the engine bay). I then assembled it together with the new stainless flat headed bolts

51069347006_c5f5434600_b.jpg


I also fitted some rubber U channel trim to tidy it up and fit the mesh. I didn't go with the fibreglass route because it still needs painting

51069442007_e9d66b2a67_b.jpg


51000161120_ab4d7fddf8_b.jpg


51069346901_8478e49d74_b.jpg


I also used the same bolts to fit the bumper to the car, allowing more room and clearance for the grille

51069442192_ea56a8b131_b.jpg


You probably spotted the import number plate mounted central too

51000161270_c7acb871c3_b.jpg


51069346926_1f4d115b1e_b.jpg


51069346866_543605c2f6_b.jpg


51069442022_177a8fdc1f_b.jpg
 
OP
OP
hoodedreeper

hoodedreeper

Ex. Club Member
The front and rear arches were rolled and the inner arches cleaned,wire brushed, rust treated and undersealed

51000222910_937c3d6526_b.jpg


The rear drums also got a coat of Smooth Black Hammerite

51068704928_79cb1d1143_k.jpg


So the search for new wheels continued. I have been wanting to put a set of cool japanese wheels on the car since I bought it, but the realisation is I'm too impatient and the cost would be ridiculous. We'll ignore the fact I'm now on my 4th set of wheels so 'could' have had some by now lol

I read that 15x7j ET30 is a flush fitment but couldn't see what the tyre size would be. I didn't want stretched tyres because the car is built to be functional.

I had a look through Paul Li's K11 build thread and saw he uses 15x6.5j ET35 with 195/50 tyres. Speaking to Paul we found out we're both lowered approx 50mm (although he is on BC coilovers). This helped the decision greatly so I began looking to see what was available in these sizes.

51068715933_b98d0617da_z.jpg


Knowing the arches are now rolled a 7j was still an option. I had narrowed it down to these wheels

Rota Grid
Rota Slipstream
Rota 356 Wheels TFS3
Rota 356 Wheels TFS4
Japan Racing JR29

I reeeally wanted white wheels but I remembered how much of a pain the Work Meister S1s were on the MX5 to keep clean. When I checked stock levels they were out of stock of full sets too so that made the decision for me.

I once again narrowed it down and placed the order. For tyres my work colleague recommended Avon ZV7, he had these on his Audi S3 and couldnt say a bad word about them. Having been out in the car, I was impressed so it was great to have some experience with them.

The wheels and tyres arrived and I got the tyre bay next to my work to fit and balance them. Today (Weds 24th March) I fitted them to the car

51069435987_21eac19697_4k.jpg


51069436137_1186fc7532_4k.jpg


51068637628_a3176f869b_3k.jpg


51000155165_093790aafc_3k.jpg


51069340911_b7dba06435_4k.jpg


51069340876_5088363683_3k.jpg


51000155130_4357a1bcf9_3k.jpg


51068637508_0d8e2f3b7b_4k.jpg


51069435997_61f2f1803c_k.jpg


The flat centre caps supplied won't fit because of the driveshaft thread/hub nut and the rear dust cover

51069546752_7906a86010_c.jpg


51069546722_ae5a5eddff_c.jpg


I spoke with Driftworks who supplied the wheels and they said Rota don't make any large size centre caps for cars with this size hub nut.

I found these on eBay so I've ordered a single one to test fit, if all is well I'll order the others. Fingers crossed!

51000274660_58547282b6_c.jpg
 
Mate, those wheels are looking so good
I've been debating getting bronze Slipstreams for mine, safe to say I'm definitely gonna be doing that now! Once I have the time and money lol
 
OP
OP
hoodedreeper

hoodedreeper

Ex. Club Member
Its been a busy couple of weeks

I'll start off by sharing a Mighty Car Mods inspired poster I created. I'll update the car when its eventually finished and I'll get it printed and framed to go along side my Mira and Super Turbo posters. Finding a background image was the most challenging, I decided to use the Hakone Skyline

51107513631_cff7ea5659_c.jpg


You may remember me mentioning about the pattern part clutch cable feeling really stiff/sticky and half way of the pedal travel it suddenly springs up. I removed the cable to spray (more) white grease down it because it had started to play up again. Upon removal it had seen better days

51106934462_03f145090d_c.jpg


The question was, do I refit another pattern part cable or go genuine? The thought of having to do this all again in a few months put me off so I rang the local dealer. £89.45 and 24 hours later I had a new cable in my hands (I still haven't gotten over the price)

51107255004_d952dba2f5_c.jpg


I moaned and moaned about the price but it was 100% worth it. The pedal is now feather light and feels soooo much better. Hopefully this lasts a substantial while

Another boring job was to replace the melted and cracked headlight plug

51107513721_6d16ddc8db_c.jpg


51106934432_34a0218d11_c.jpg


You may ask why didn't I fit a ceramic plug? Well, the ones we sell at work aren't a great fit and I've had to cut away at the ceramic to make it fit in the past. If it happens again I'll search else where and buy one.

While we're talking about repairs, it seemed like an appropriate time to finally sort out the broken Almera air box. The majority of the neck plastic had broken off and the airbox would rock.

51106934457_bbb0a314f0_c.jpg


I managed to find some black PVC tubing from a local drainage company and plastic welded it on. I also blanked the pipe on the side and the inlet side which had a piece broken too.

51107255124_7f521bb43e_c.jpg


The new pipe was much bigger than the original so I purchased a 90>70mm reducer from eBay. The listing image showed the reduction alot smaller (like a Radius wheel bolt, but instead its a 60 degree taper). I've trimmed the hose as much as I could but it's made the airbox too tall for the strut brace to be refitted. I'll look into sourcing another hose later on but for now it'll do.

51107255039_2f4c419699_c.jpg


Another job I needed to tick off the ever growing to-do list was to paint the centre console. An all grey/silver dash becomes boring rather quickly. I decided to try and paint fade for the first time, didn't come out too bad I think :)

51108287935_7e2be81967_c.jpg


I also replaced the cig lighter with a twin USB outlet and volt gauge

51107255089_f16cbbc1e3_c.jpg


The boot floor under carrige got cleaned up and undersealed ready for the next mini project

51106934392_1c3ddb6c85_c.jpg


51108287930_509ff2d374_c.jpg


51106934357_73f867ba39_c.jpg


51107254984_cc0343a486_c.jpg


51108287890_165ab937fe_c.jpg


I applied the same techniques I used for the R34 diffuser but as a mini version. The hole in the middle allows the factory tow hook to still be accessable and functional (although the hole could have been abit smaller, nevermind)

Painted in smooth silver hammerite aerosol, stainless fixings were used including the same flat headed bolts I used for the undertray.

The rear bumper will be replaced at some point due to the crack in the centre along the top edge. It made sense to chop this one first
 
I missed the new wheels somehow!

Looking good!

I'm keen on getting mine on BC's and 15's and have been considering my wheel options. Like you I don't want stretched tyres as I drive mine hard and need the tyres to perform properly.

Most of the cool Japanese wheels are 7" or 8" with far too lower offset. I might blow a bit of cash on some OZ Motorsport wheels but with BC's I'll be blowing a lot of money on a £700 car!

I've been using Avons for a long time now and find them a great performance tyre at a reasonable price. They're long lasting and good grip.

We have them on our Octavia VRS, so if they cope with 200bhp only slightly wider, they'll be ok on a K11!

Kirkynut
 
I just went to price up 195.45.15 ZV7's and they don't make them, which made me read your post again and both you and Paul have 195.50.15's.

Was this a conscious change from the normal profile or just getting them because Paul runs them ok?

If it was a conscious decision, may I ask why you chose that higher profile?

Kirkynut
 
OP
OP
hoodedreeper

hoodedreeper

Ex. Club Member
I just went to price up 195.45.15 ZV7's and they don't make them, which made me read your post again and both you and Paul have 195.50.15's.

Was this a conscious change from the normal profile or just getting them because Paul runs them ok?

If it was a conscious decision, may I ask why you chose that higher profile?

Kirkynut

195/50 is more readily available, plus Paul's experience and recommendations were a large part of the decision making. Purely because I could see a visual representation of that wheel and tyre size and have feedback from someone who uses it.

Although my re-engineered rear springs give a different amount of dampening to Paul's BCs, a rear wheel ocassionally scrubs if I come off a speed bump too quickly
 
OP
OP
hoodedreeper

hoodedreeper

Ex. Club Member
After what seemed a life time waiting for delivery, the next segment of the build had arrived and was ready to be fitted.

The first being a Sparco Sprint L seat and OMP 4 point harness. A friend modified the stock seat runner to allow the Sparco seat to be mounted. Its a really nice and simple design and he tilted the back up so the seat is level. We noticed the stock seat runner tilts back when bolted to the floor so he raised the rear up so I sit level.

51155544701_83db4fef34_c.jpg


From previous experience, a harness with 2" webbing cut into my shoulders so I made sure to order a 3" version. I was abit dubious with the colour choice but I think it works

The last upgrade is very noticable in the previous photo, a 4 point half cage from Caged Laser. What should have been a reasonably straight forward fit turned out to be quite a head ache.

51155778008_cc483dbfd1_c.jpg


The brackets aren't exactly a 'direct fit' in particular the rear legs. The cage isn't quite wide enough for the brackets to butt up against the rear wheel tubs. A piece of steel plate had to be sandwiched inbetween to fill the gap. Not the end of the world but abit annoying when neither the supplier or Caged Laser mentioned it when I rang them.

51156329934_deee13b199_c.jpg


51156652010_1b98e497c5_c.jpg


I painted the brackets in red hammerite, but it looked awful so ended up painting the rest of the rear floor to match.

51155778033_d9ea33df35_c.jpg


The front hoop obstructs the factory seat belts so the passenger seat has been removed for now. I may leave it out permanently, because (slow) racecar lol

Next job at some point is to remove the front sound deadening and paint the floor to match

I also took a visit to H&S Performance for a wheel alignment. I hadn't had it checked since lowering and replacing the bottom arms (naughty, I know)

51154879262_f180ea9b16_c.jpg
 
OP
OP
hoodedreeper

hoodedreeper

Ex. Club Member
Its been a busy couple of days

The wings were removed to be repaired and rust treated. I'm by no means experienced with body work/filler so this isn't gonna be a fantastic job lol

51174529591_4acdfd9c98_c.jpg


51174755383_e05bc1e6ce_c.jpg


51174755368_547a379555_c.jpg


51174755308_b3791b7cfb_c.jpg


51175321024_9b5361d570_c.jpg


With the filler sanded and the Kurust dry, I gave the treated areas a coat of zinc primer.

With the rest of the panels keyed and cleaned it was time for painting. I wanted to keep costs down so decided to paint the car in Montana Code Red graffiti paint, purchased from Graffcity.

51175612665_3ff1d2e38a_c.jpg


51174745113_c7e4b67b47_c.jpg


51173842607_968143e7a4_c.jpg


51174745073_593149aeaa_c.jpg


51175612610_1e6d83910a_c.jpg


51175310324_aa3e13f911_c.jpg


51175612565_9dfe6abecf_c.jpg


51174745013_2401d10b11_c.jpg


Its not perfect, its rough and patchy as hell but its all one colour which is the main thing. I'm sure it'll need redoing again at some point but I'll cross that bridge when it happens.

Now I need to get this rear arch replaced, get the bootlid holes welded up and the rest of the car can be painted
 
OP
OP
hoodedreeper

hoodedreeper

Ex. Club Member
First part of this update is some good news, I've booked my first track day of the year woohoo! I'll be heading to Snetterton in July with a small group of friends so its gonna be a fun day.

When the Gizfab manifold was fitted it made the exhaust quite loud and raspy, which isn't ideal for a track day. So I purchased a stainless centre section with 2 resonators from Gizfab to help sort it. It still has a low end grunt but WOT it's certainly alot quieter than before

51208411252_c492723dc7_c.jpg


One of the jobs that needed doing before the rest of the car got sprayed, was to have the bootlid welded up. I removed the rear wiper shortly after purchasing the car and had used an ebay blank. The wiper hole along with the holes for the original boot handle were welded by a friend and I done the filler work.

51208418212_23c08a00b4_c.jpg


The corners need some more sanding but overall its come out pretty well IMO

51209892424_06fd222271_c.jpg


51210197860_8eee8754e3_c.jpg


The other job I've recently carried out is the removal of the sound deadening and painting the floor.

I used a freeze spray and hammer to remove the majority of it, followed by a Makita multi tool to remove the pieces stuck by the factory seam sealer. Unfortunately I didn't weigh what I removed, but reading on the forum its approx 9-10kg

51209326178_cafd9e7cbc_c.jpg


The holes were abit scabby around the edges so I cleaned them up with a drill wire brush attachment and gave it a coating of rust treatment.

51210190895_e58ed7a75e_c.jpg


Once that was dry I applied seam sealer to cover the holes to prevent water getting in

51209326138_f3beffd370_c.jpg


Next was to paint the floor. I used smooth red Hammerite so it matched the rear half of the interior (although that was aerosol and this was brush on)

51209125551_0c72c62138_c.jpg


51208410732_86978b3e30_c.jpg


51209125236_9a58a58474_c.jpg


51209125226_102b546c97_c.jpg


51209325723_7b3a134d94_c.jpg


This weekend the rear arch should hopefully be sorted,removal of the graphics and door boards and any dings/dents filled
 
OP
OP
hoodedreeper

hoodedreeper

Ex. Club Member
Nothing exciting to report at the moment. I've owned the car for a year now, here are some comparison photos

51225884884_8db924f538_c.jpg


51225118706_f5238f5f6b_c.jpg


51225884894_69577593f4_c.jpg


51225329083_a29a7c870b_c.jpg


Went to a local meet so snapped a few photos

51225328308_d67d85edc9_c.jpg


51224408742_2c3ff79d98_c.jpg


51225884264_6e6dcbfe49_c.jpg


51224408702_1a03d8fe09_c.jpg


51225328318_a4c8609c31_c.jpg
 
OP
OP
hoodedreeper

hoodedreeper

Ex. Club Member
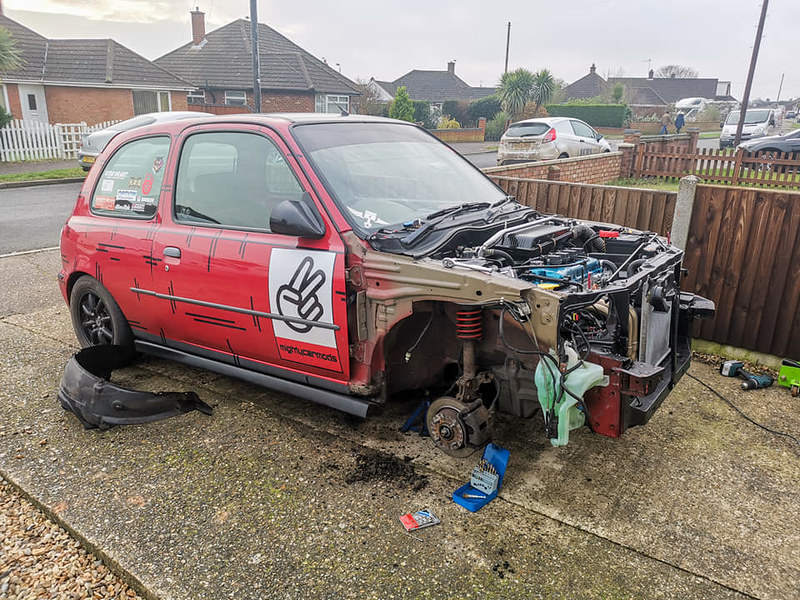
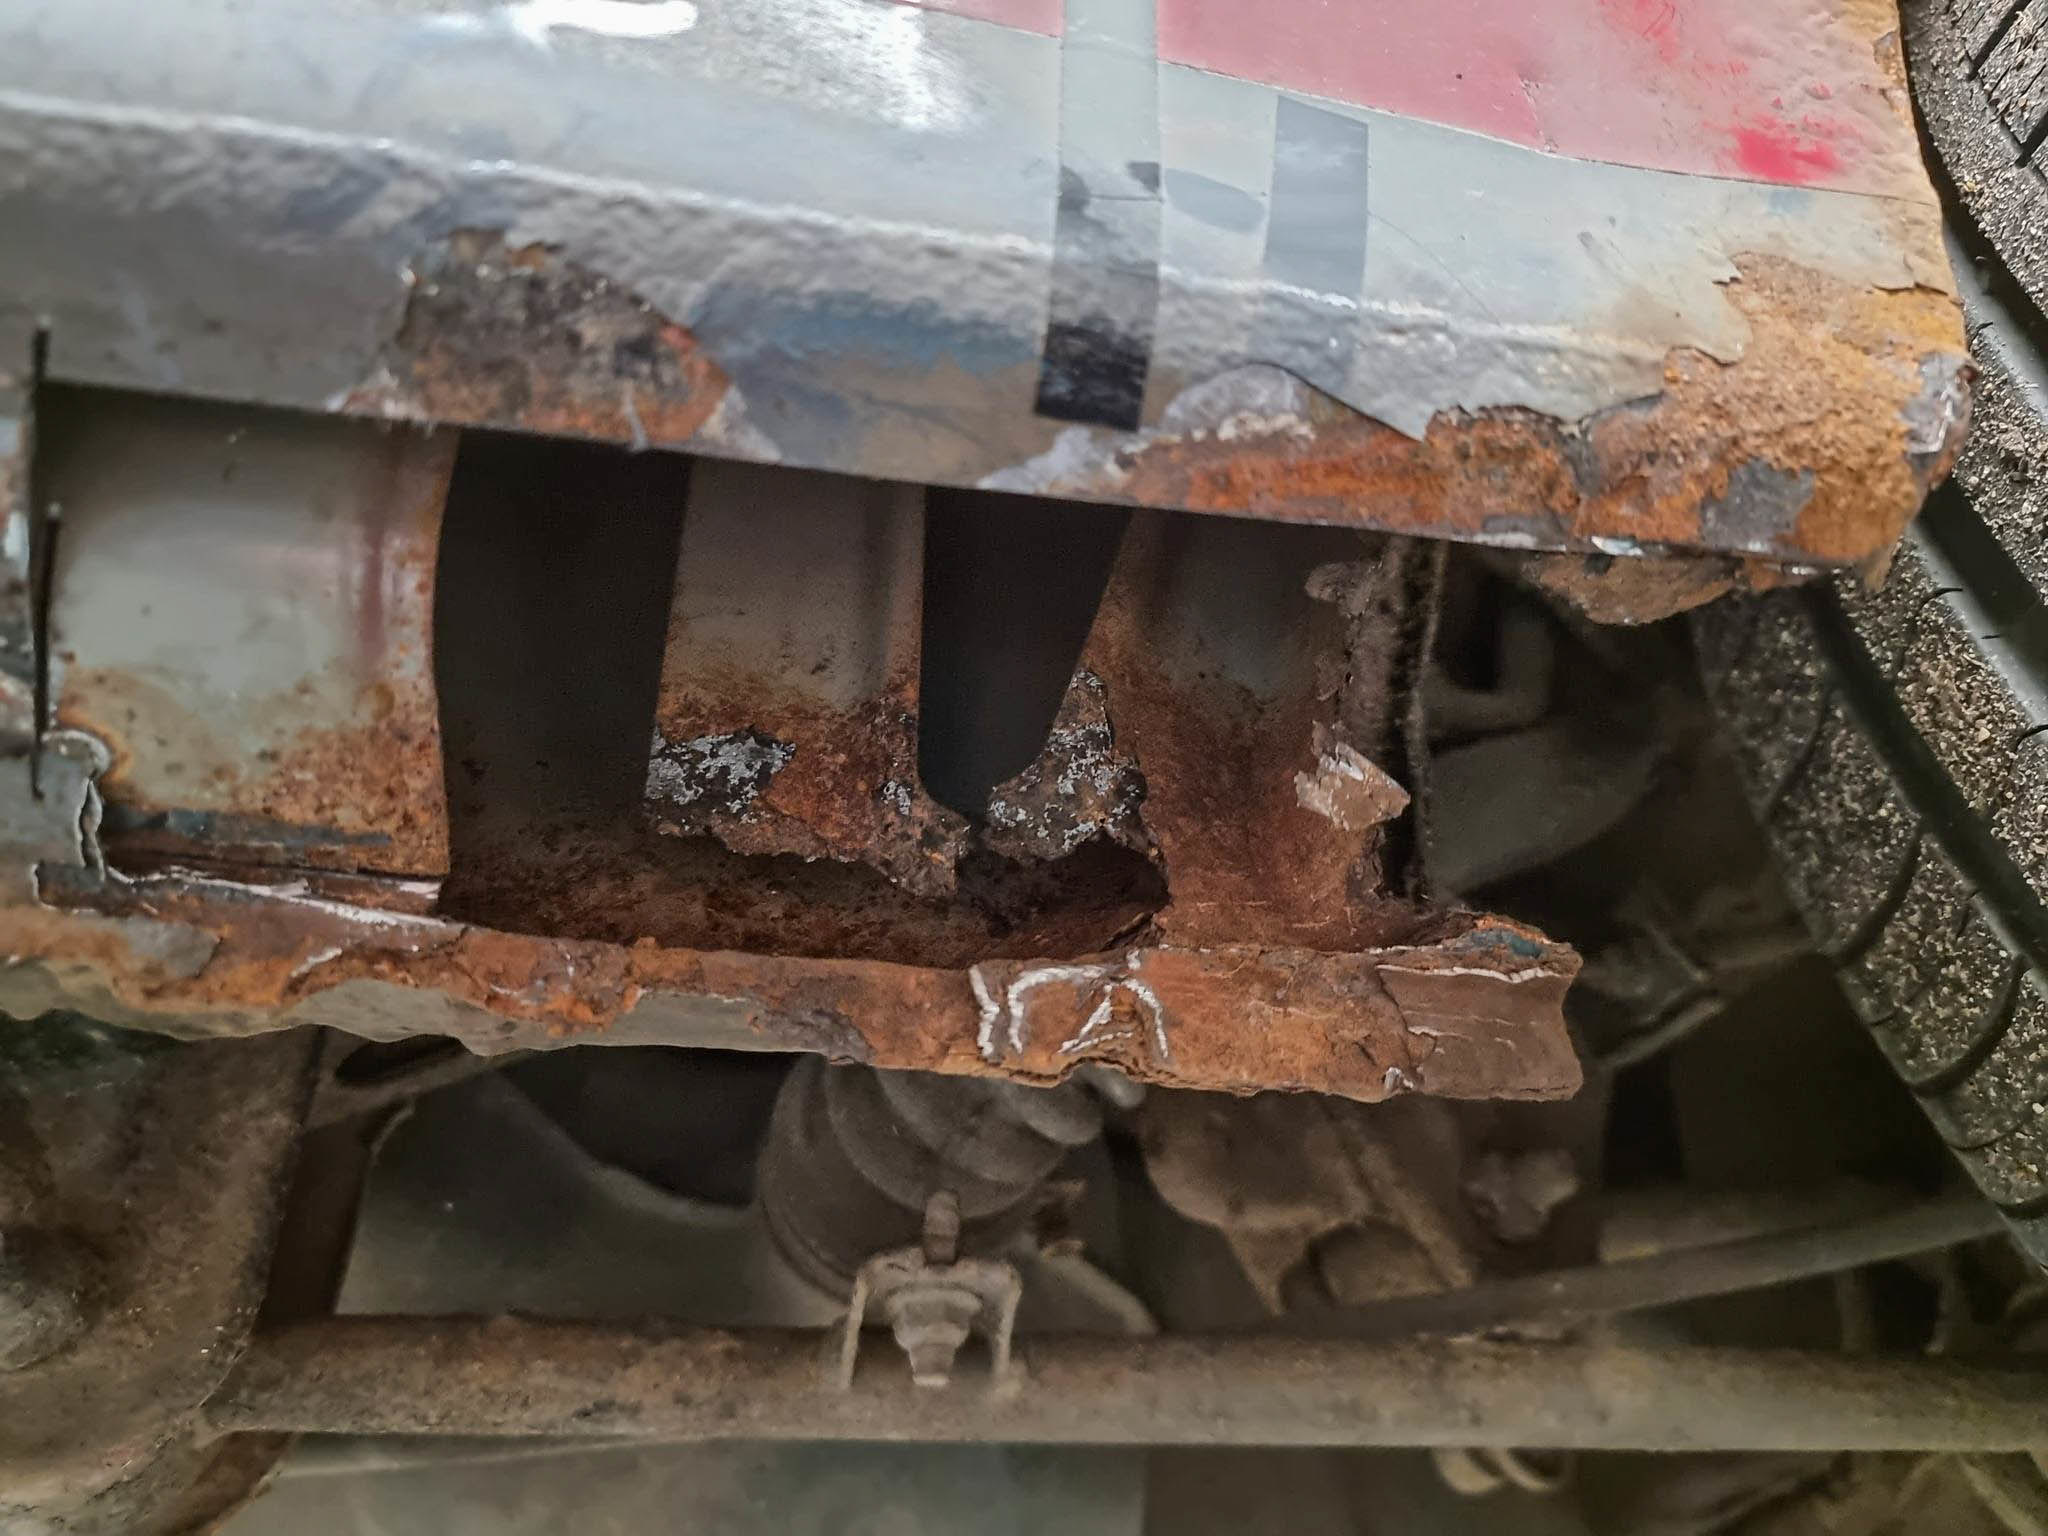
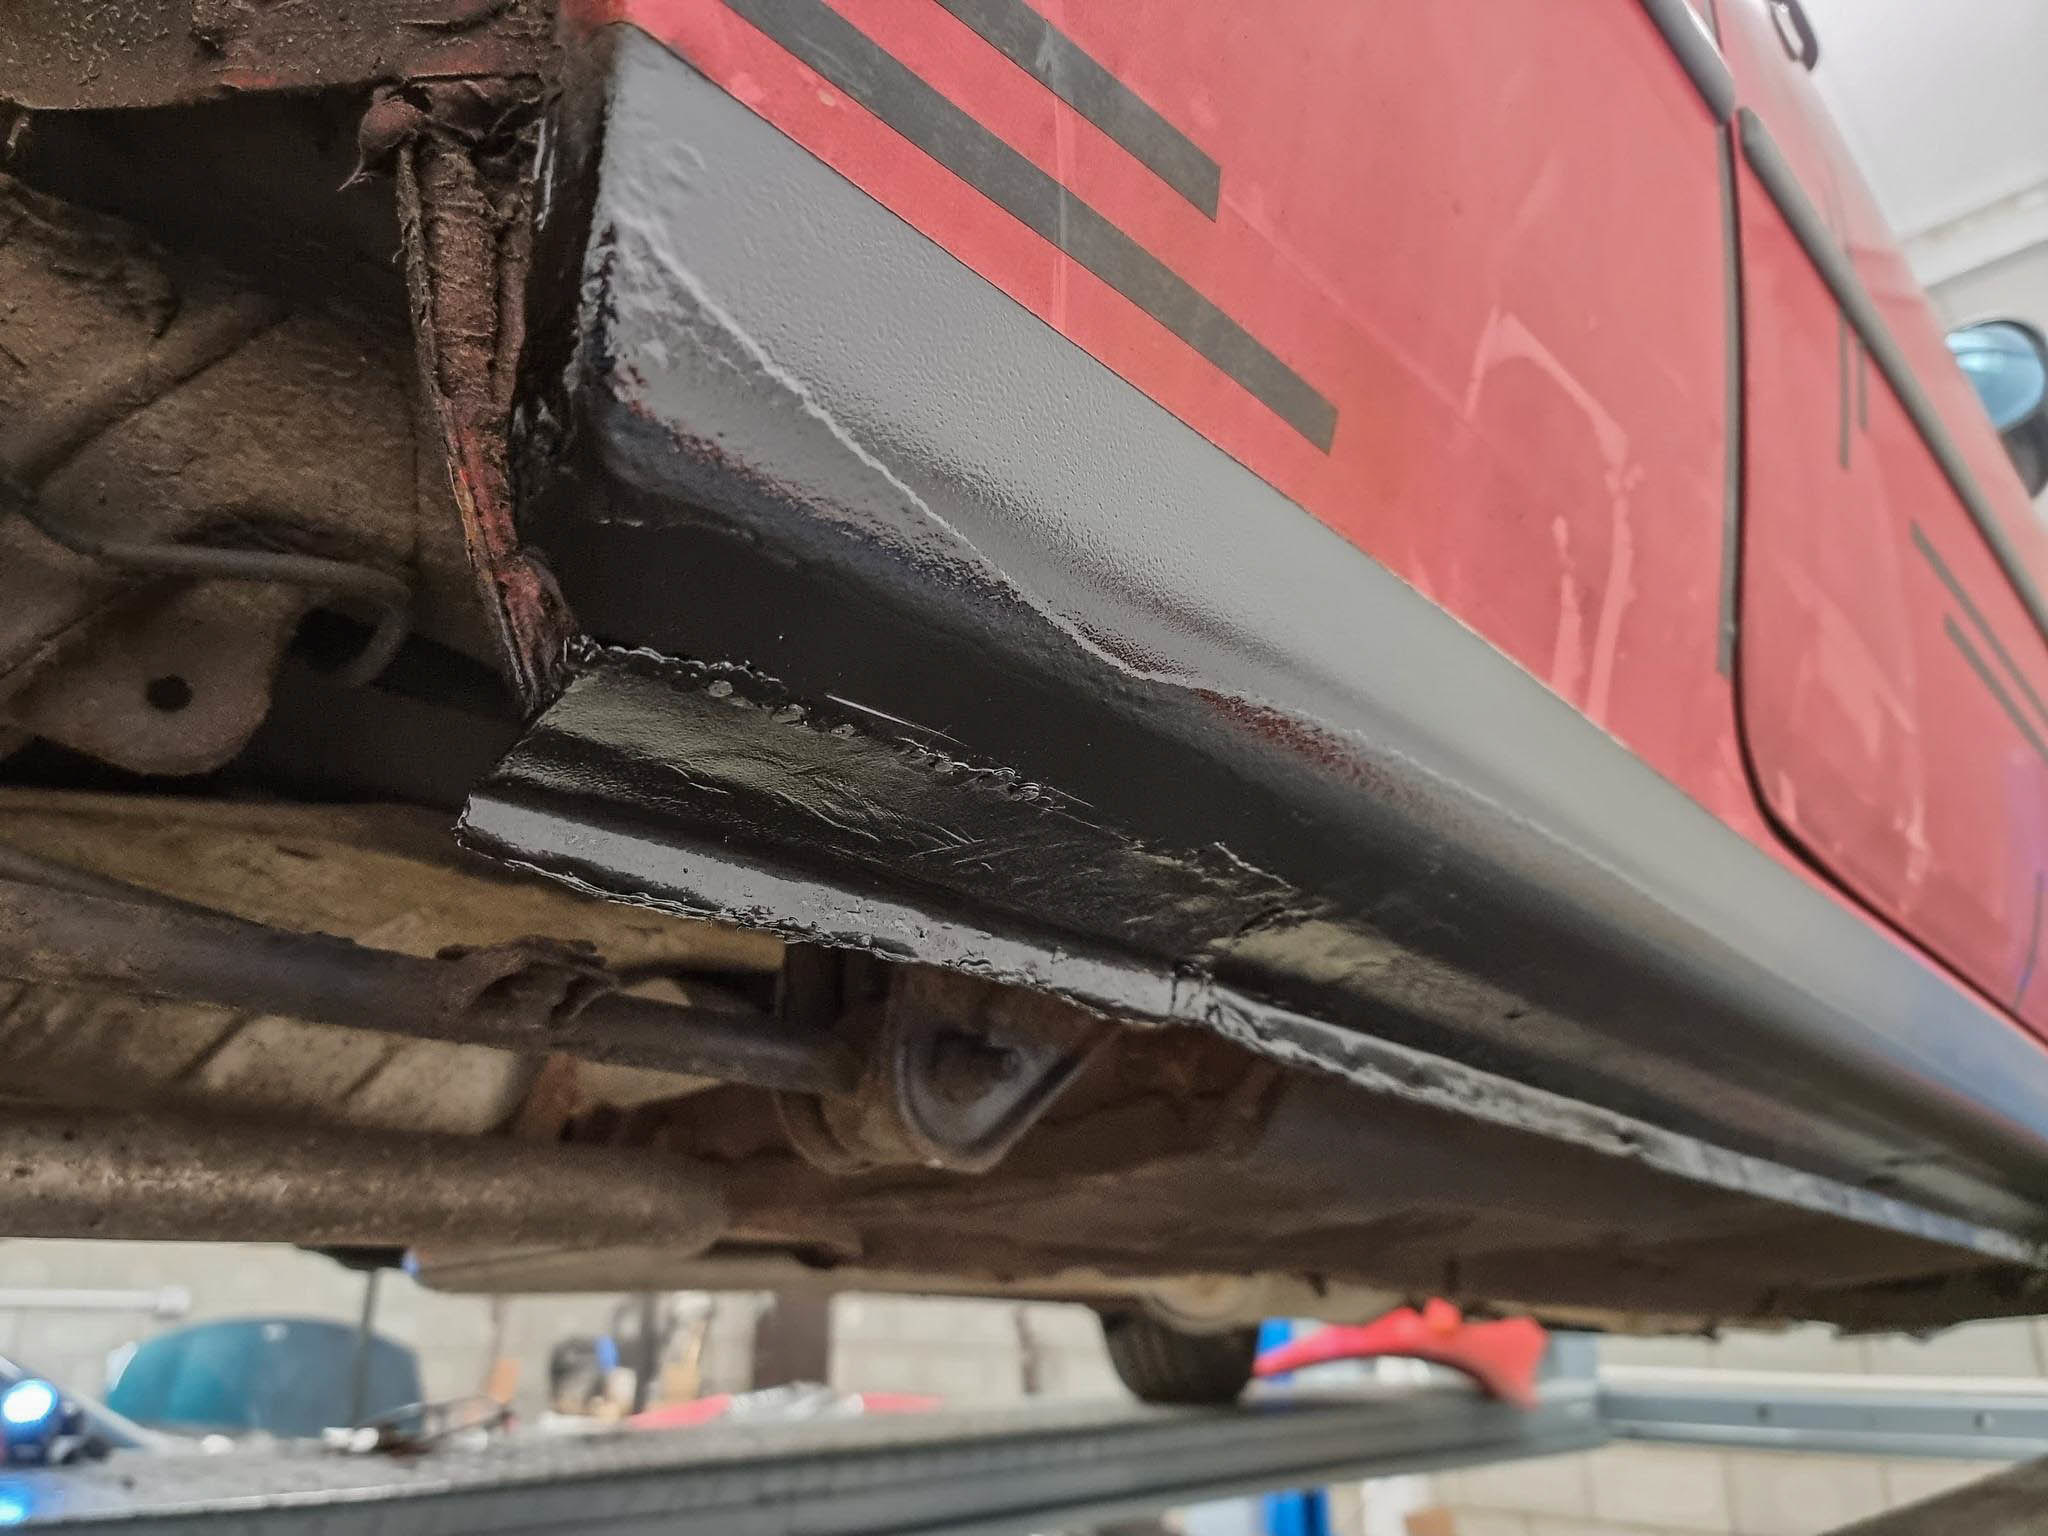
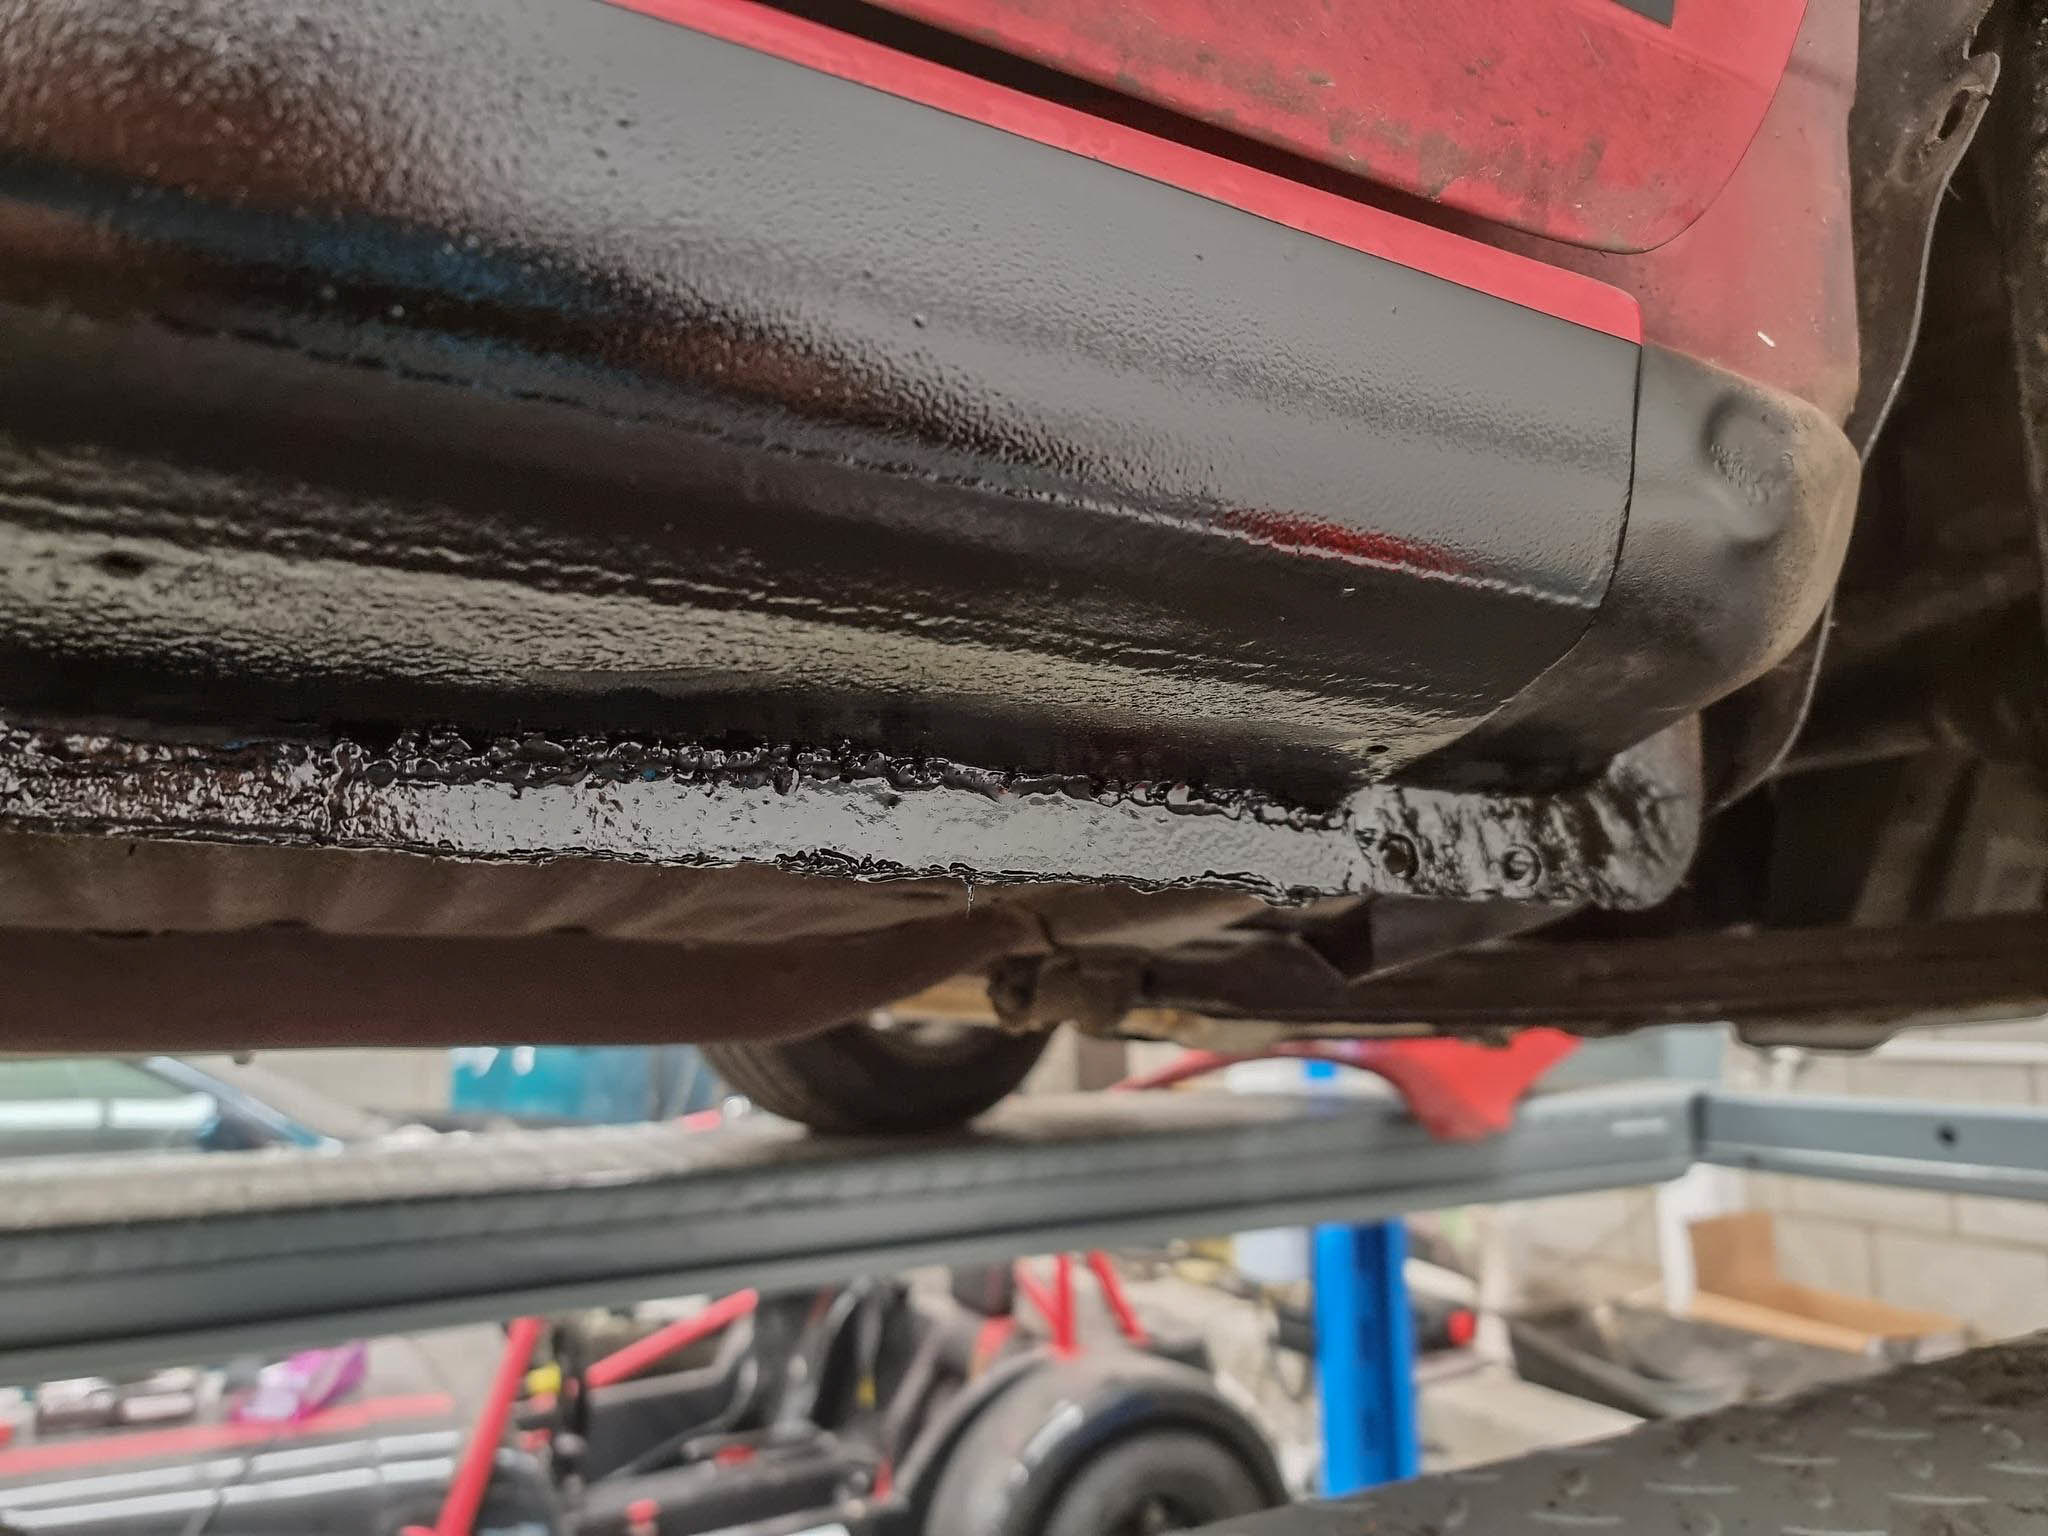
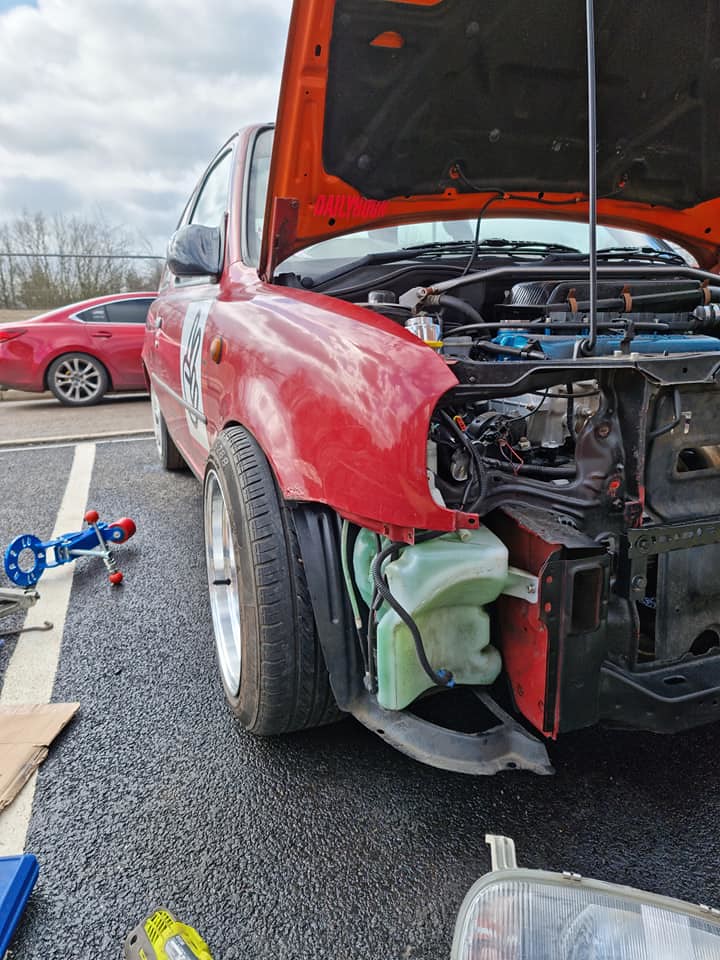
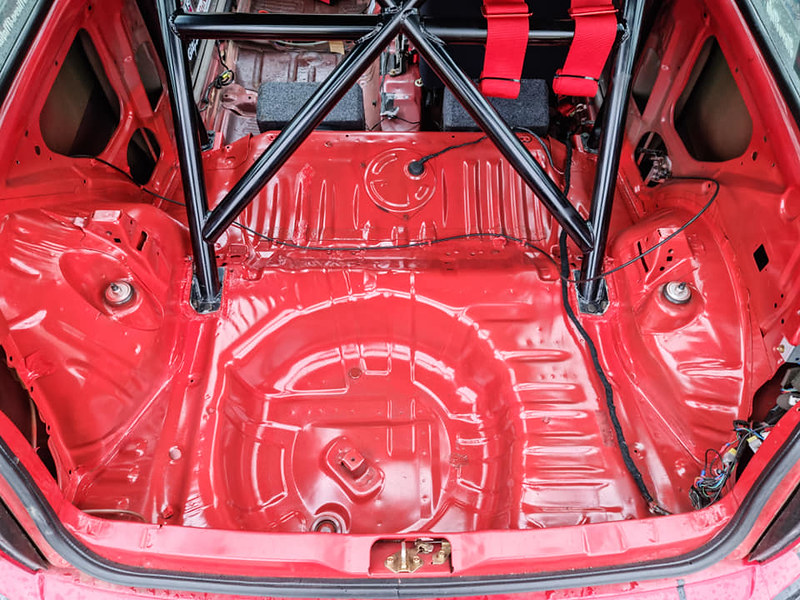
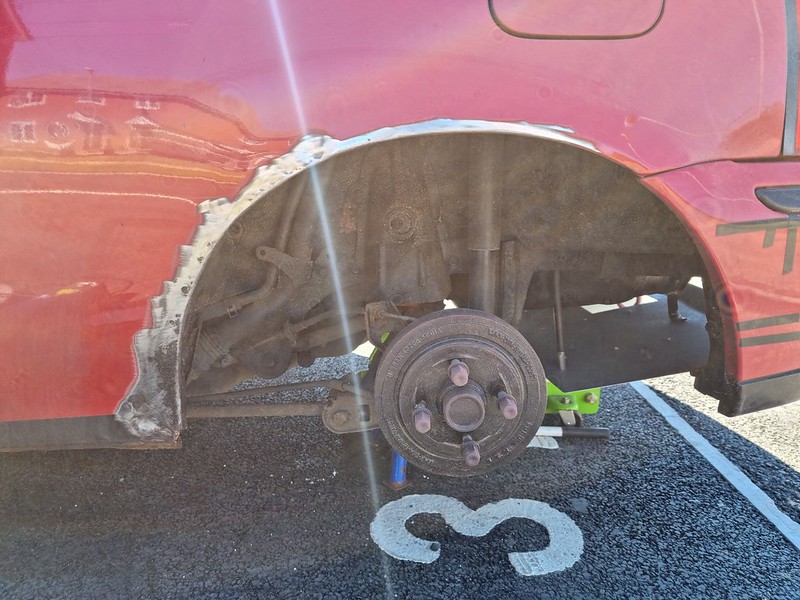
Time was quickly passing and I was running out of time to get the car sorted ready for my track day. I spoke to a couple of people who work with bodywork (to get a price on cutting out and replacing the N/S/R arch) and they said it was solid metal and replacing the panel could distort the quarter panel.

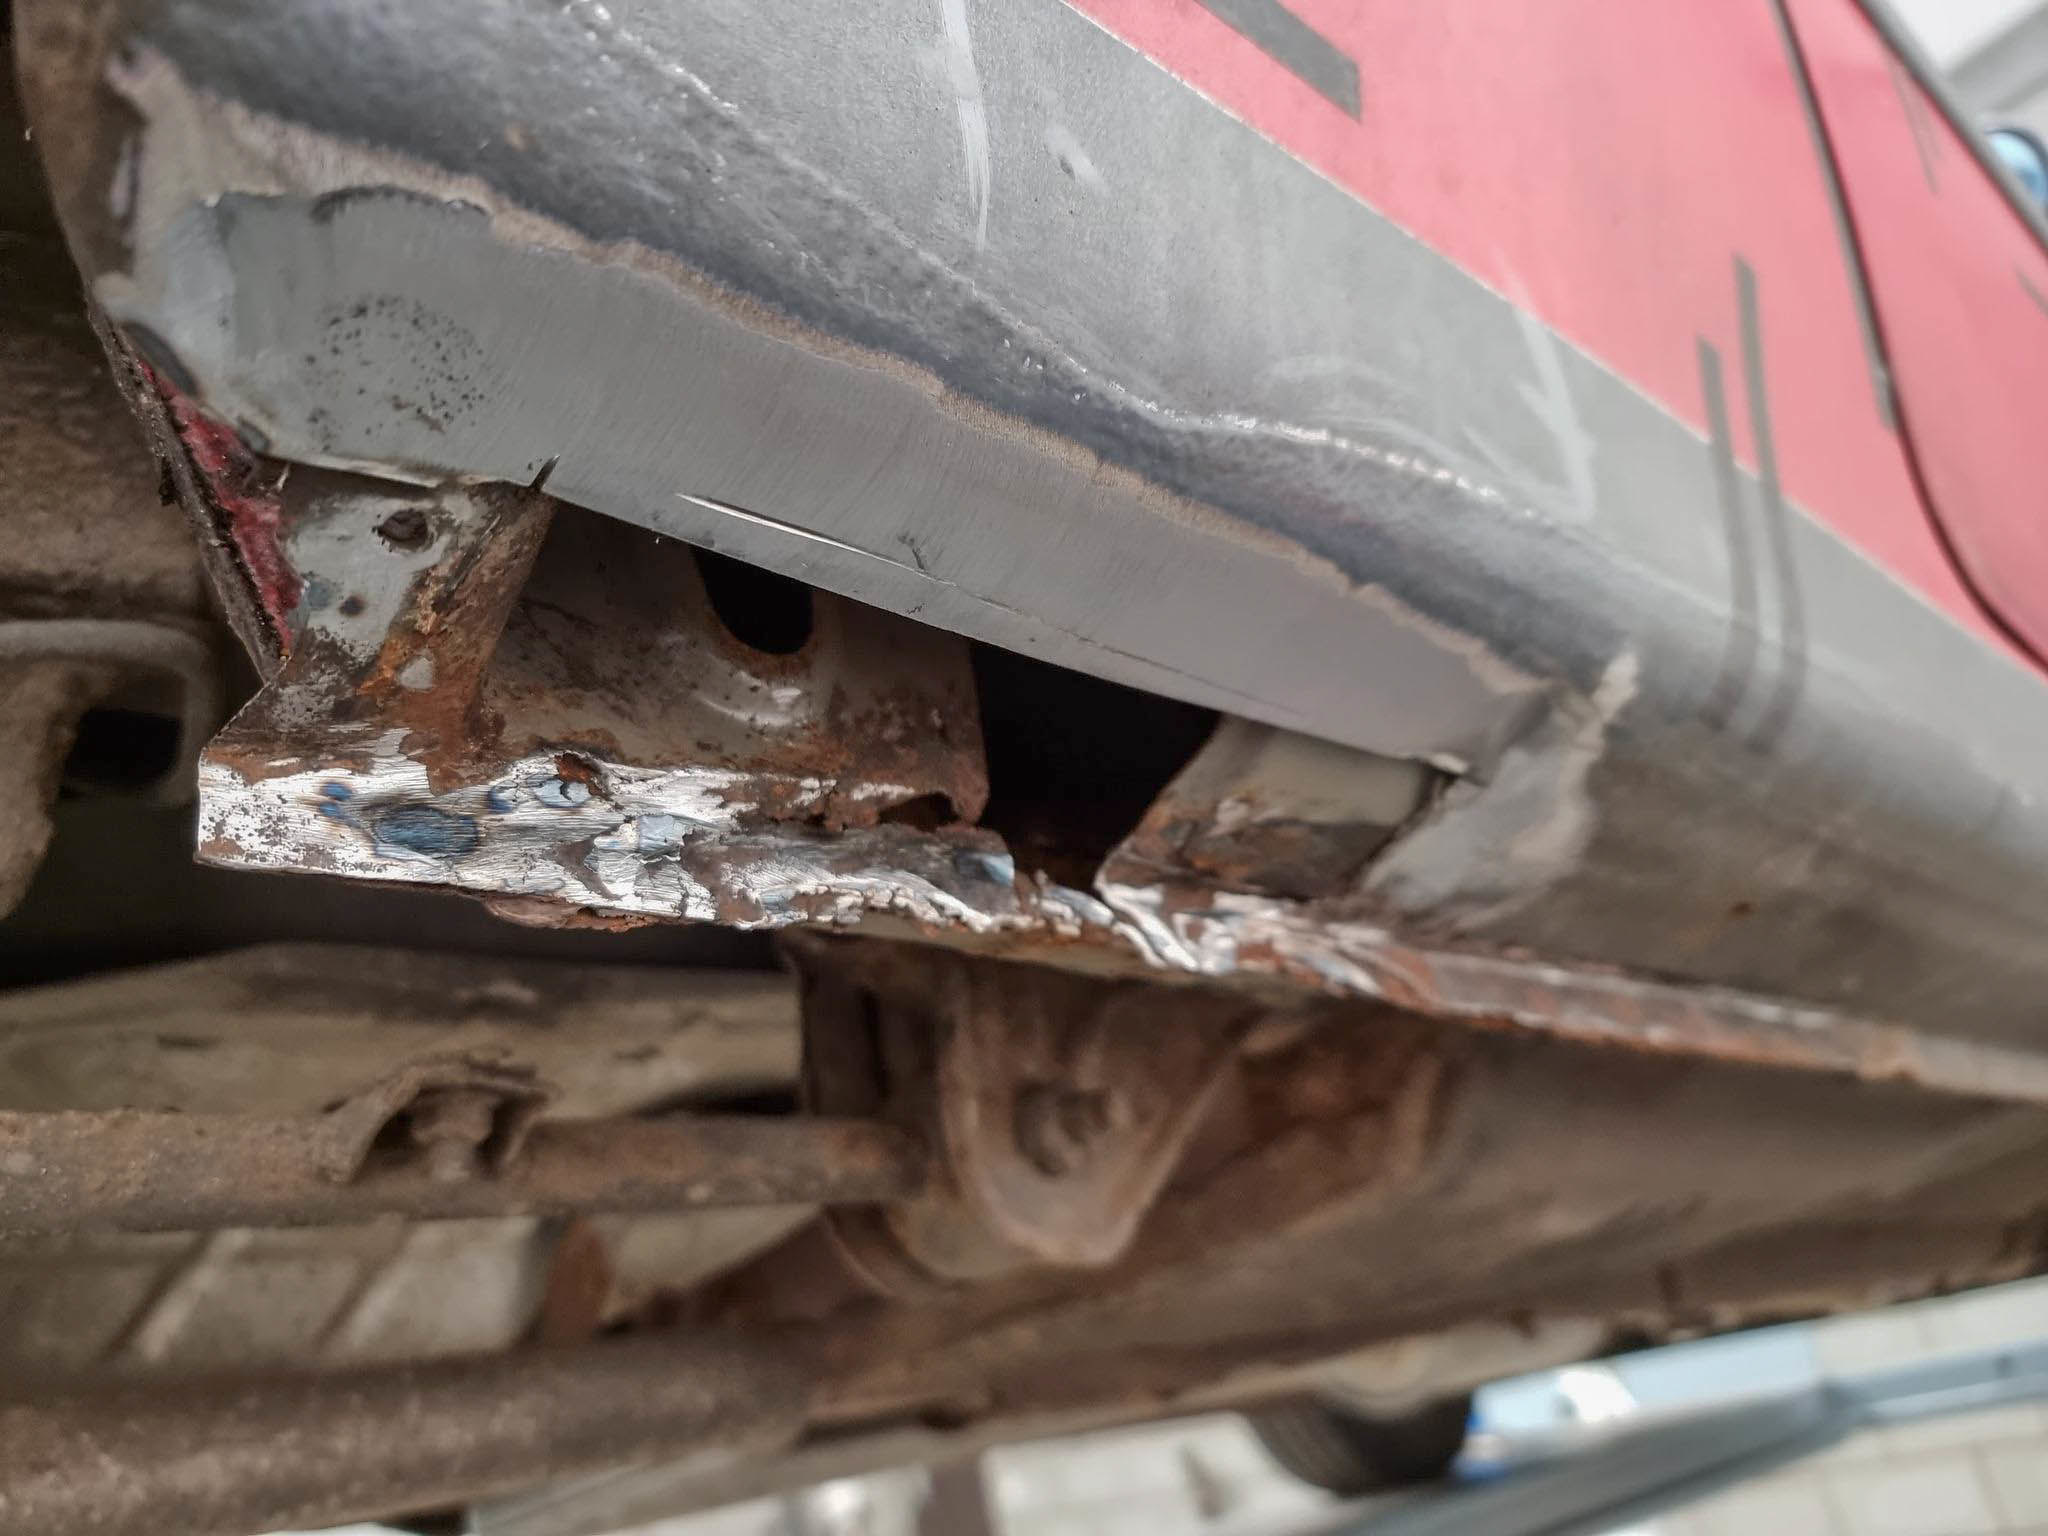
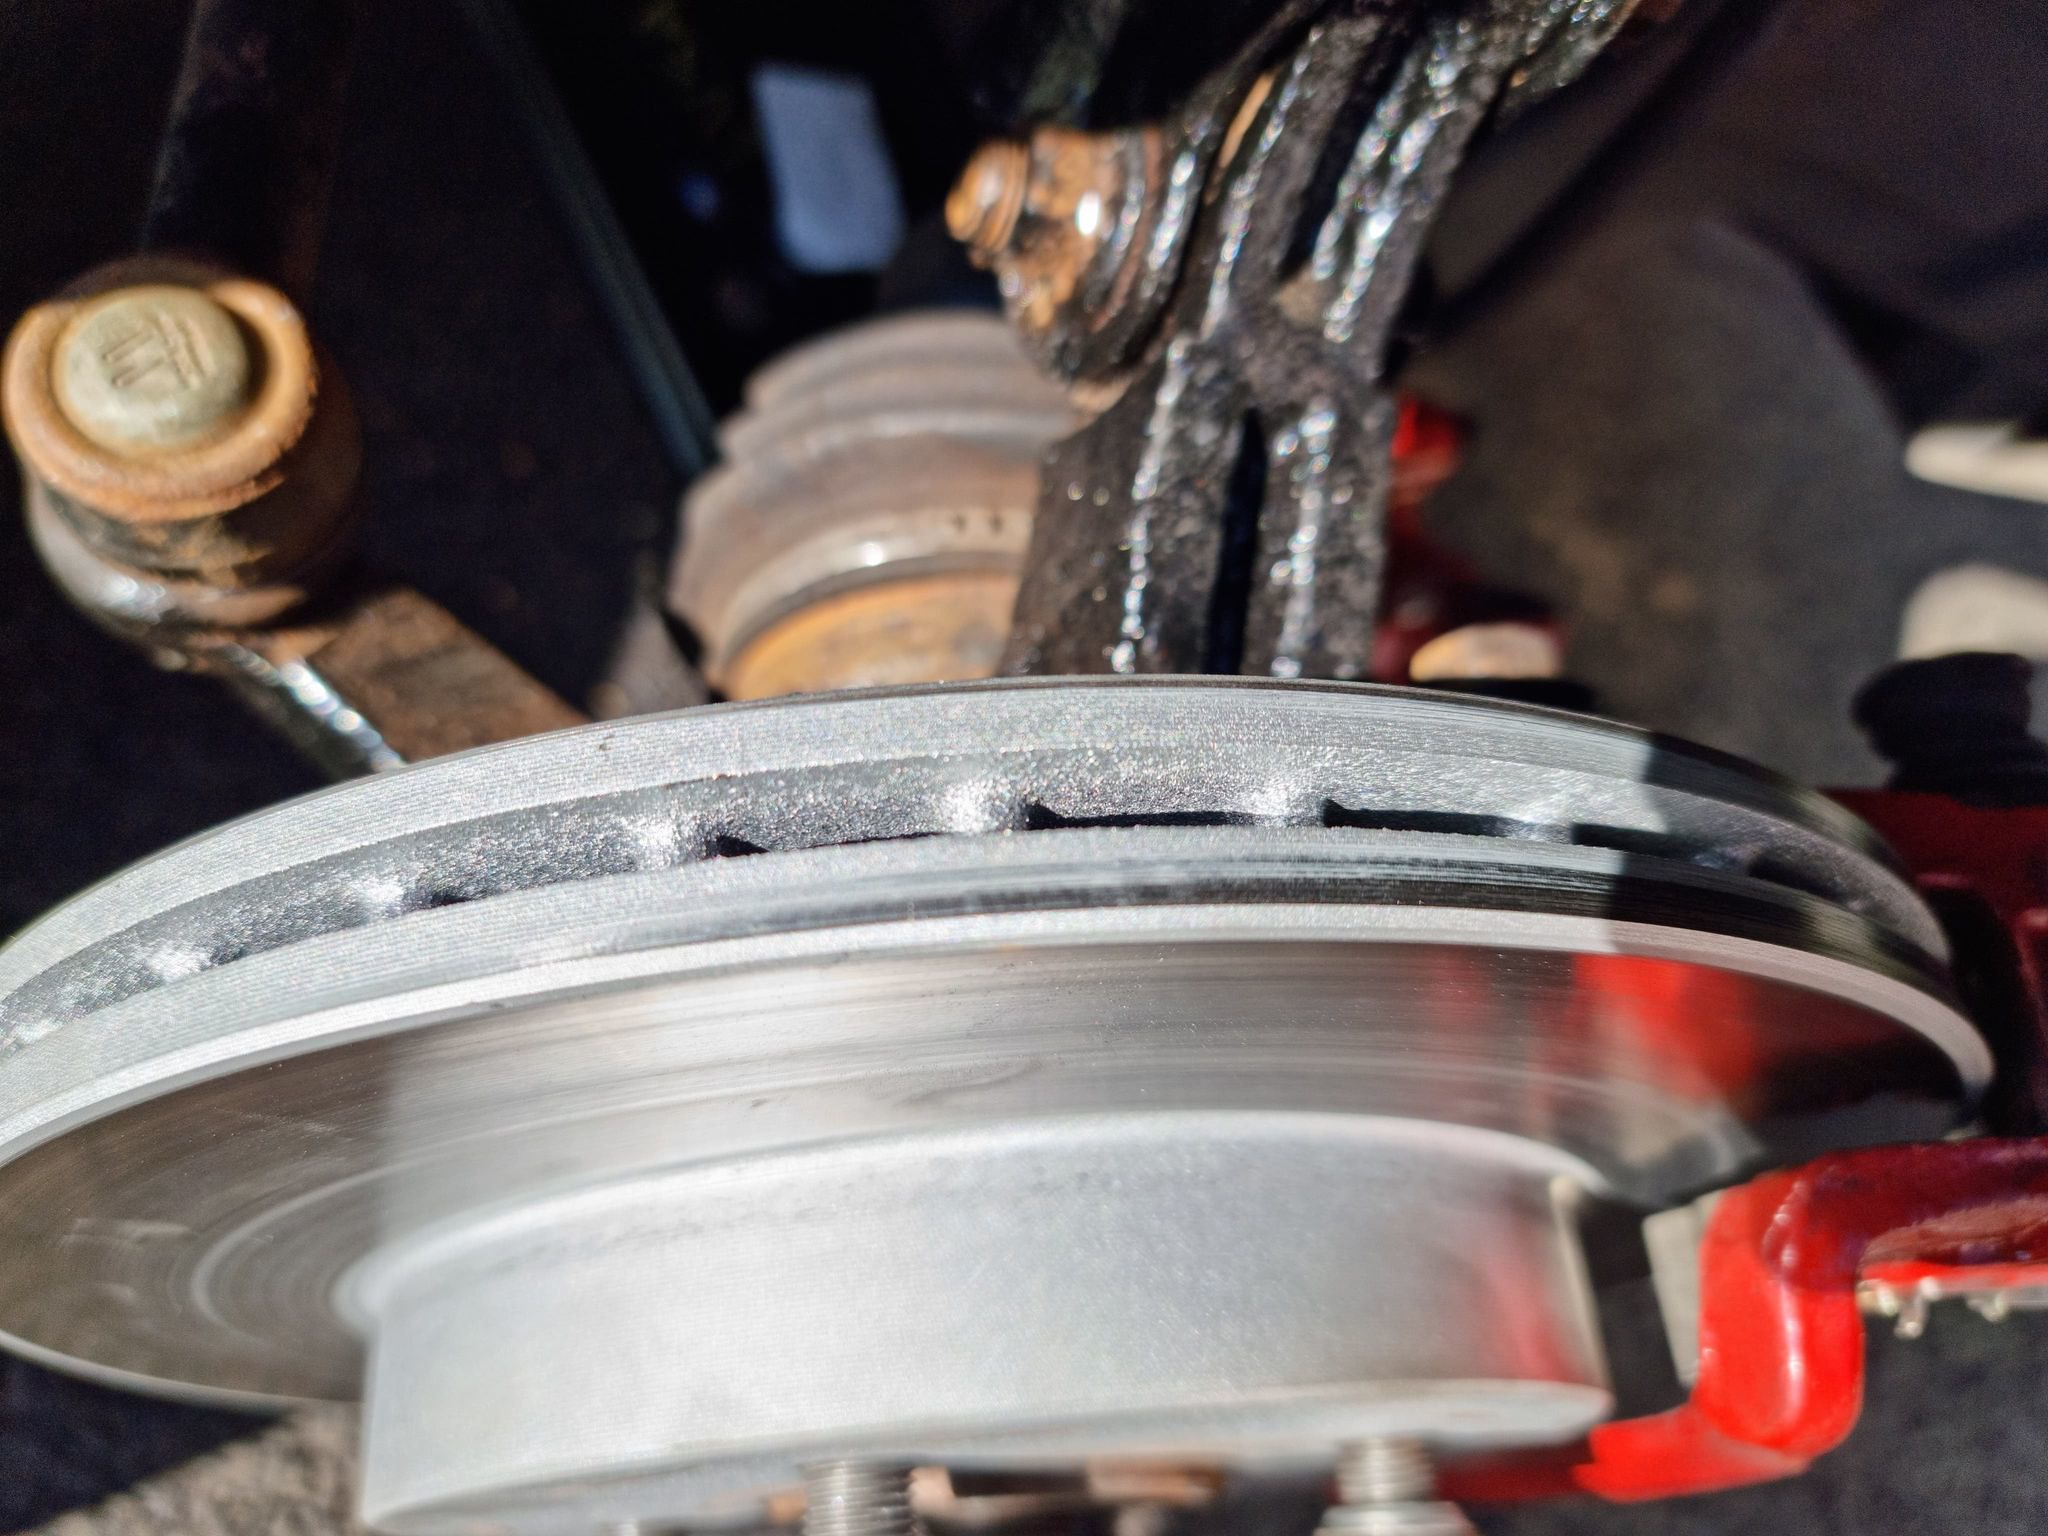
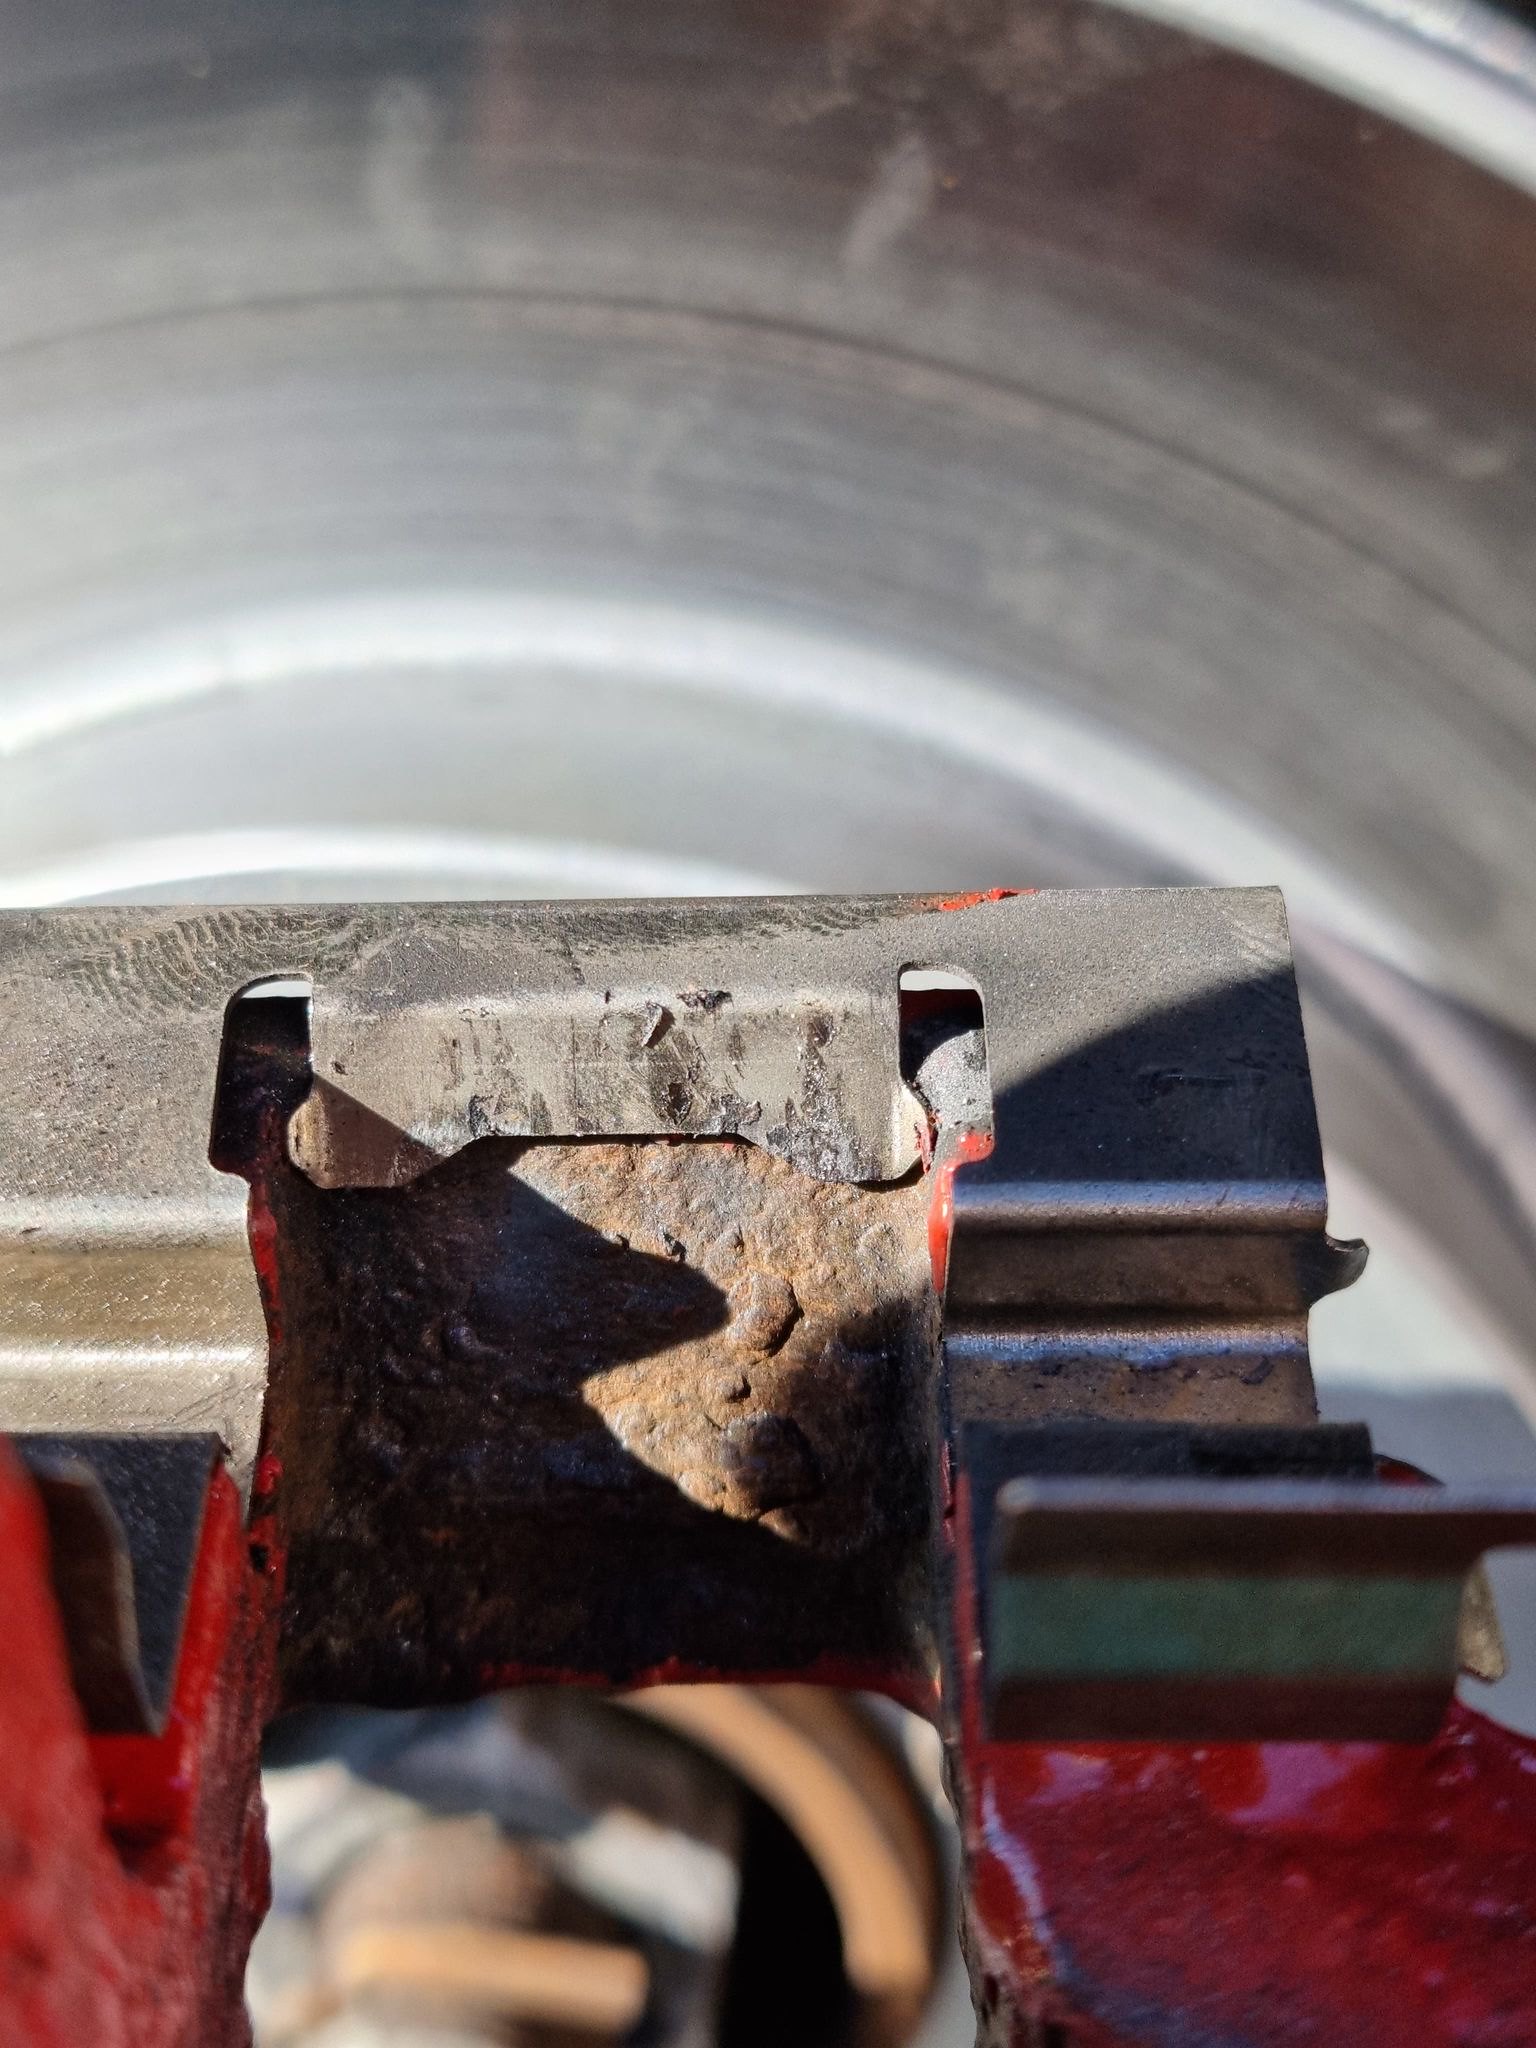
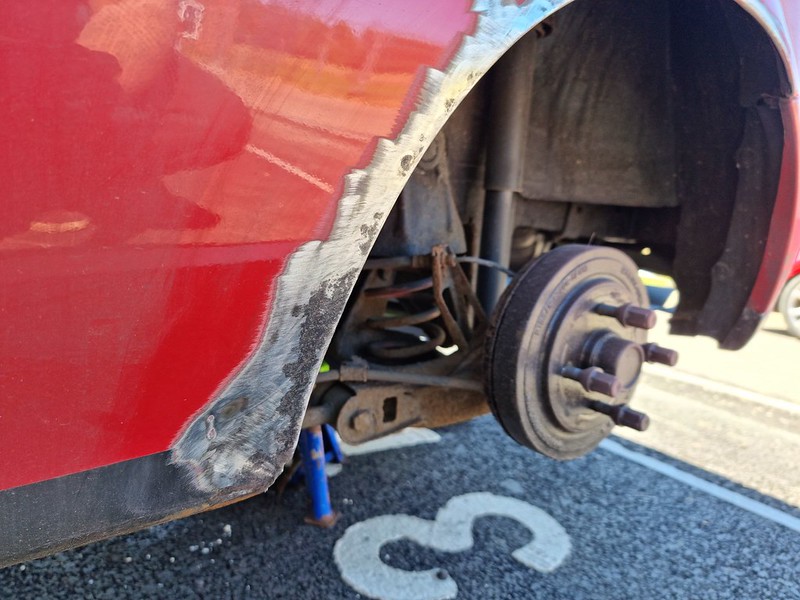
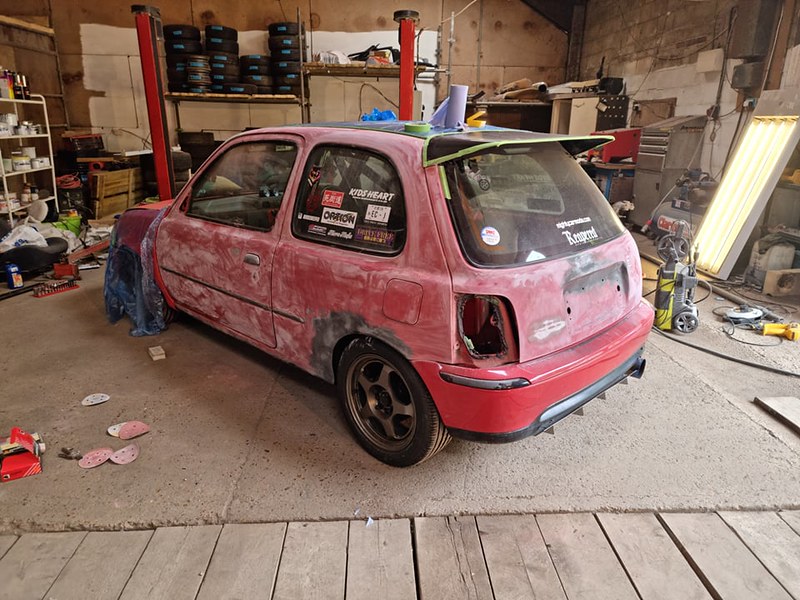
So I attacked the arches with a flap disc on a grinder to see what I was dealing with. Turns out it IS good metal underneath, winning!

51288683856_5159c69b70_c.jpg


51289401629_745e6d0a89_c.jpg


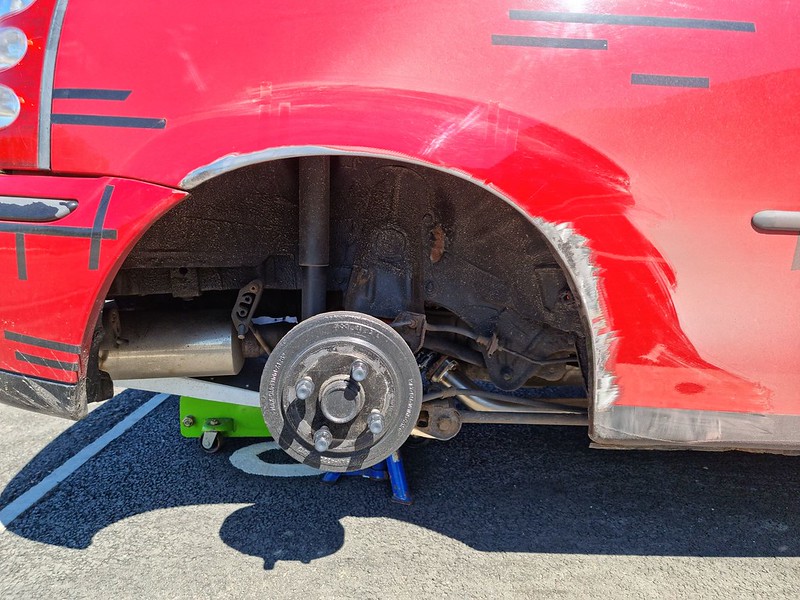
Driver side wasn't as bad but had started to bubble so that received the same treatment

51289401649_0f16a77fbb_c.jpg


The areas were cleaned, rust treated and then filled. I envy those who can do body work especially filler. These areas are pretty straight forward, but it certainly tested my patience lol.

Unfortunately I dont have any final photos of the repair.

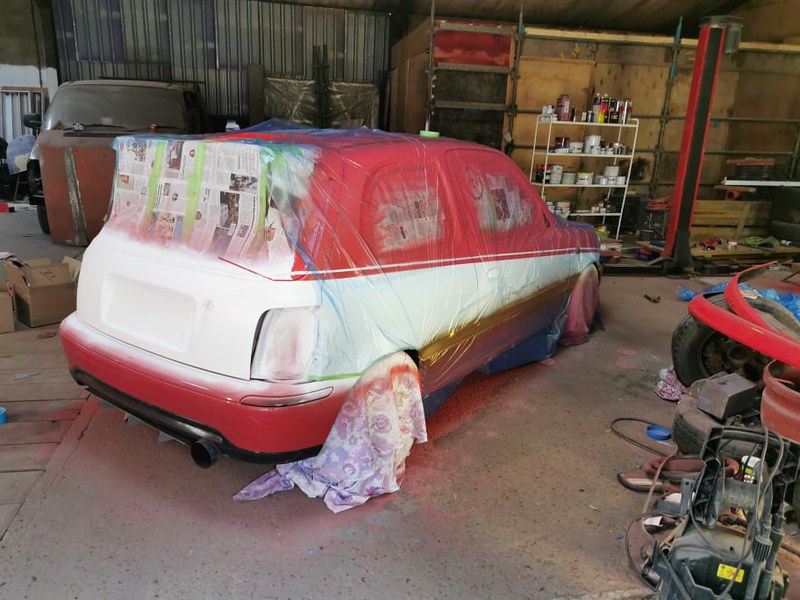
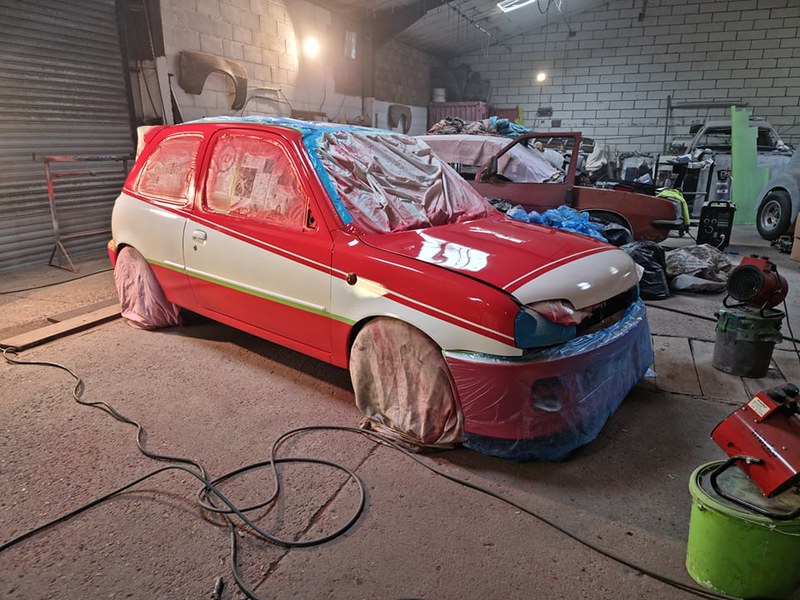
Fast forward to last sunday (27th June). A friend had kindly allowed me to use a space in his unit to prep and paint the car. The paint booth he has is currently being re-done otherwise this whole process would have been alot better and easier.

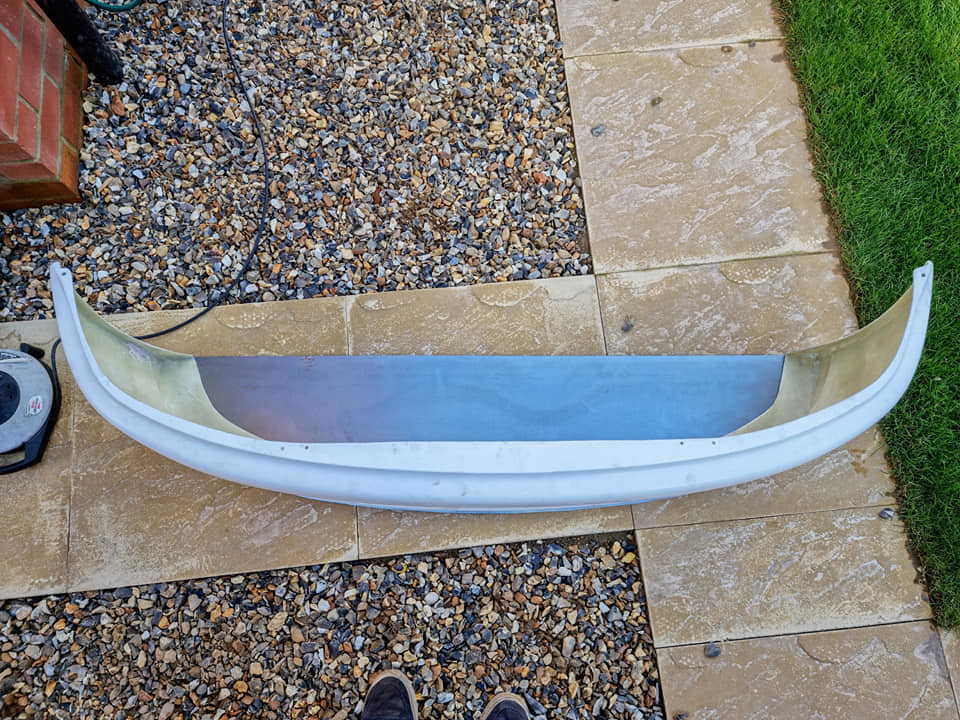
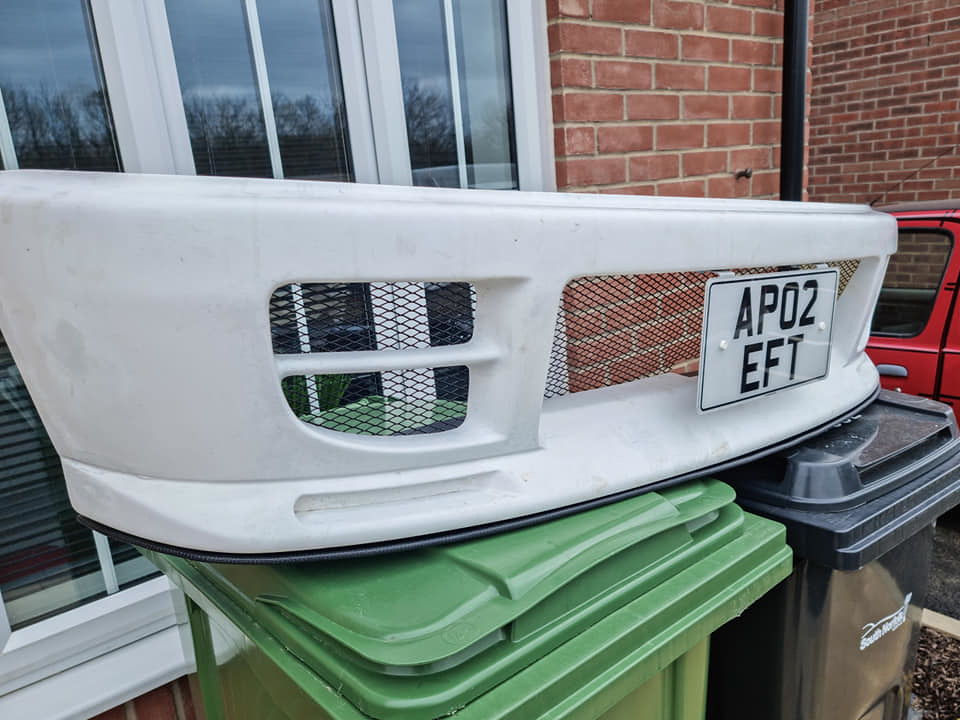
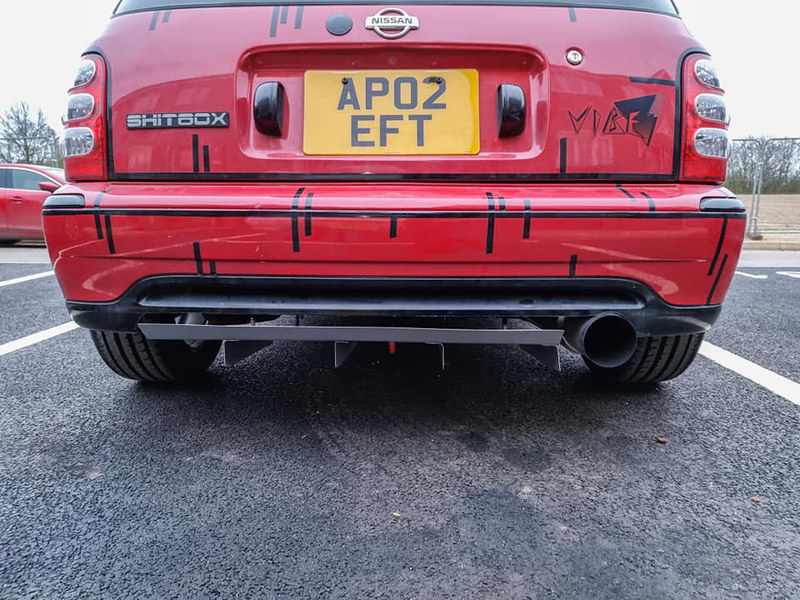
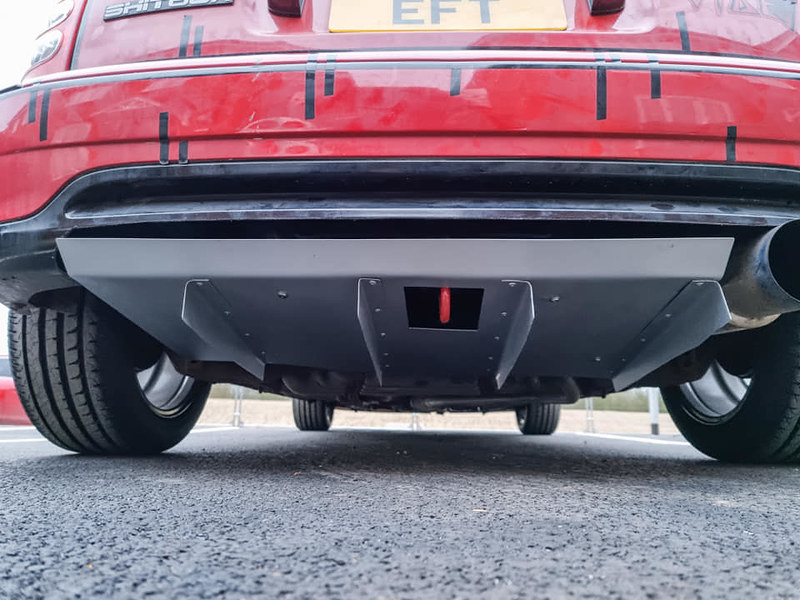
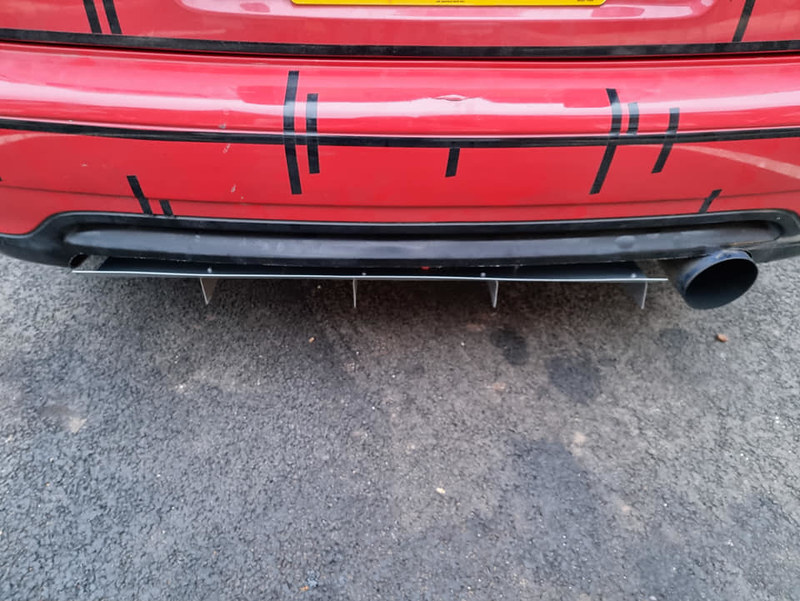
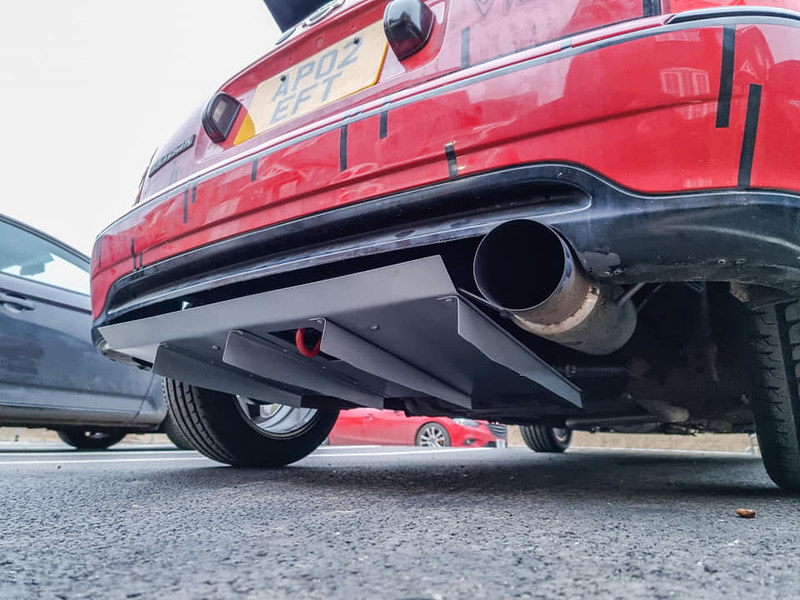
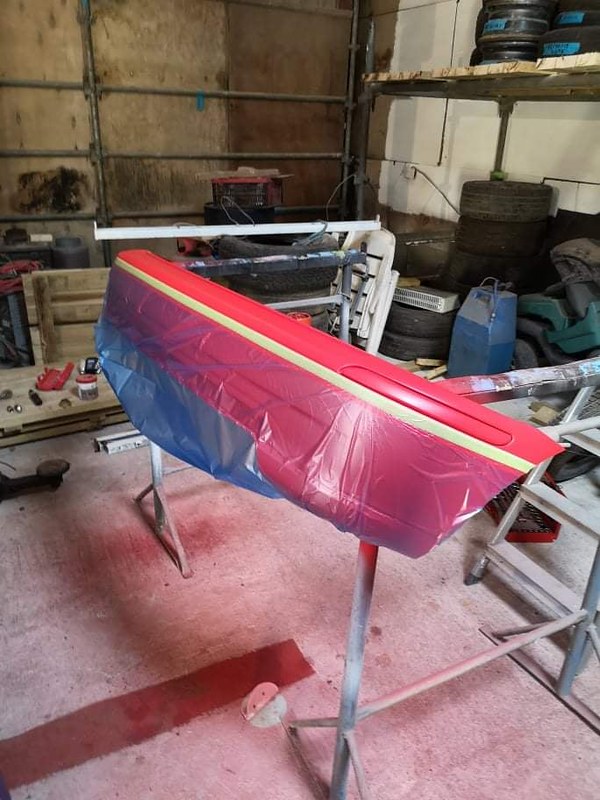
With the car prepped with 400 grade sand paper, wiped down and masked it was ready for painting. The rear bumper was left on, a replacement was purchased and was being prepped off the car (I needed to cut the bottom for the diffuser and exhaust)

51285414931_6f74289ac6_c.jpg


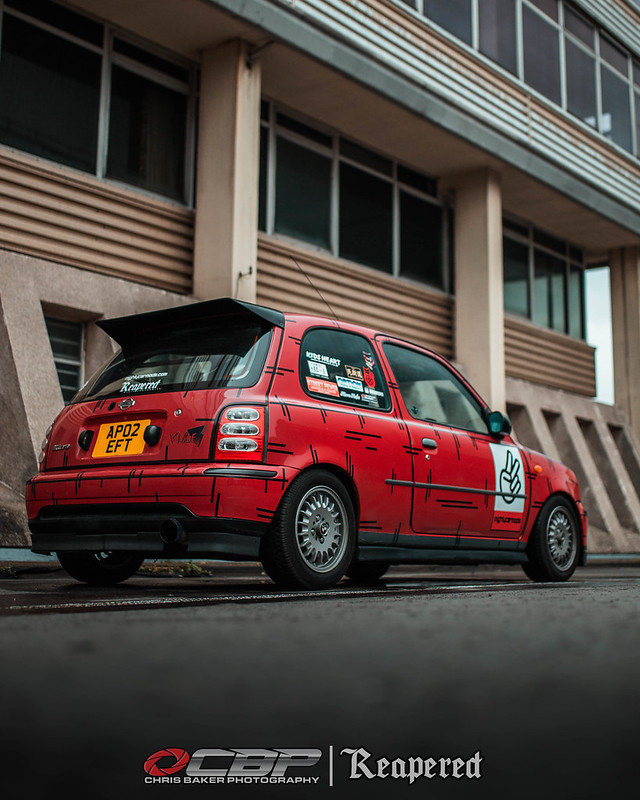
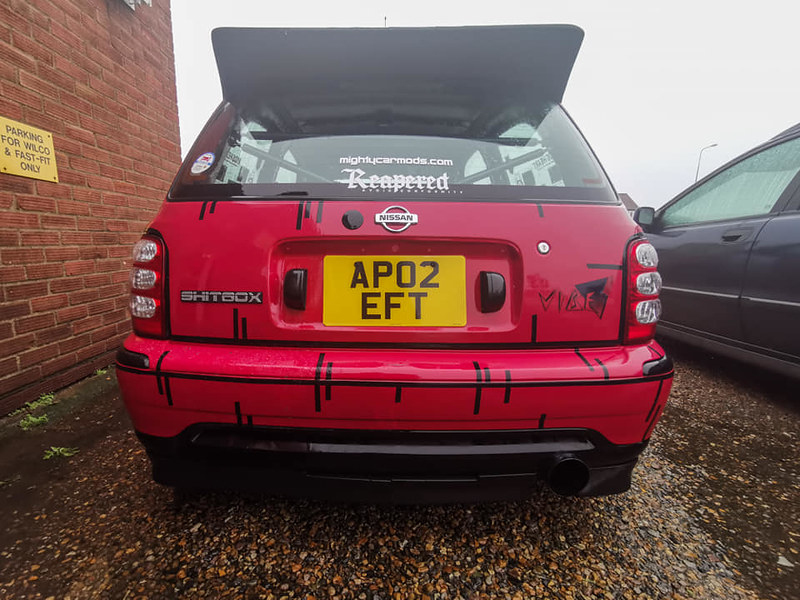
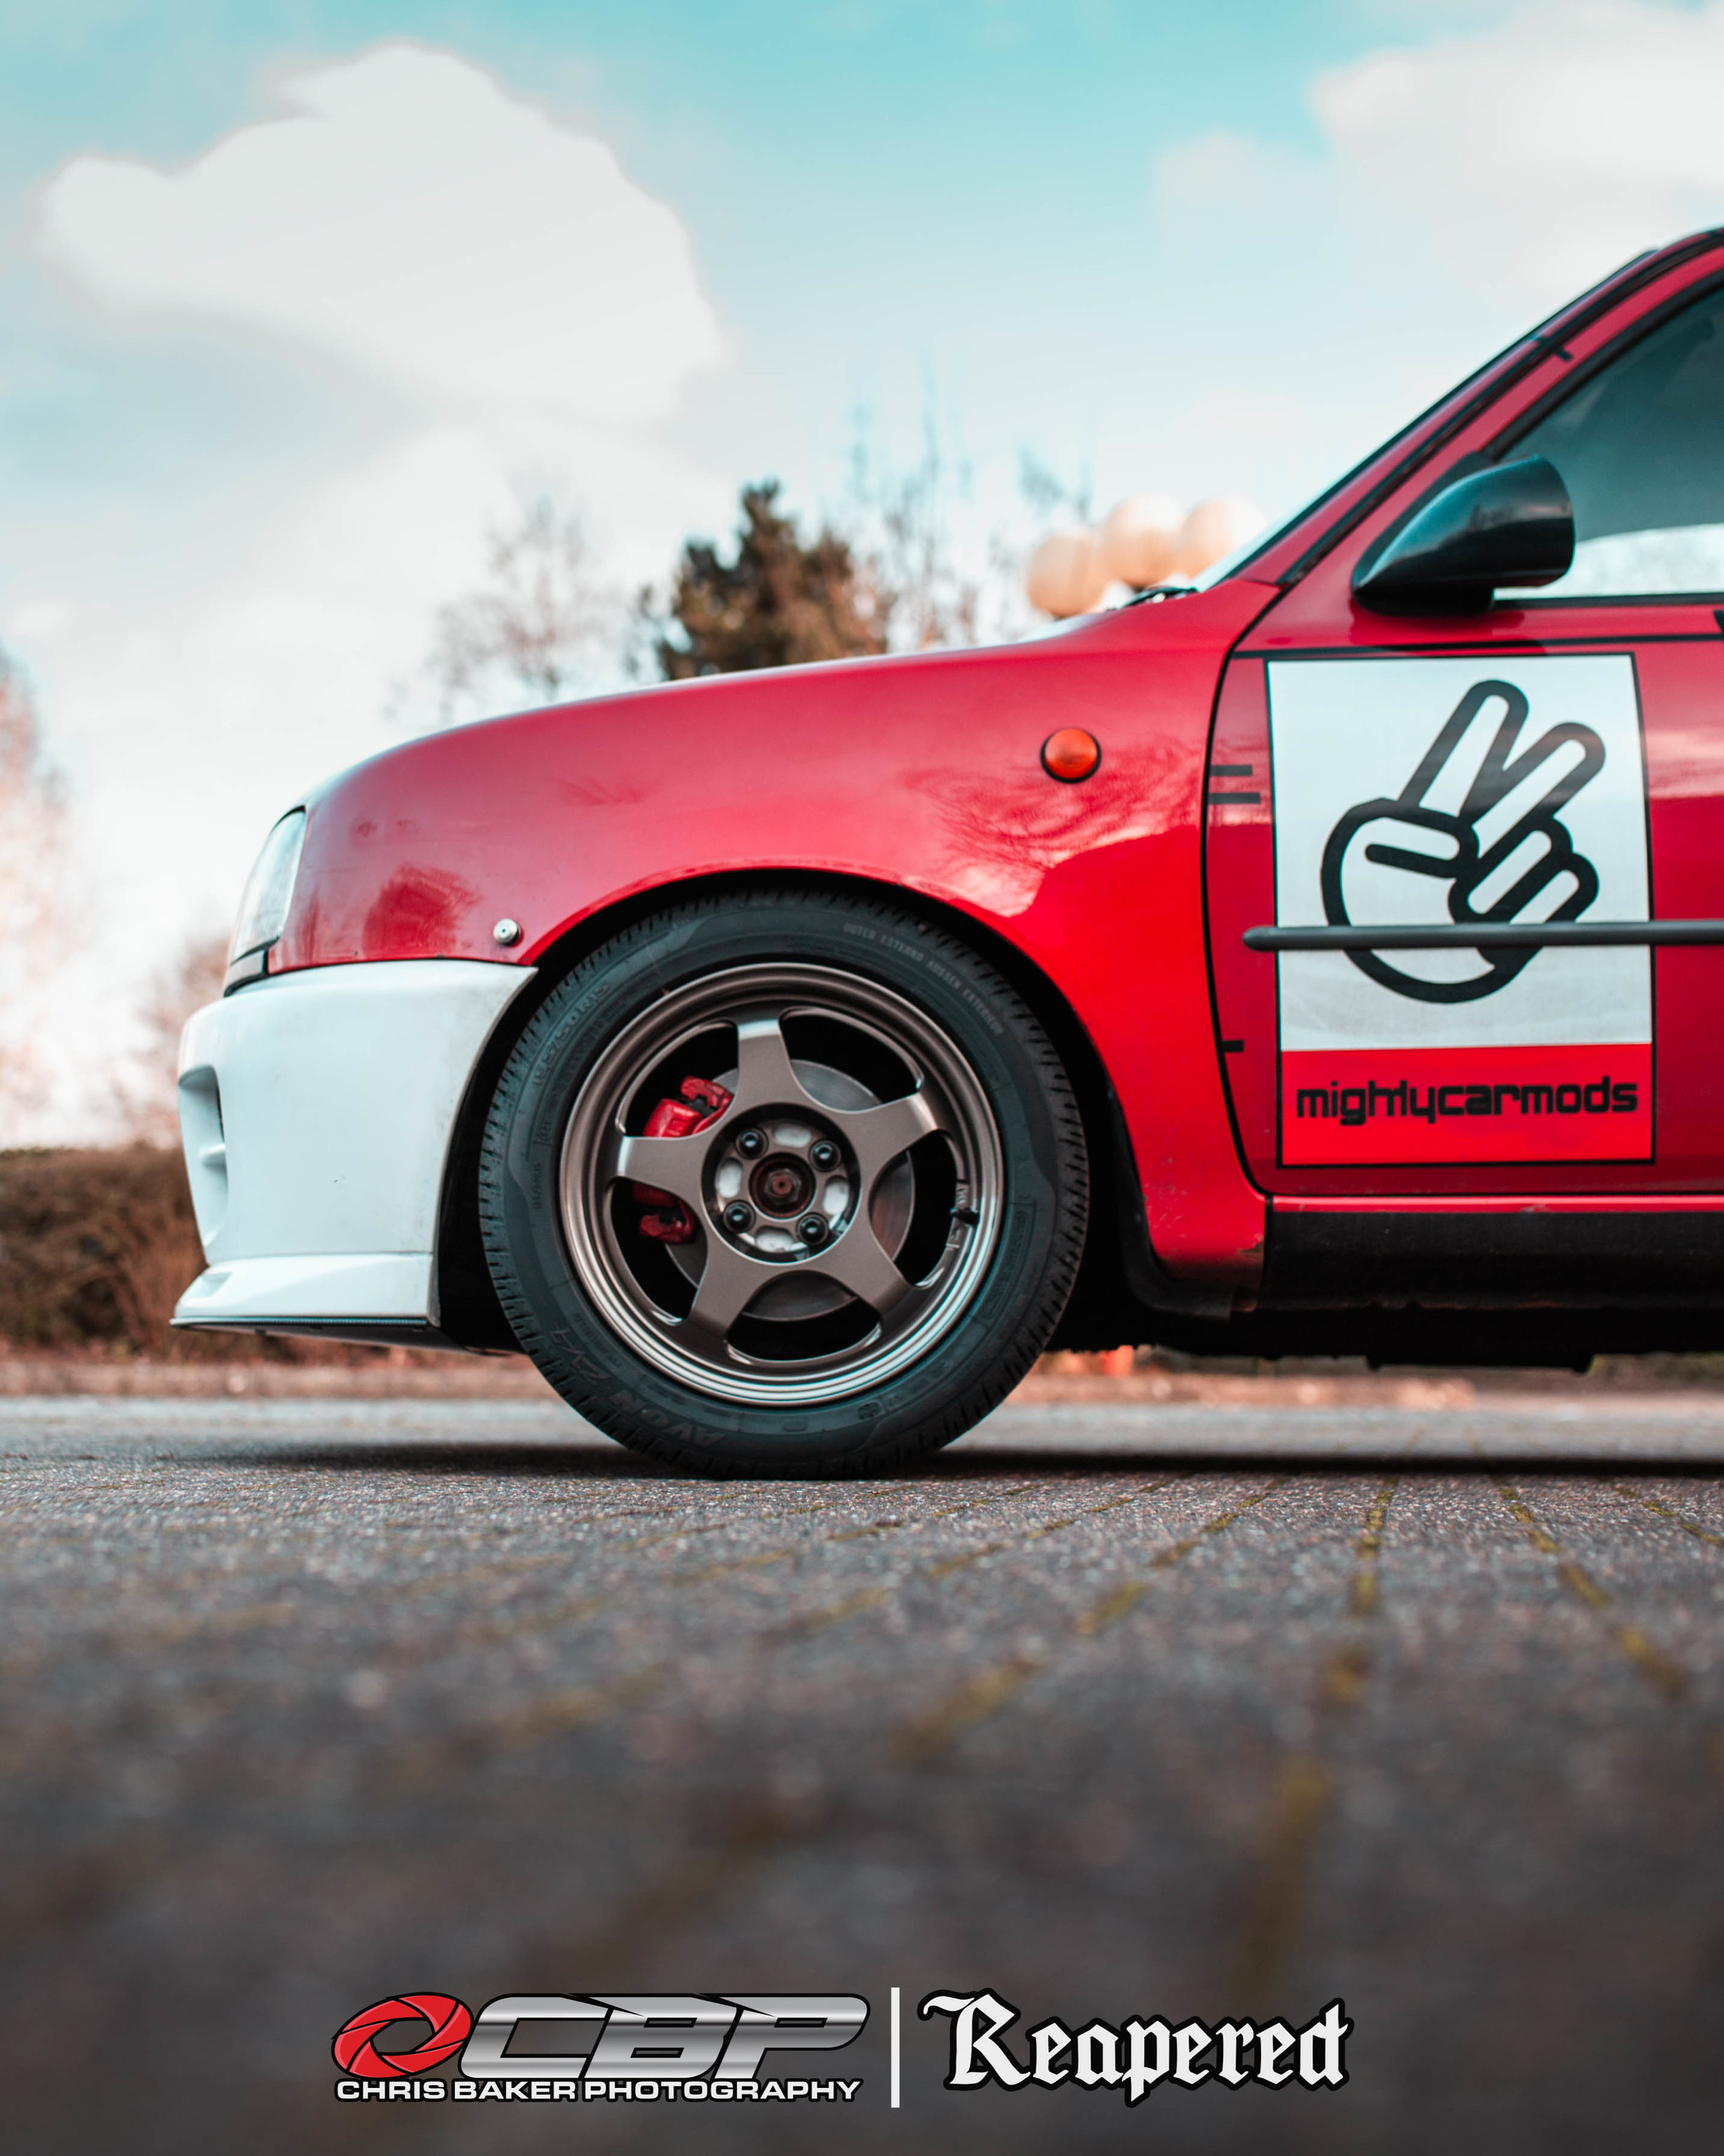
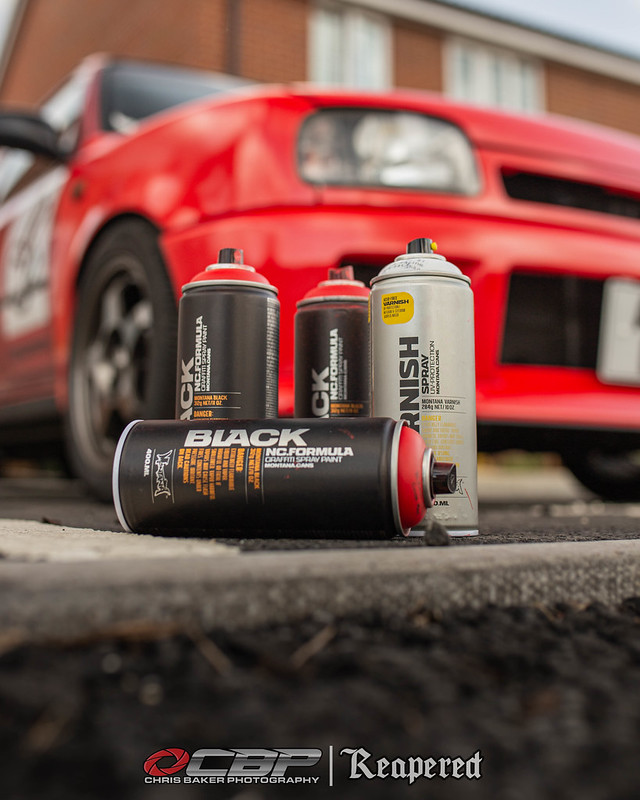
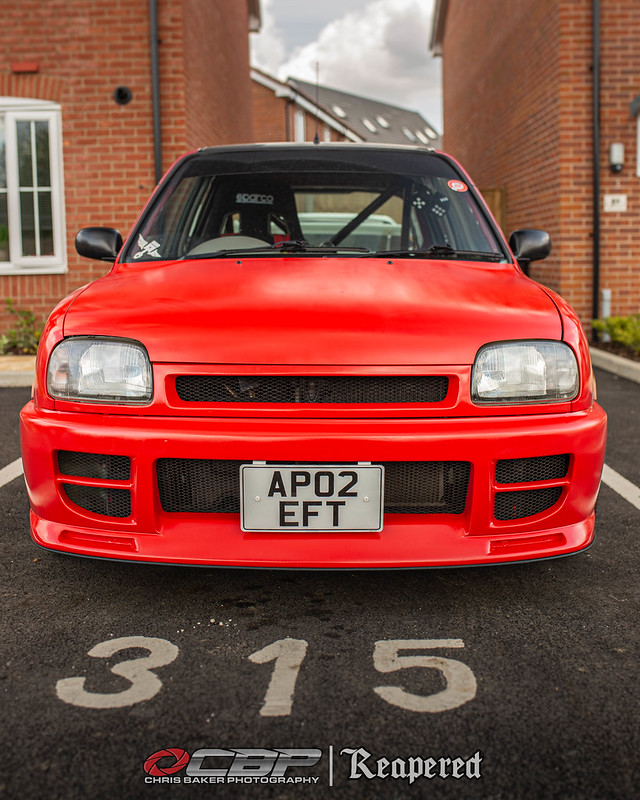
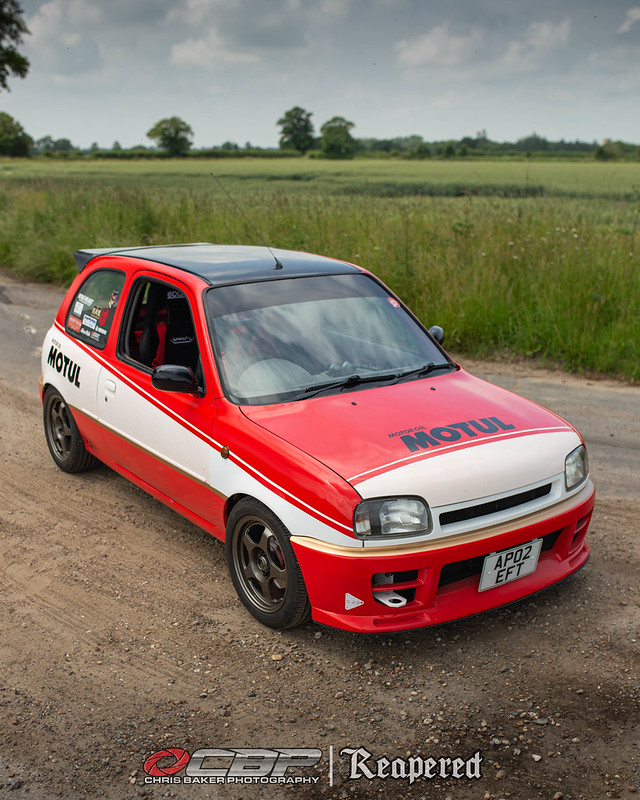
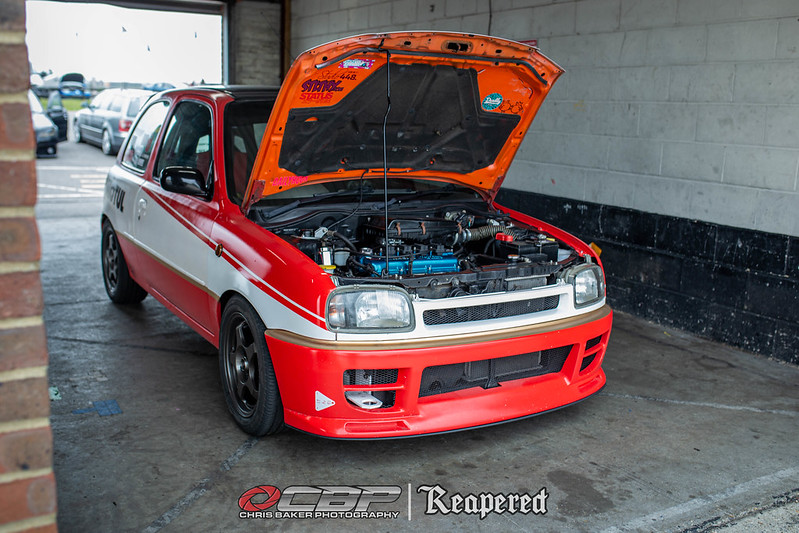
We then used 8 cans of Montana Black Code Red with pink dot caps to paint the car. Someone recommended these caps as they give a wider spray pattern. We also repainted the bonnet because it was streaky from when I had painted it at home.

51285414871_96b4032977_c.jpg


But we didn't stop there...

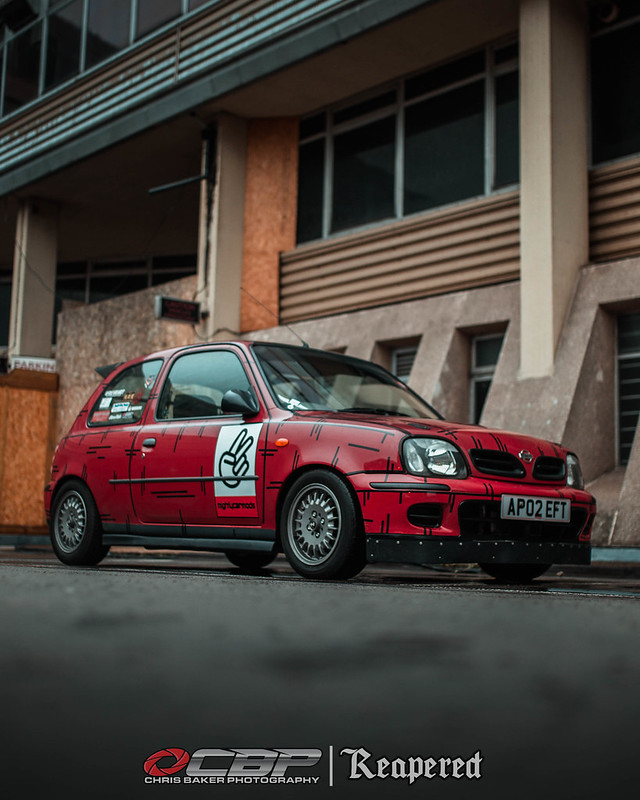
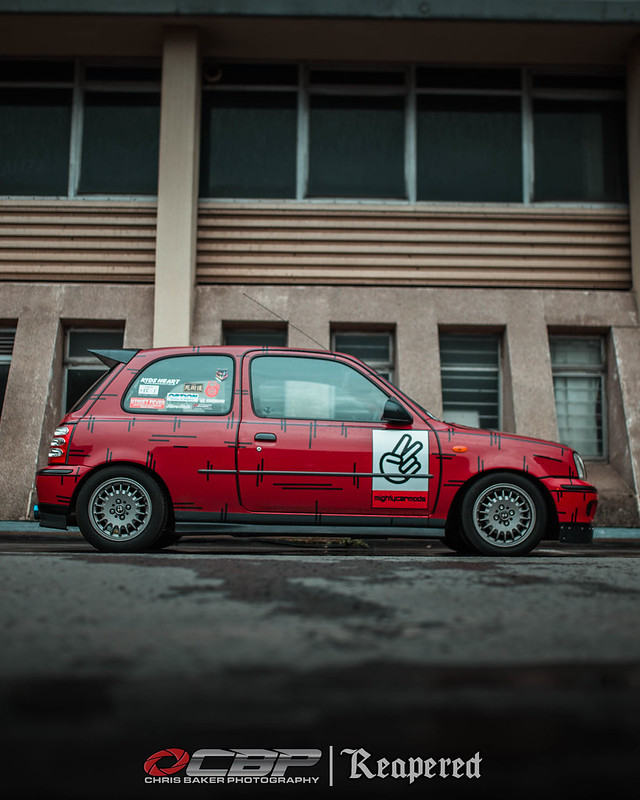
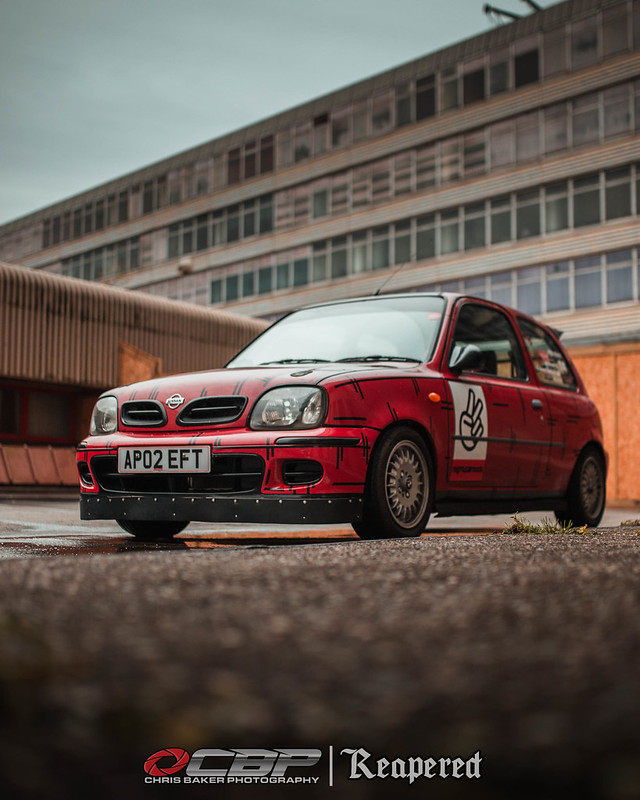
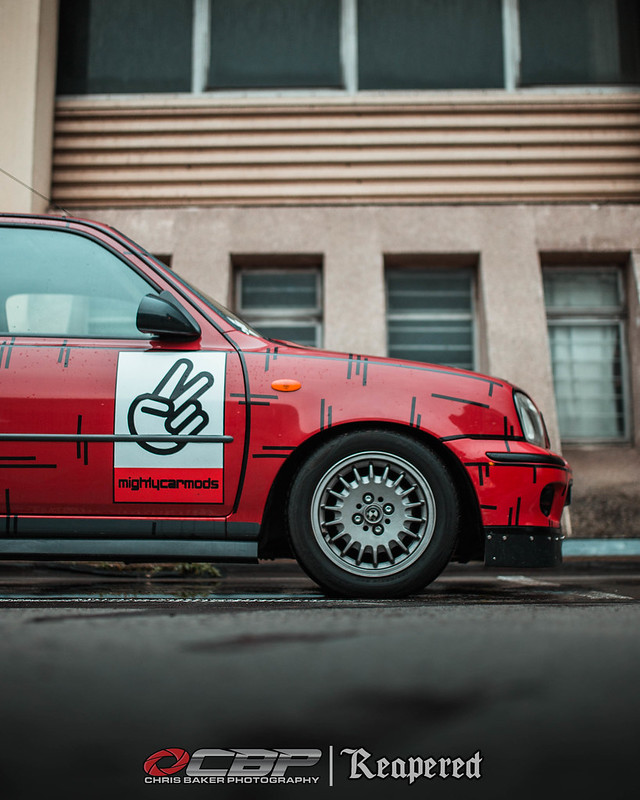
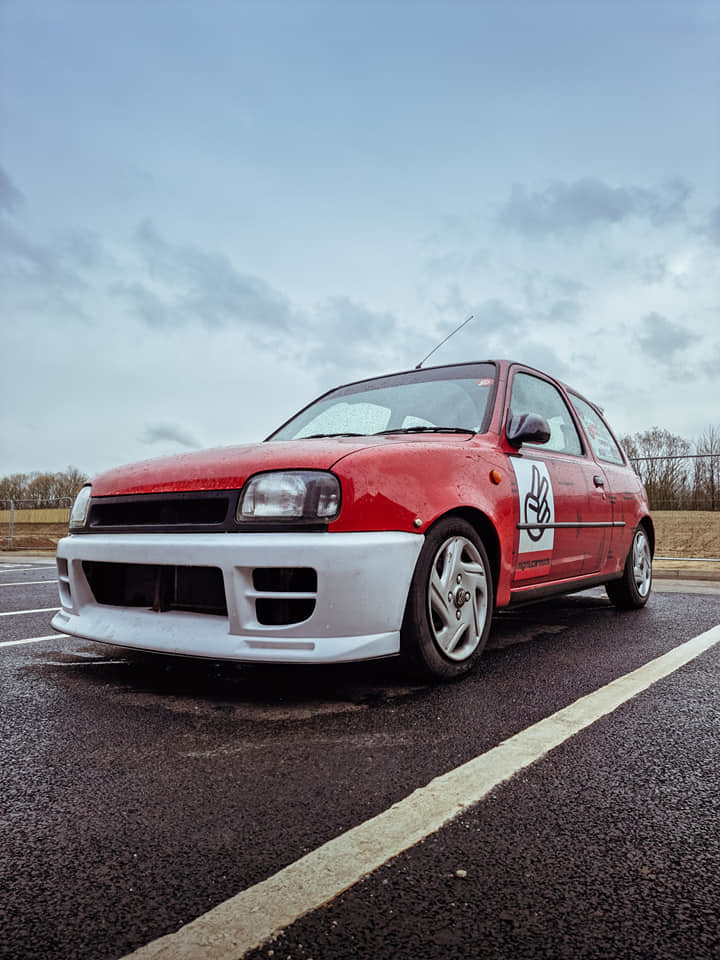
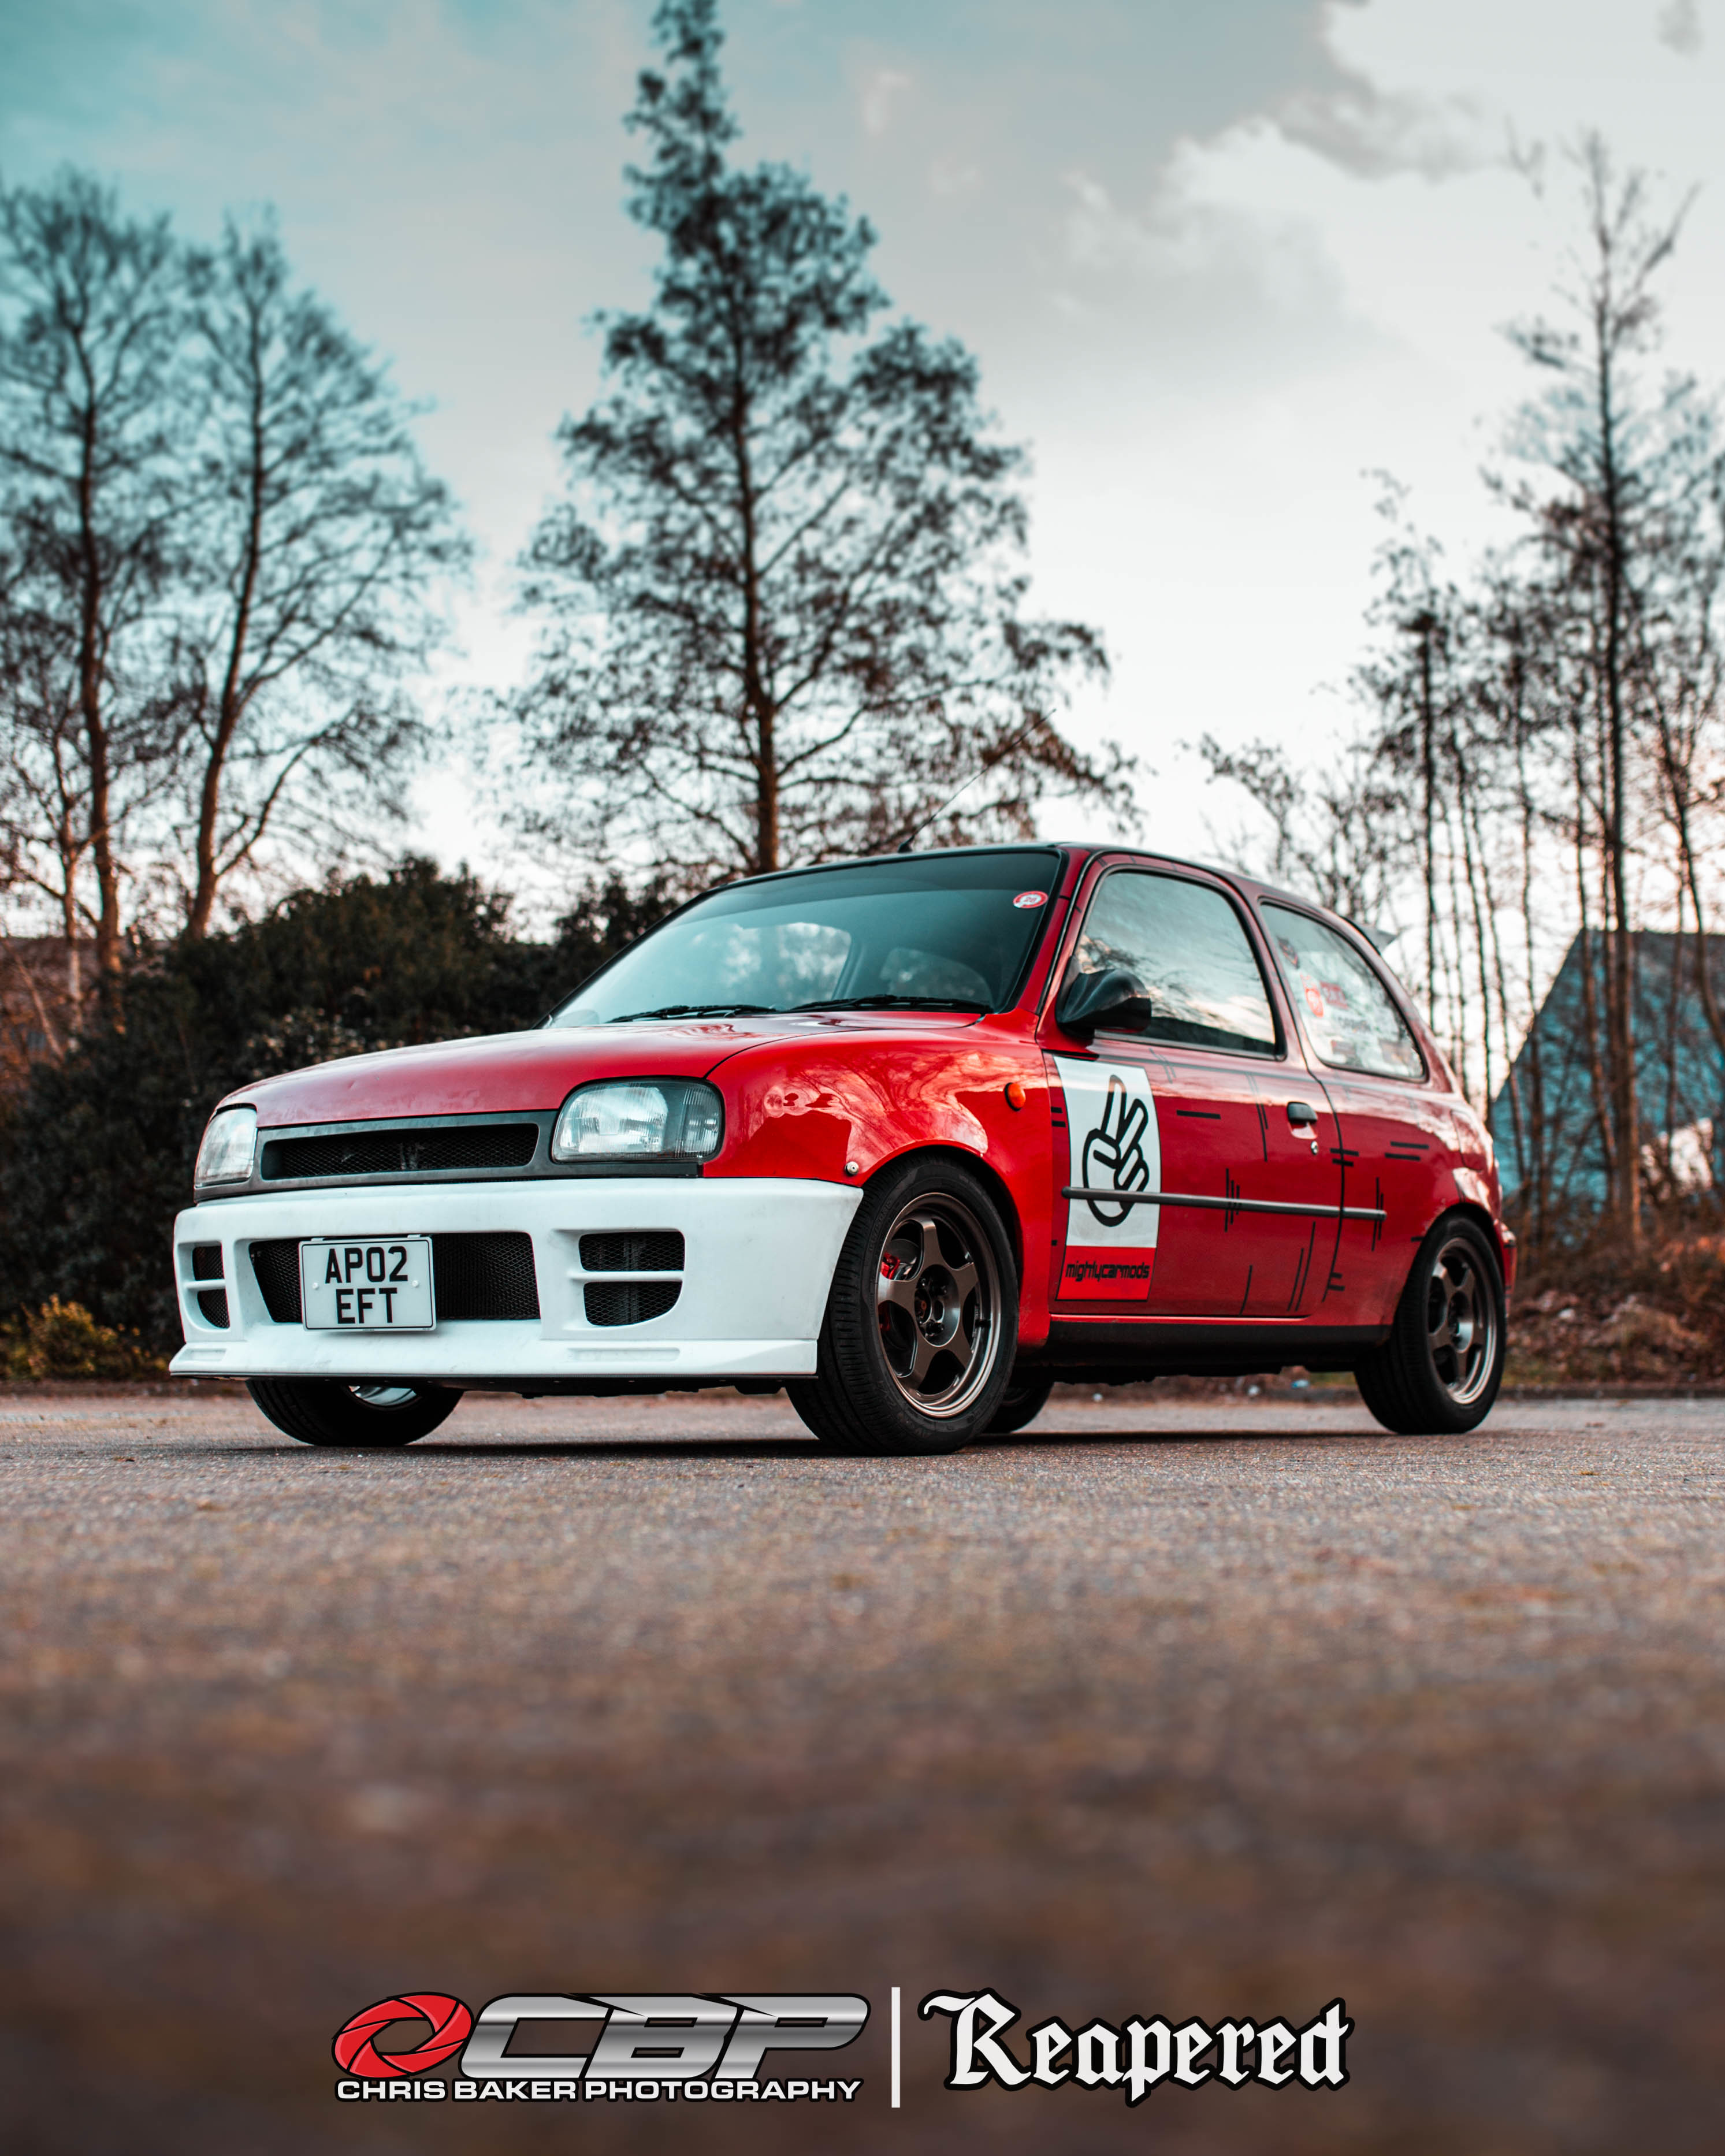
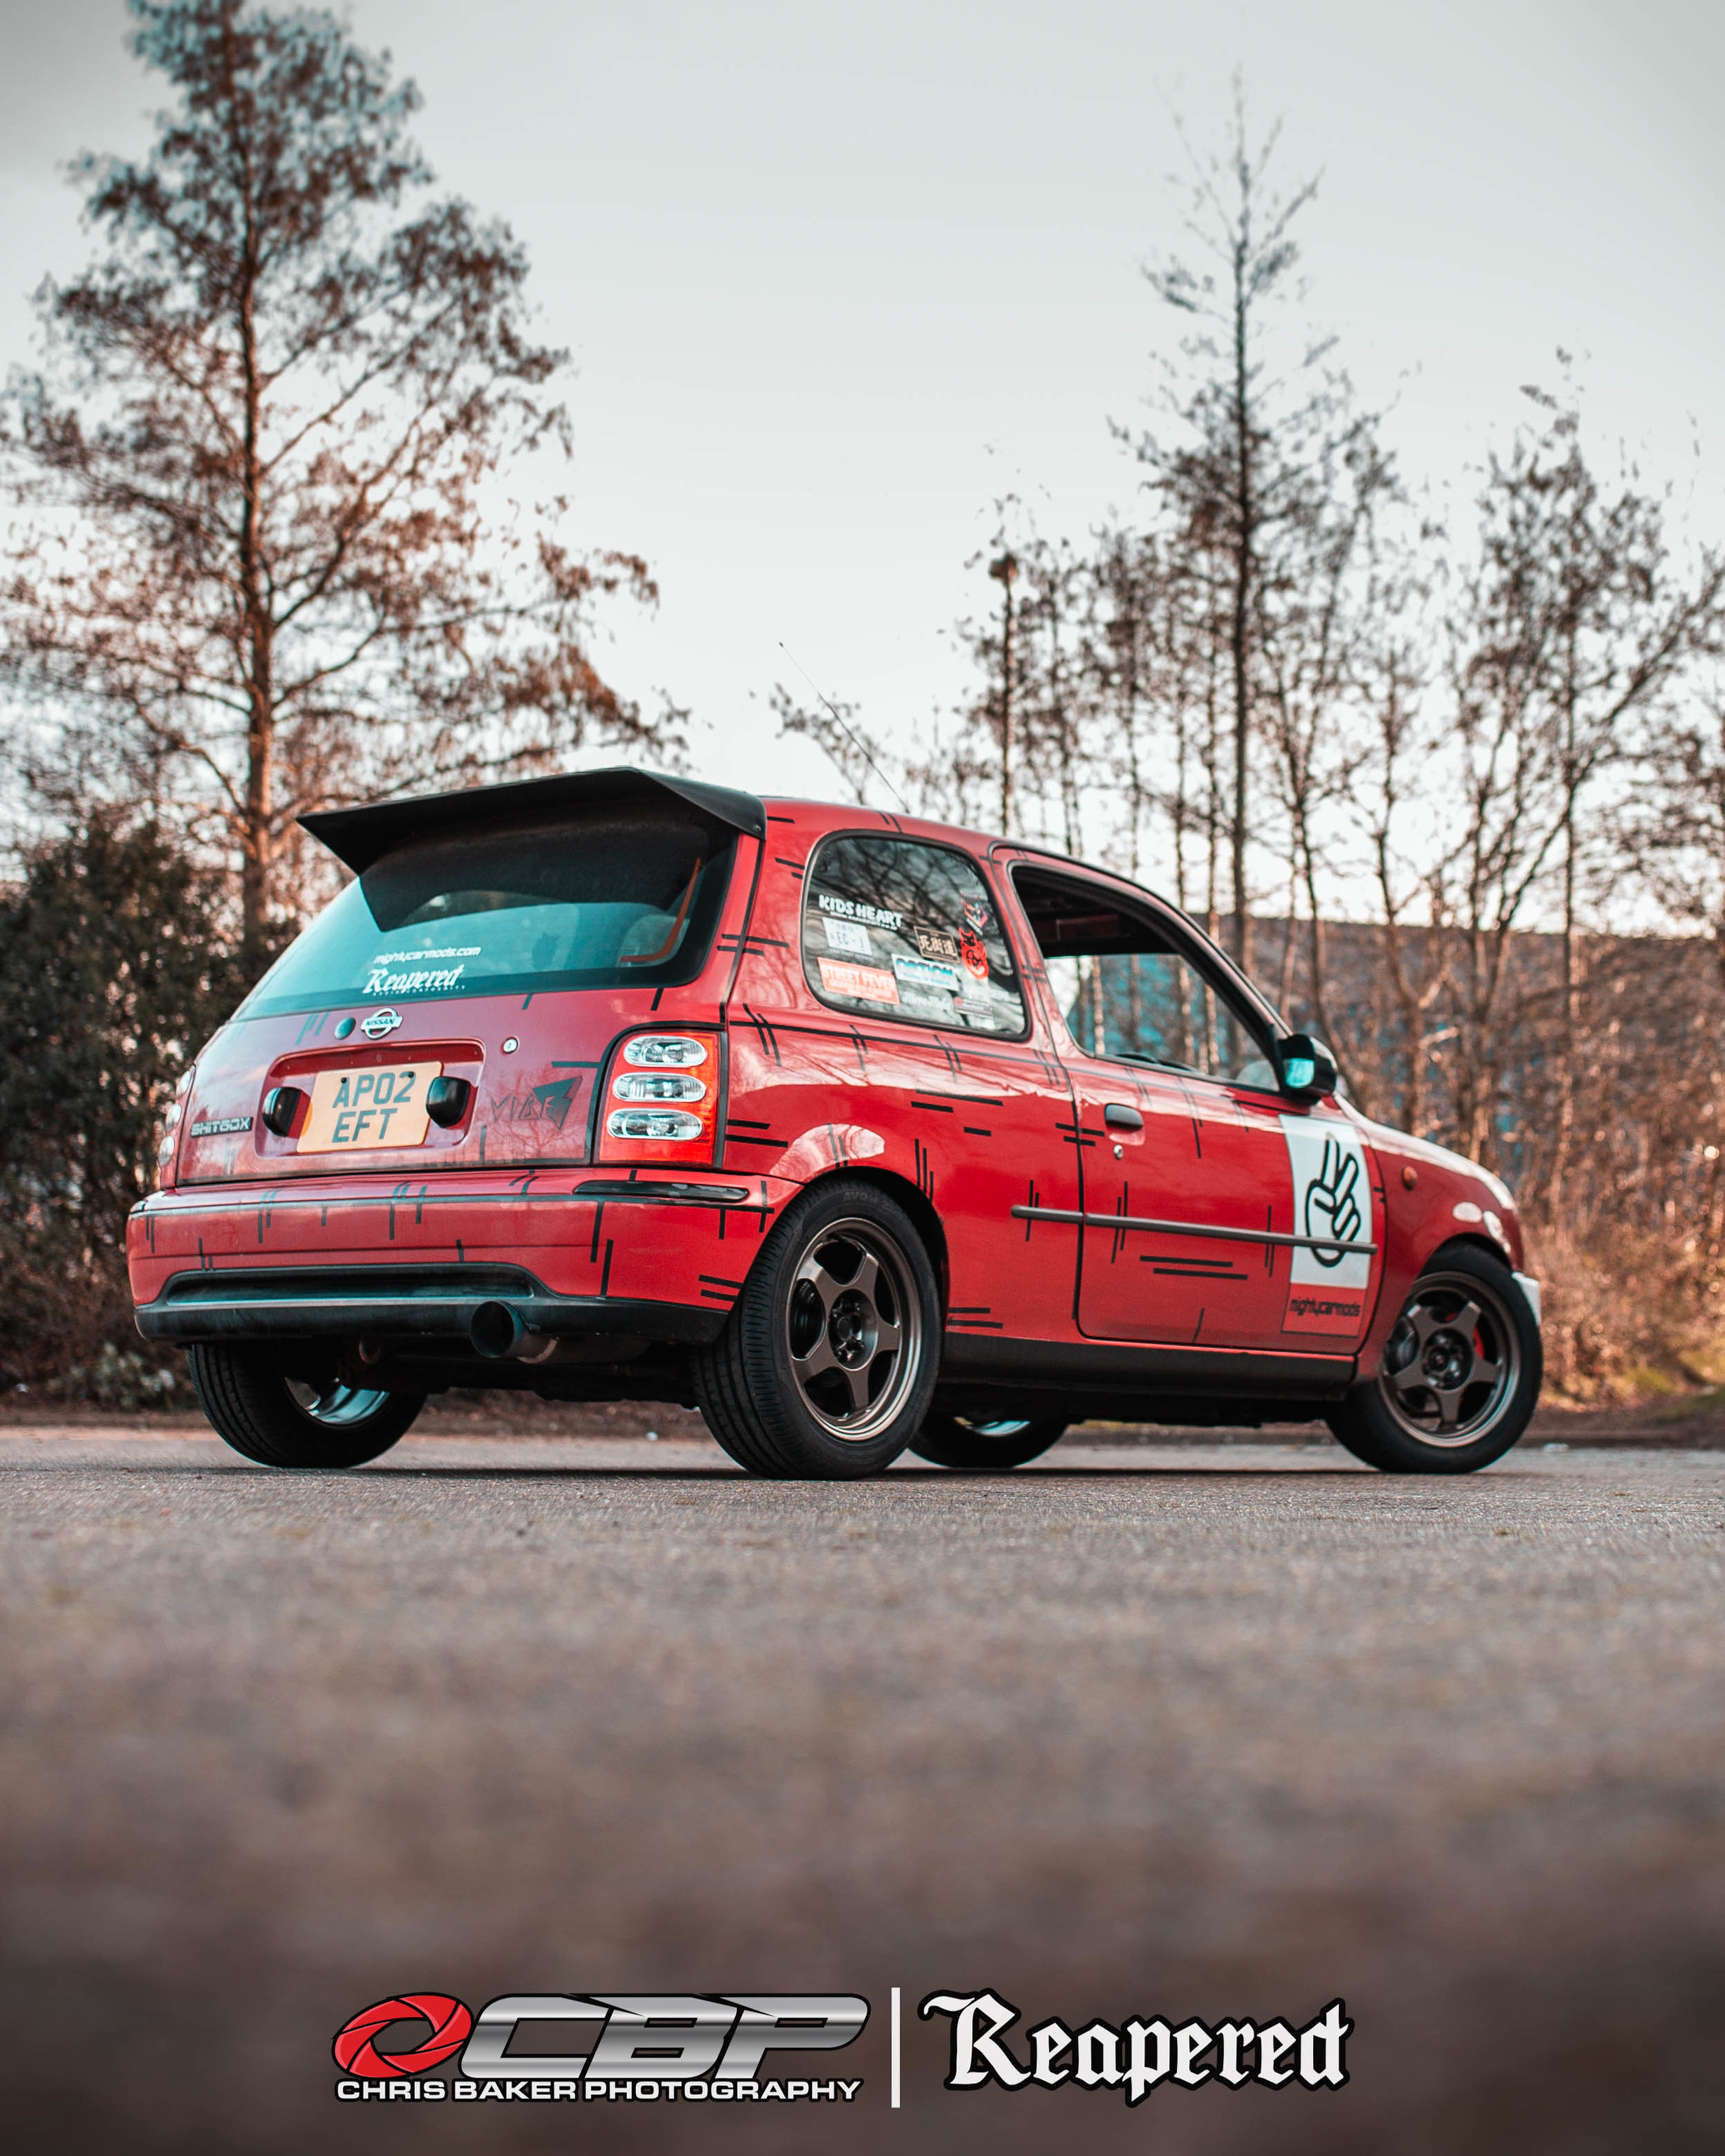
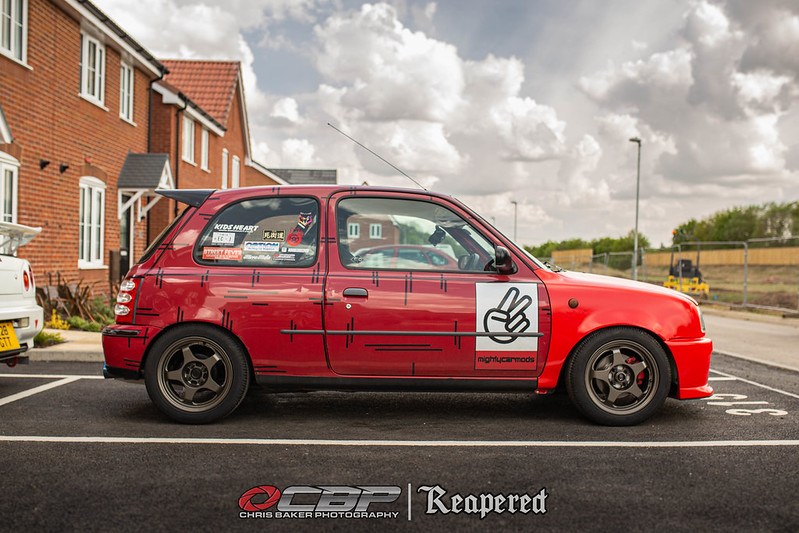
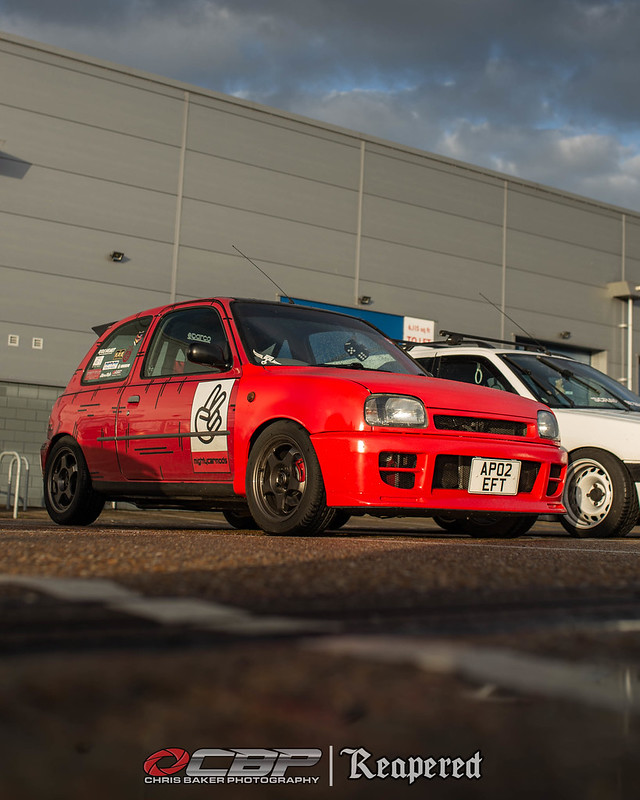
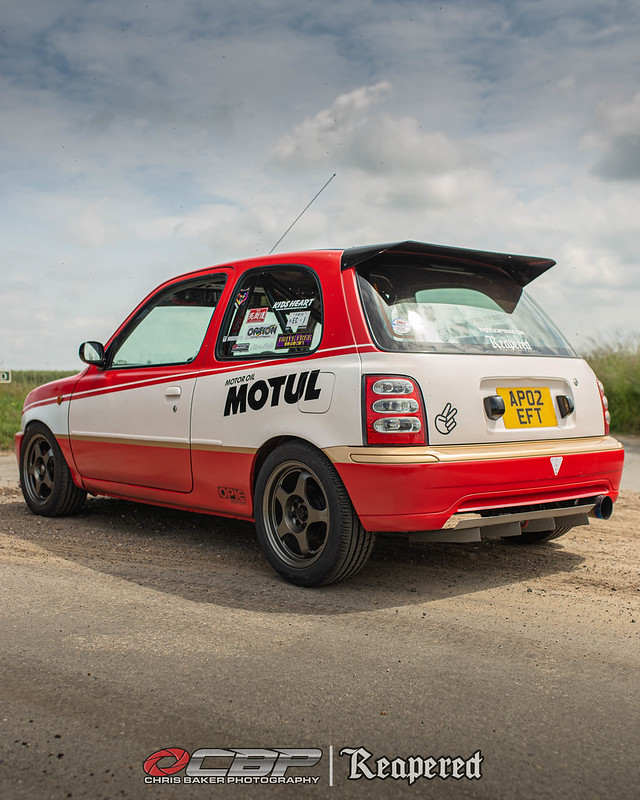
I thought it would be a great idea to PAINT a livery on. I didn't know how vinyl would stick to the graffiti paint so went this way instead.

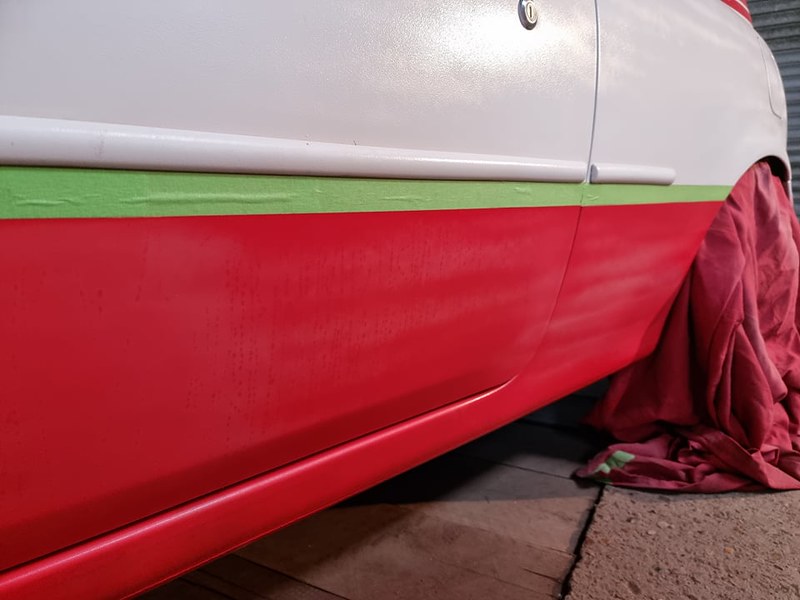
We started off by applying 6mm 3M fine line tape

51284663432_1b36697795_c.jpg


Masked off the rest of the car

51286433720_ceb24ac257_c.jpg


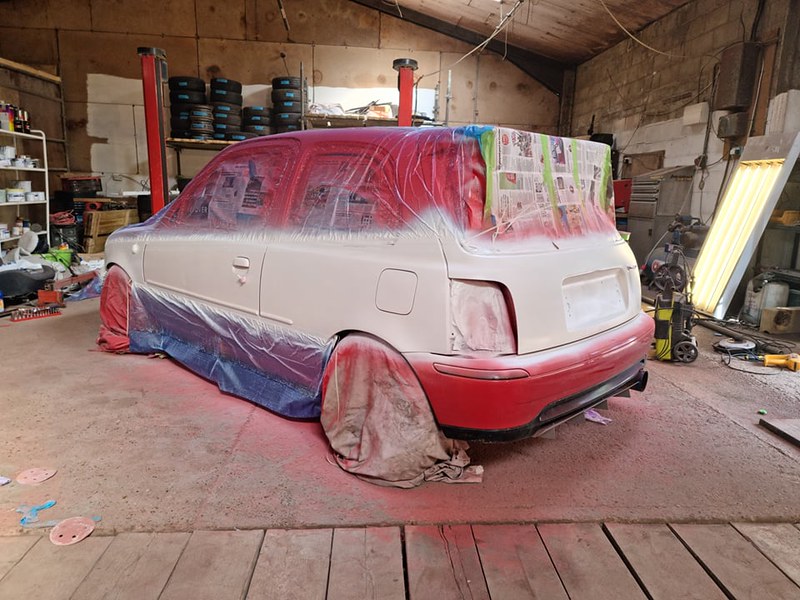
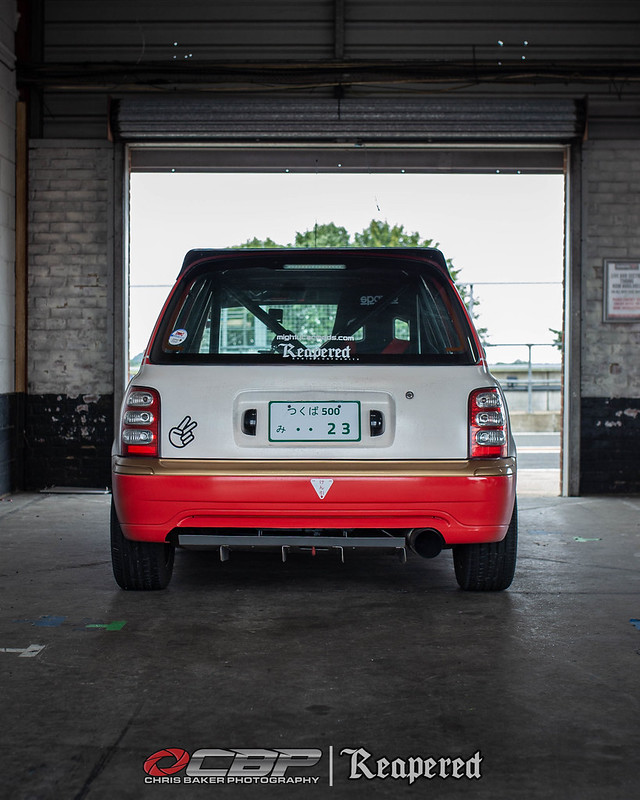
We then sprayed the areas with Montana Black Snow White

51286433745_53ee68d478_c.jpg


51285414801_aec2df6a58_c.jpg


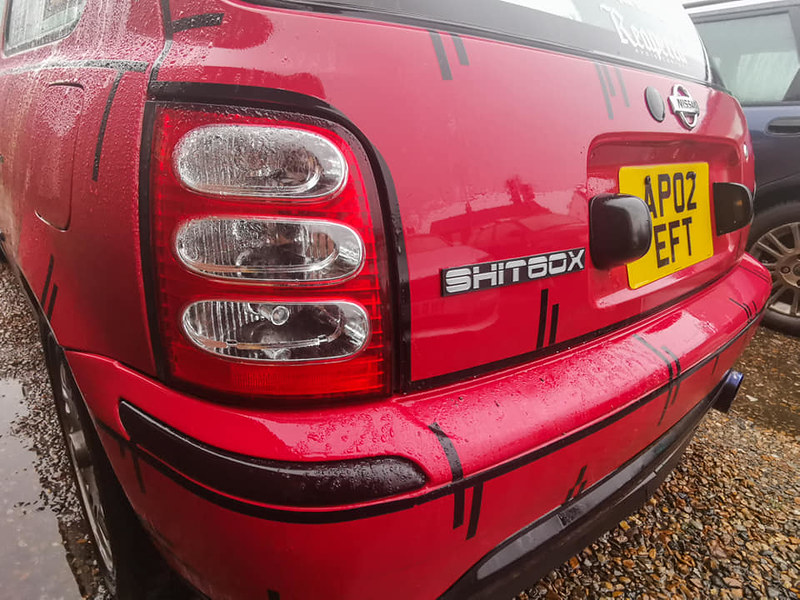
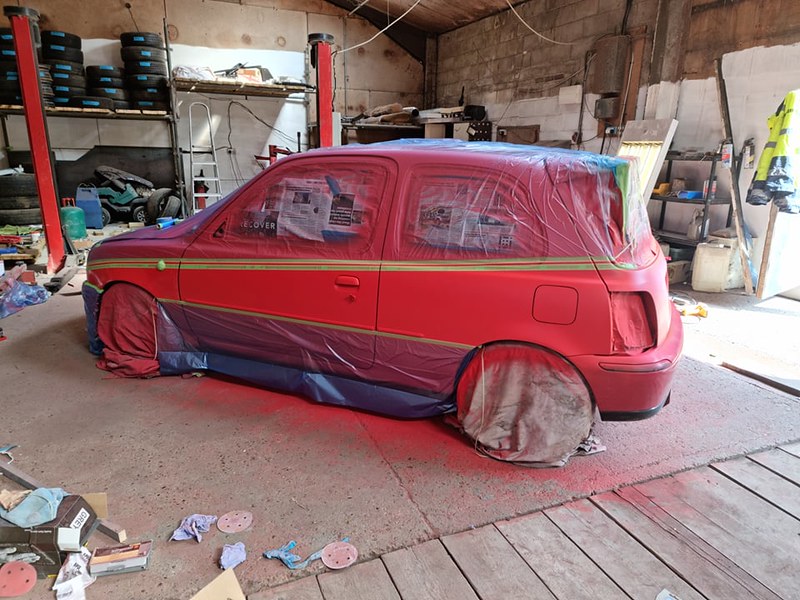
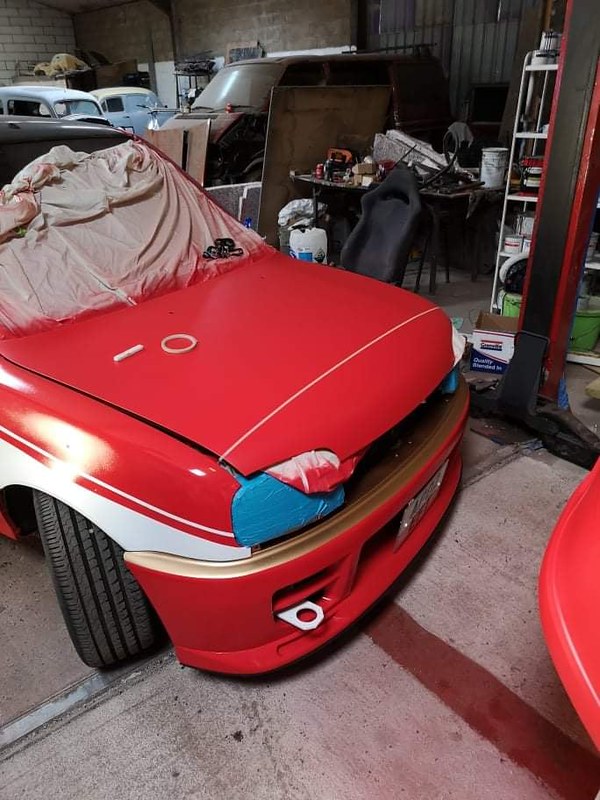
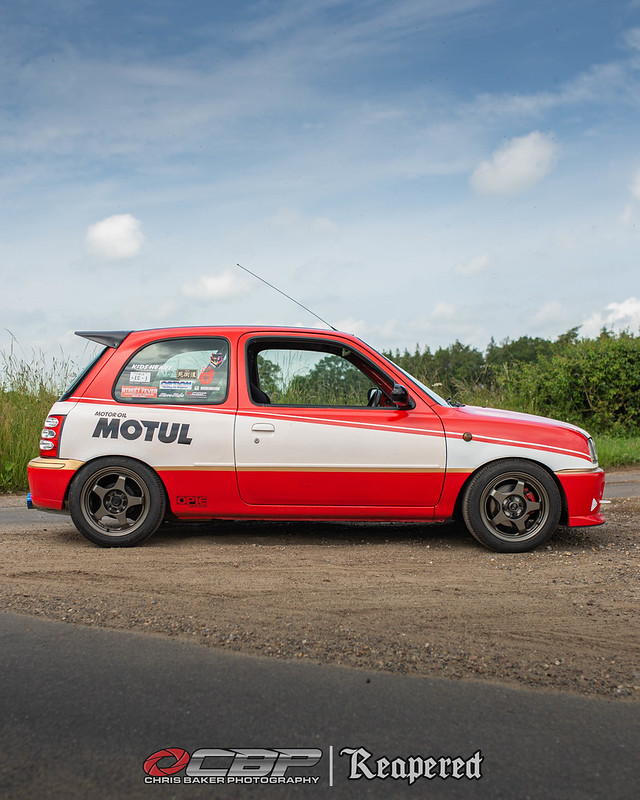
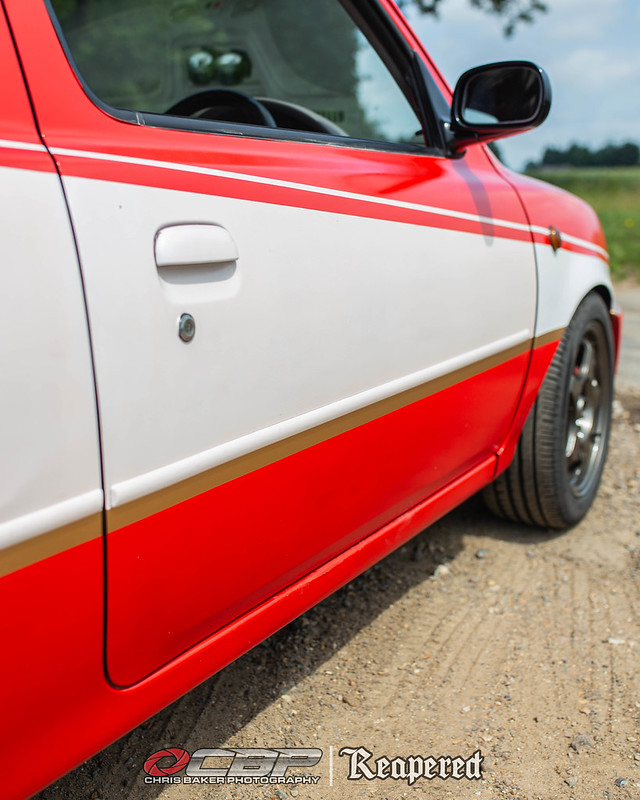
A band approx 25mm was masked down the sides along with the tops of the bumpers ready for the next colour

51284663512_d0bb7778bd_c.jpg


51286133304_046b6e56ac_c.jpg


51285584383_64b4988383_c.jpg


51286133339_a26fdaf76d_c.jpg


51284663407_6949d3e08f_c.jpg


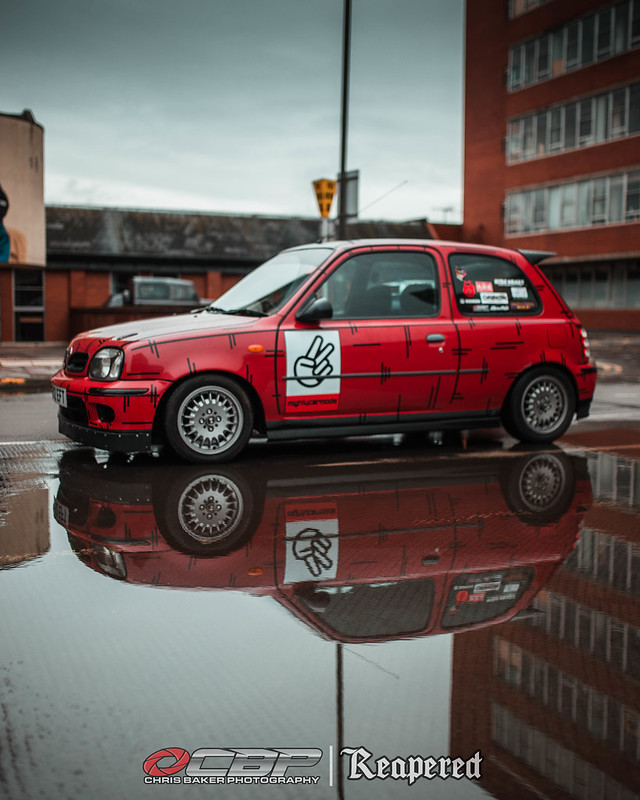
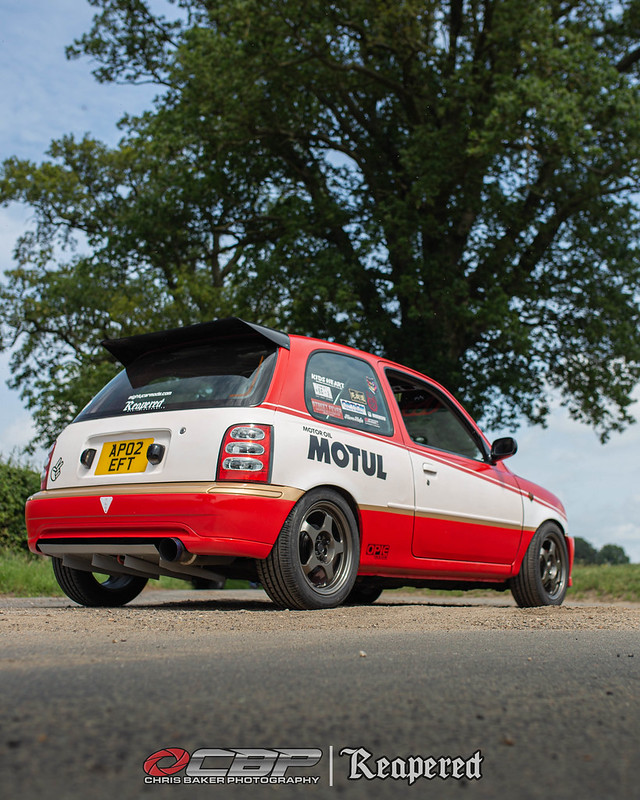
Very happy with how crisp the lines have turned out

51285584358_818da86df6_c.jpg


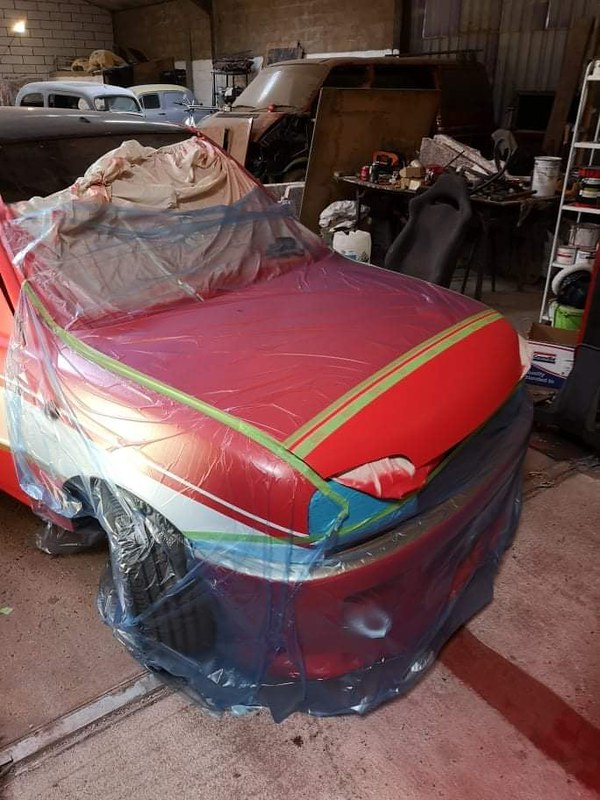
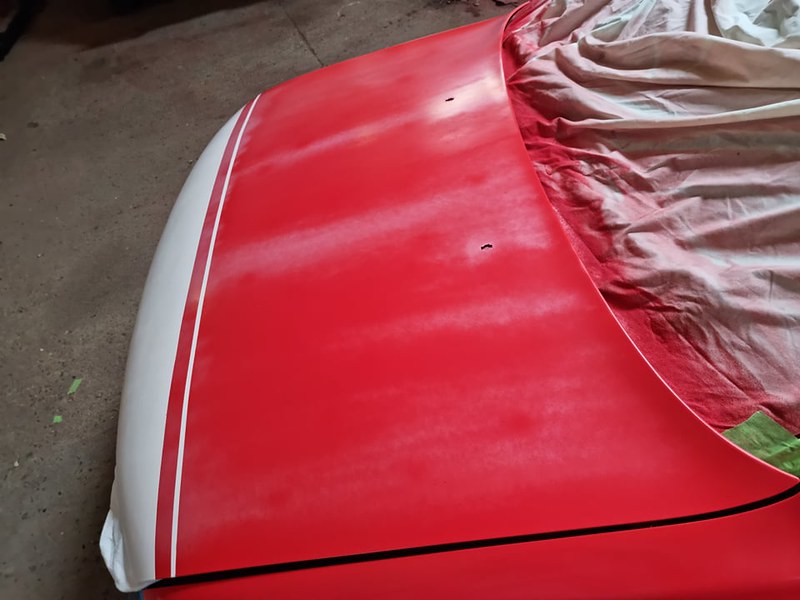
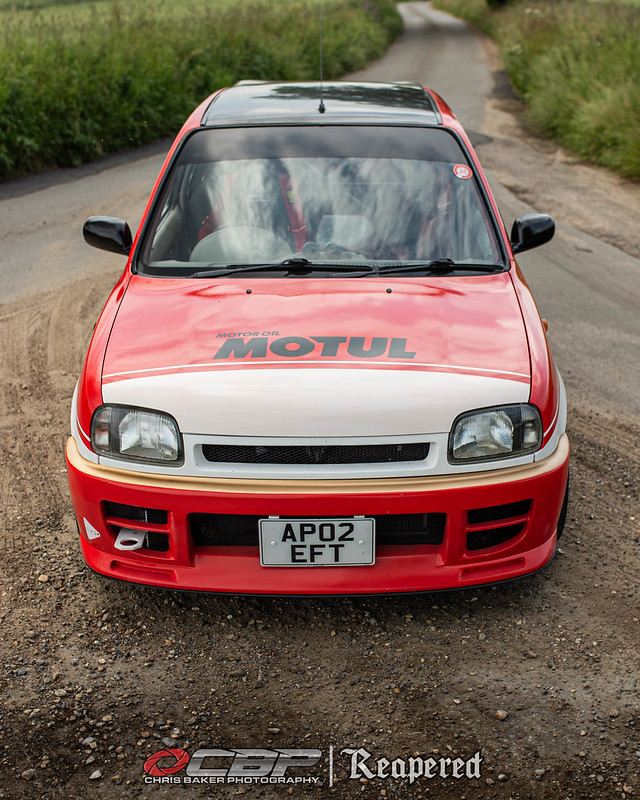
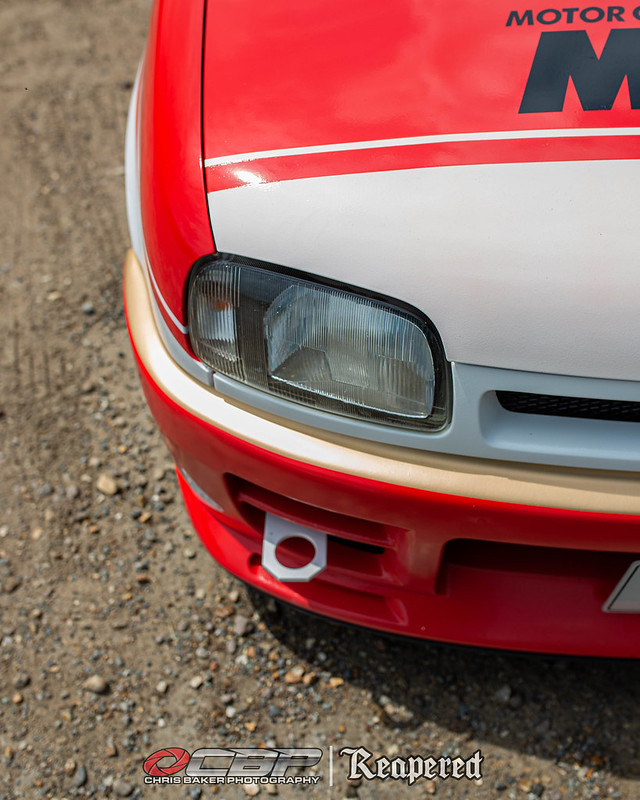
Next was to fine line the bonnet and spray that white

51284663492_7d27b6b846_c.jpg


51284663327_3e94259e8c_c.jpg


51284663357_1ce575d9fb_c.jpg


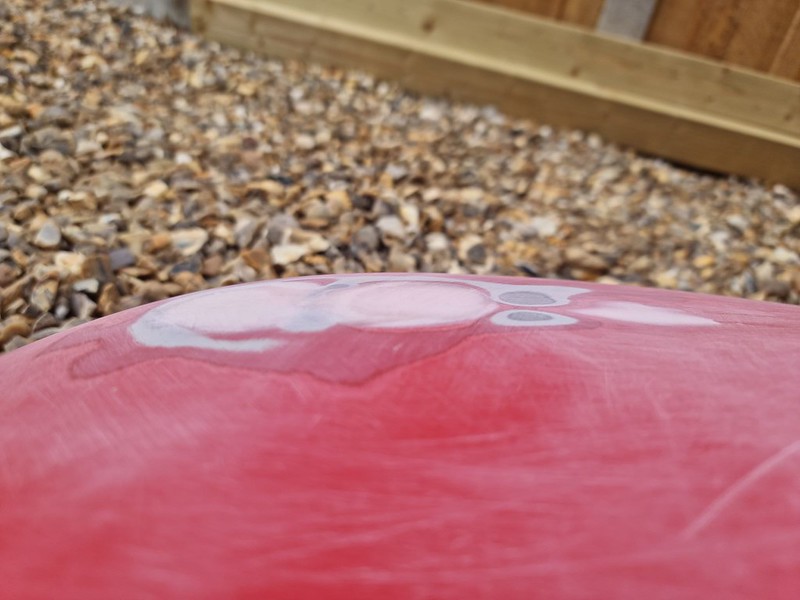
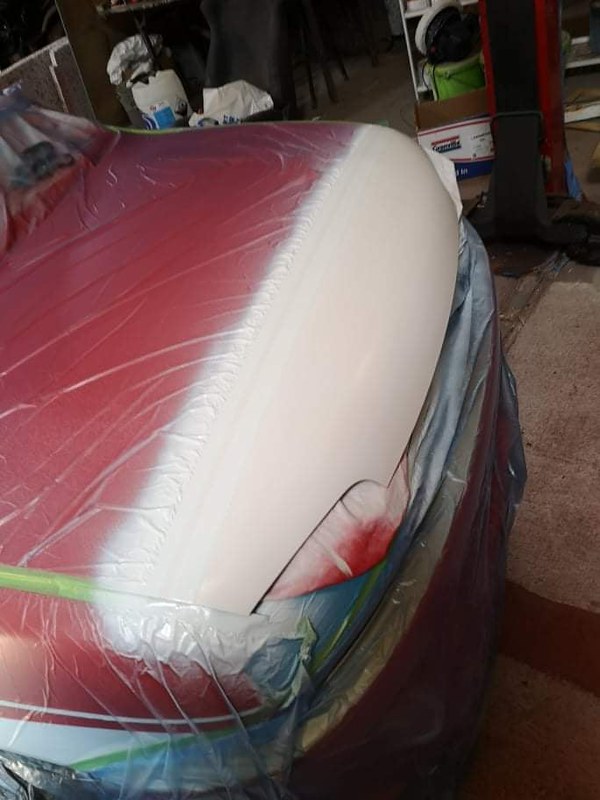
It was time for the clear coat. I applied the first coat of Satin lacquer (Montana call it Varnish). By the time I had done the whole car, I noticed it had started to go cloudy in places.

51286133204_7366760648_c.jpg


51285414676_d03cf4416a_c.jpg


Perhaps it was too cold in the unit? So we pulled out the little heaters and see if there were any improvements

51285414736_1ecd4dc6b6_c.jpg


Much better!

51285584208_bf2fd20e21_c.jpg


But the bonnet was proving to be a real struggle. I tried spraying far away and up close, tried the wider nozzle and normal nozzle, tried holding a heater above and then spraying. Nothing was seeming to work....ARHH!!

51285584258_3f4e6634c3_c.jpg


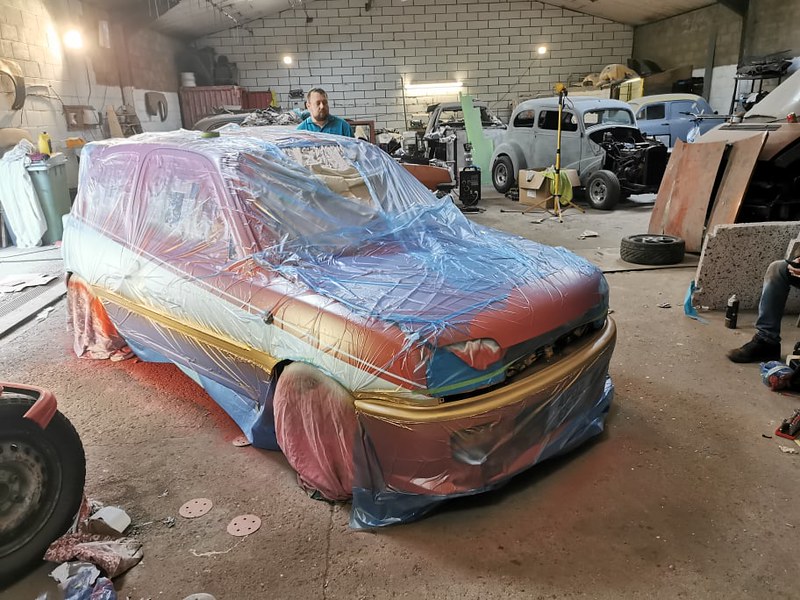
In the end my friend mixed up 500ml of 2k lacquer and used his spray gun. Not ideal conditions but its the only option we had

51284663307_a349560598_c.jpg


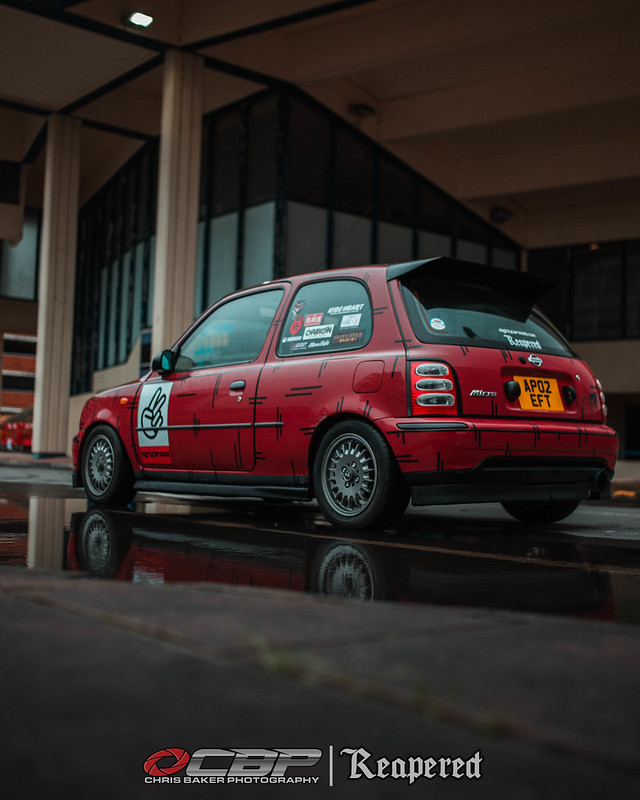
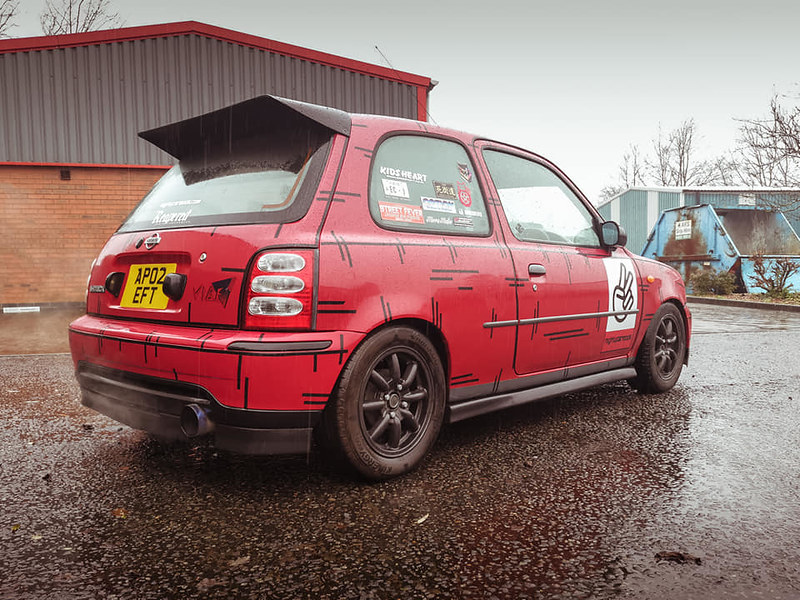
He did a single coat/pass over the whole car, left it about 20mins and we unmasked. This was now the end of the 2nd full day and we would return the following morning.
 
OP
OP
hoodedreeper

hoodedreeper

Ex. Club Member
It was another early start and I was petrified of walking through the door, hoping the 2k lacquer hadn't reacted with the graffiti paint. To my delight it hadn't, woohoo!

Although the first thing I noticed was the white on the front wings and the grille were brighter to the rest. Thats because the white was sprayed over the lacquer and then lacquered over the top. Later on all of the white will get re-done so it'll eventually match

With the windows unmasked it was time to fit the graphics followed by cleaning the glass,roof and spoiler.

51285411451_fbb5dcd927_c.jpg


51285411591_1dff5a504b_c.jpg


51285411581_98170e160c_c.jpg


51286430430_a0d9af0cca_c.jpg


51285411551_2ea8d9319b_c.jpg


51286129814_129d3857be_c.jpg


51286129764_be131a351f_c.jpg


51286129854_4eaa595307_c.jpg


51286430340_9de93ca830_c.jpg


Yes, I know the tow sticker isn't above the tow eye. I'll get another one cut lol

51285580758_04dbc7ed7a_c.jpg


51285580788_6c9368f9c4_c.jpg


51284659852_f247351bb8_c.jpg


51286129679_b53b7778dc_c.jpg


51285580708_e307361610_c.jpg


51284659967_9de93ca830_c.jpg


Painting in a dusty unit isn't ideal, it has its faults and flaws but we can all agree it's much better than it was before :)

We got the car done and had arrived at Peterborough East of England Arena the next day (Saturday 3rd July) for one of the UK's largest modified car show, Modified Nationals.

51289013998_d4b67fc09c_c.jpg


Turns out the Micra got more attention than my R34
 
OP
OP
hoodedreeper

hoodedreeper

Ex. Club Member
Wednesday this week I had my first track day at Snetterton accompanied by some friends (Supra Mk4, Fiesta ST and Mini One)

51316714865_267ee04d23_c.jpg


It had been awhile since I had done a track day (Snetterton 2015 and Lotus Test Track 2016, both in the purple MX5)

The day started out overcast with a drizzle of rain on the sighting laps. Spent the morning avoiding getting in the way of everyone else

51316437389_06dbef50fc_c.jpg


51314970587_eb2b8074e8_c.jpg


I think the majority of the time was figuring out which gears to use for each corner,cornering speeds, braking distance, when to accelerate out of the corner etc Theres so much to think about without realising.

51314970662_8bcb770f6a_c.jpg


51315916983_d95cbabb75_c.jpg


After lunch things started to improve as the track become quieter. I was very surprised the brakes hadn't boiled up, it was a good decision to get the fluid flushed through with Dot 5.1 a couple of weeks prior. I was still on the Pagid discs and ADL Blueprint brake pad, they survived the day and got me home. Probably because I eased onto them rather than braking late, which obviously effected 'times' and flow

51316437524_cd007d0801_c.jpg


51316714980_3e47a71a61_c.jpg


The Avon ZV7 tyres held up pretty good too. After a couple of outings I dropped the pressures to 29-30psi and left them at that. Whether I should have increased/decreased them more I'm unsure?

51315917033_c8cd21d560_c.jpg


51316437469_282c28bcd1_c.jpg


As expected the car struggled on the straights,purley because of the 1.0L gearbox. Quickest I got down the back straight was 95mph backing off at the first brake marker (again, didn't want to kill the brakes)

51316714820_2662f27784_c.jpg


51315916768_d69dc7fbd3_c.jpg


Confidence was much higher towards the end of the day so switched on the GoPro for the last couple of outings. Still lots to learn but that will come with more seat time :)

 
OP
OP
hoodedreeper

hoodedreeper

Ex. Club Member
Considering selling my K11 but no idea how to value it.

2001 Vibe (approx 70k)
Originally a 1.0L
MOT till June 2022

New Battery fitted October 2020
New Radiator fitted October 2020
New Alternator fitted June 2020
Genuine Clutch Cable fitted April 2021

Engine swap was done in October 2020
1.4 Engine (done approx 110k)

**Engine and ancillaries was cleaned and painted. All sensors,gaskets/seals,Waterpump, drive belts,spark plugs,thermostat and fuel filter were replaced with new. 90% bolts changed to stainess allen cap**

1.0 gearbox with Blueprint clutch kit
eBay short shifter
Engine bay painted in Satin Black
Gizfab 421 Manifold
Gizfab Centre Section (2 resonators)
Universal stainless backbox (pipework tailor made to match original)
Almera GA16 airbox (OE air filter)
Mishimoto PAS reservoir tank
Unbranded FR Upper Strut Brace
(Non air-con car)

Almera vented calipers (all fitted February 2021)
Pagid brake discs
Blueprint brake pads
DOT 5.1 fluid
(MOT brake pipe and handbrake advisory replaced June 2021)

Stock FR shocks (will be replaced as they were an advisory)
Matiz 30mm Springs
RR KYB Corsa B shocks
RR K11 30mm Springs (2 coils cut off)
Gizfab Adjustable Panhard Rod
Caged Laser 4pt Roll Cage
(Non Anti Roll Bar car)

Interior stripped
Floor repainted in smooth red hammerite
Sparco Sprint L bucket seat
Original seat rail modified to fit
OMP 4pt harness (3" shoulder webbing)
OMP 300mm? Steering Wheel
HKB S13 boss kit
Rev Counter clocks (mileage reads 137k)
Horn button relocated
5 Panel wink mirror
52mm Oil Temp and Water Temp gauges
FR Aluminium door cards
JVC bluetooth CD player
6x9 boxes behind seat(s)
(Nismo gear shift knob not included)
*Spare dashboard included*

Repainted in Montana graffiti paint with 1 coat of 2k lacquer
Prefacelift front end swap
Headlight Inserts painted black
Impul replica FR bumper
Custom undertray
Custom FR tow hook
Open Mouth Grille
Gloss black vinyl wrapped roof
Gizfab Devil Wing
March K11 tail lights (split and colour lenses removed) inc LED bulbs
March K11 number plate lights inc LED bulbs
Bootlid welded and smoothed inc RR wiper
Rear bumper cut
Custom RR diffuser

All inner arches undersealed
Boot floor undersealed
All jacking points strengthend and undersealed
Floor and sills will hopefully be re-undersealed if I have time
Front Cross Member in good condition

Rota Slipstreams are NOT included. Car would come on steels

Pretty sure theres some stuff I've missed

Ive spent 4.5k building it, I know I wont get all of my money back but this is a well built and spec'd car
 
OP
OP
hoodedreeper

hoodedreeper

Ex. Club Member
The car was advertised for 2 days and today it sold and drove away.

As far as builds go it was probably 90% done. I had planned on buying a Tornado Systems ECU, K12 injectors and an intake with remote MAF from Matt Humphries, smoothing out the map and increasing the power to approx 110hp. It would be alot of money for not alot of gain which was one of the deciding factors. Boosting or engine swap were out of the question due to time,space and money.

I had planned on buynig either BC Racing or Gizfab coilovers, stickier tyres and some improved discs and pads ready for the next lot of track days. Again, that would be in the £1100 region depending which suspension I chose.

I had alot of fun with the car, learnt new skills and would like to prove that with some planning and good choice of parts, you can build a pretty decent car.

The new owner is based in North London, hopefully he'll keep in contact
 
Top