Random stuff you've made.

markbognor

Ex. Club Member
Club Member
I was going to stick the bike up in the "into cycling" thread, but as I'm not actually that much of a cyclist I thought I'd put it here. The rest is some other tat that i've cobbled together over the years.

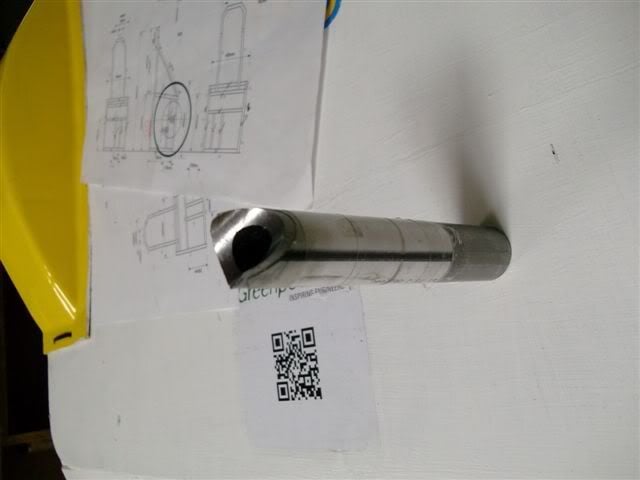
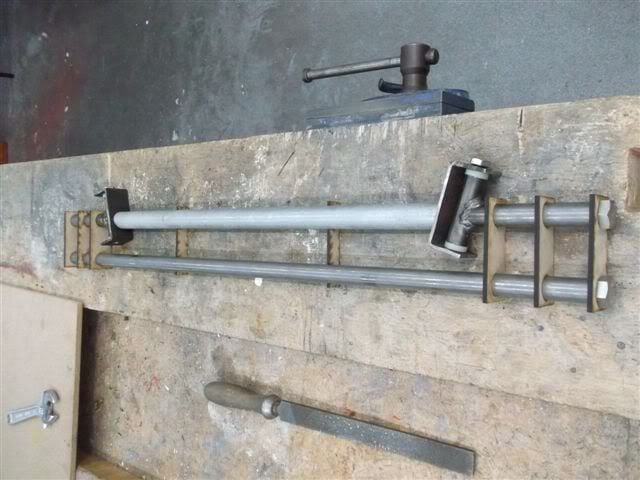
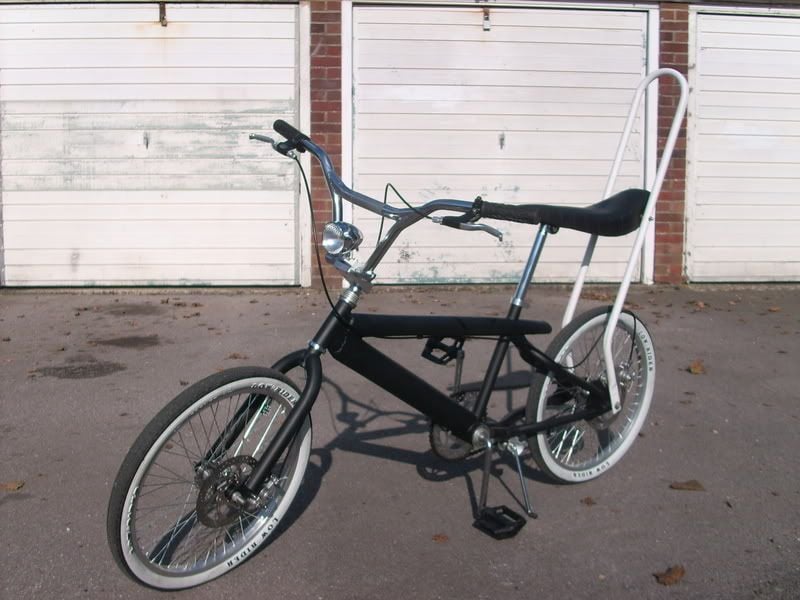
BMX Based Chopper, layed back stem tube, extended rear stays, home made sissybar.

DSCI0485.jpg


DSCI0395.jpg


DSCI0398.jpg


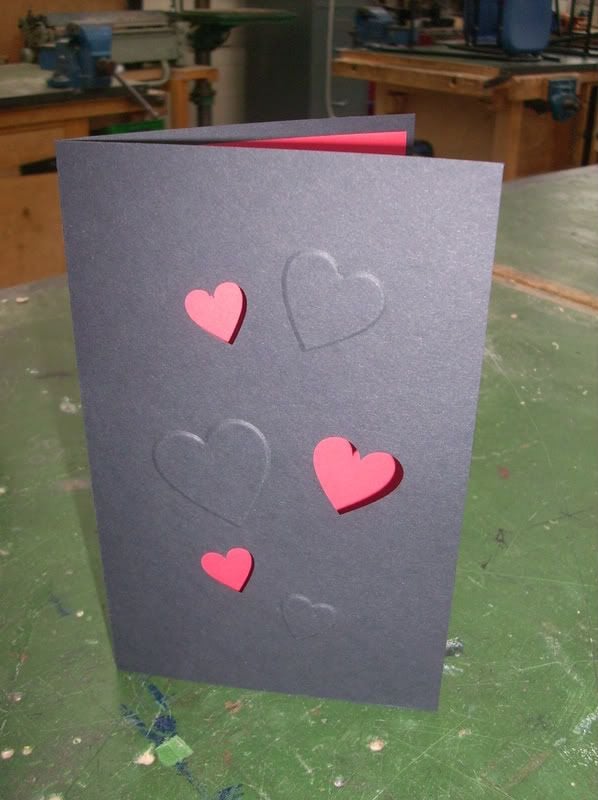
Embossded valentines card
DSCI0047-1.jpg


Laser cut 1mm acrylic sheet for the press tool, which was used after the had been laser cut.


Laser Cut MDF memory stick case.

DSCI0032-1.jpg


Lego brick memory stick case.

DSC00131.jpg


DSC00132.jpg


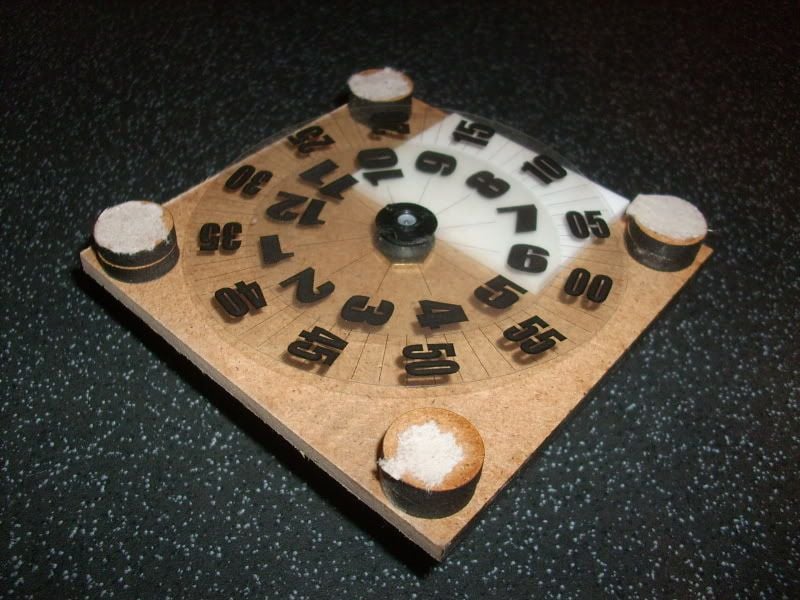
Jump Hour clock, laser cut MDF case.

DSCI0267-1.jpg


DSCI0269.jpg


Five note Keyboard and Stylophone, 555 osscilator circuit, laser cut acrylic case.

DSCI0223-1.jpg


Trophies for Retro-Rides Gathering 2008.

DSCI0003-1.jpg


3D CAD model of Mardave V12 RC car.

V12ProD.jpg


IR Remote controlled 1:24 Scale '64 Impala Lowreider. Custom PICAXE Programmable integrated circuit board with IR inputs and servo output, laser cut acrylic chassis.

DSCI0128-1.jpg


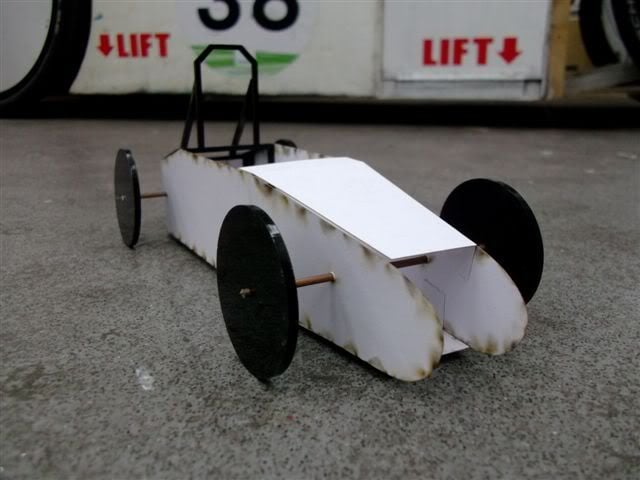
Laser cut acrylic chassis, as an example of what might be achieved for the 4x4 in schools challenge.

100_0052.jpg


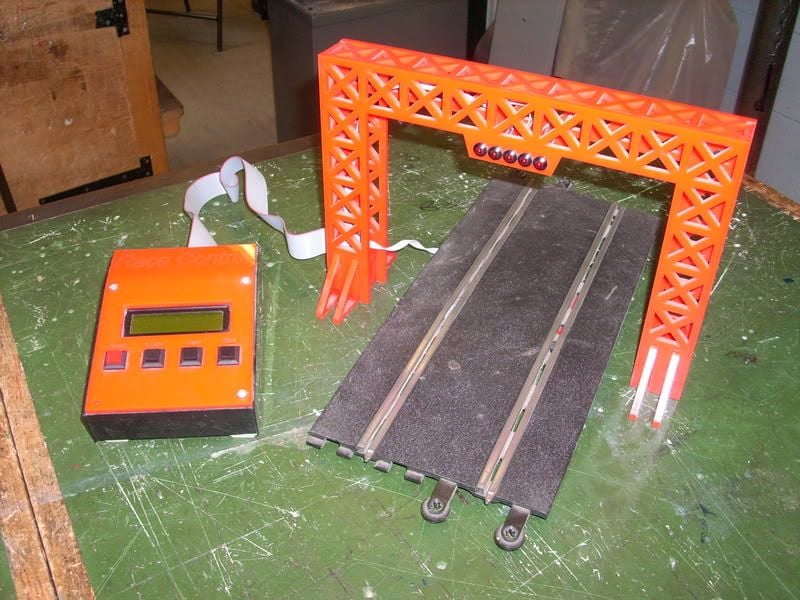
PICAXE PIC Scalextric lap counting and timer setup, uni project.

DSCI0391.jpg


Pop Art Hand Bag, as an example of how resistant materials can be used in textiles.

DSCI0382.jpg


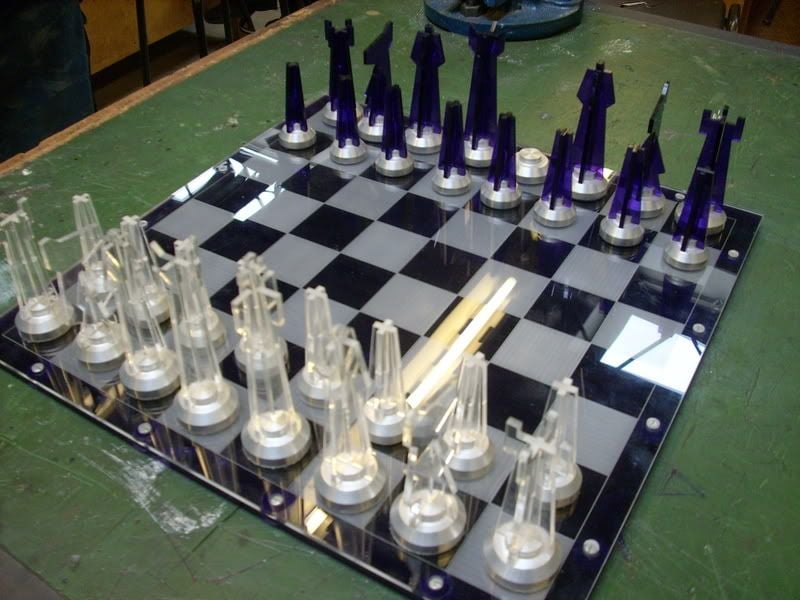
Chess Set, laser cut acrylic and CNC turned bases. Another Uni project.

DSCI0388.jpg


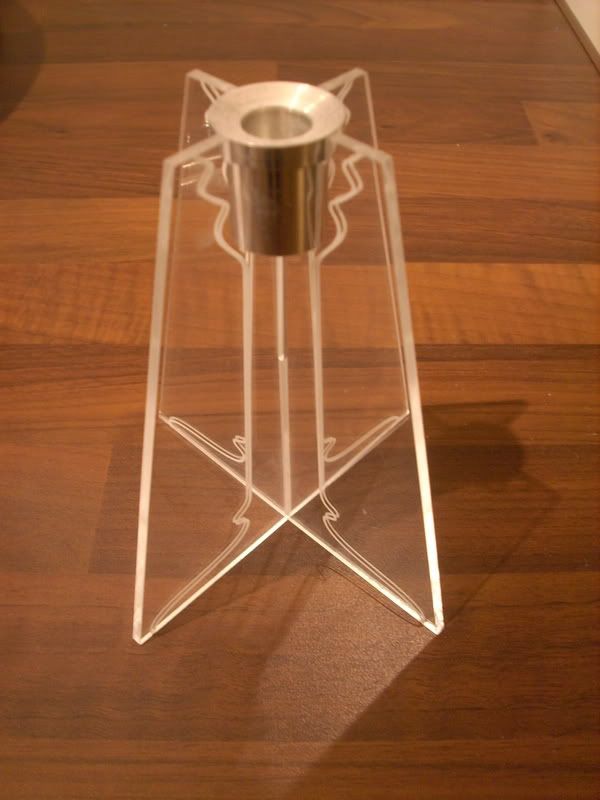
Candle Stick, acrylic and turned aluminium.

DSCI0355-1.jpg


Earringings, aluminium tube with layered then laser cut acrylic inserts, laser cut acrylic case.

DSCI0356.jpg


My Website, very basic, written in HTML in note pad. I really need to have another look at this.

www.easypcd.co.uk

EasyPCD's, laser cut acrylic PCD checking tool.

DSCI0309-1.jpg


Thats everything I can find in my Photo Bucket. You might have notice how the laser cutter is without doubt my favourite toy!

What have you made when you are not messing about with cars?
 
I'm a Design and Technology teacher in a Secondary School, I teach BTEC Engineering, GCSE Product Design and electronics, graphics, product design and sometimes food technology and textiles at KS3 (11-14).

I get to play with a lot of nice toys, making project examples, developing ideas for units of work and developing my knowlege of what can be done with the equipment we have. As well as dealing with arrogant lazy teenagers all day.
 
mark love the bmx! im bust making 3 atm, im going for the chopper (motobike) look on one, hopeing to get the same lenth too, just haveing trouble with the front forks (getting the lenth) any ideas
 
Haha thats brilliant. The PICAXE devices sound quite interesting. I've done a reasonable bit of assembler programming with PIC chips and its not always that fun...

Wish I had a laser cutter too haha!
 
what do you do for a living mark? is it your own laser cutter?


LOL, I did noticed a lot of laser cutting myself, what happened to good old chisel and saw, lol.

Some top stuff there, I remember the days of having a MARDAVE MINI cost about a tenner it was great.

Check out that old technic as well those were the days. When my son turns 5 (3 1/2) years time) I'm allowed to have all my LEGO and Technic off my Mum, Can't wait, lol.

yea my bro turns 5 in 4 months cant wait to get all mey old lego out, lol
 
Thanks for the comments guys.

Micras, maybe find some tube with an inside diameter the same as the outside diameter as the fork tubes and sleeve it over with a weld at each end, or turn down a peice of bar of the same outside diameter as the fork tubs so that there is an insert into the fork tube and weld it in (probably best for a short increase) or find some tube the same as the fork tubes and butt weld it in. I wouldn't do the last one because it relys on the weld rather than any mechanical means, and I know my welding isn't that good!

Theres a build thread for the bike
here.

Ed, The PICAXE is a very nice easy platform to use, the chips come with a kind of firmware already installed which makes the programming interface easier to use - its for the kids after all. The programming is done in BASIC or with flow charts, either using the picaxe software or PIC Logicator.

Build thread for the Lowrider here. There's an example of the programming on page 2.
 
That low rider looks ace, just realised there is a video and makes it so much better. Might have to look on ebay after I get married and see if I can get a cheap Mardave, lol. I had once before and put bigger wheels on it by sticking tamiya wheels over the top of the current wheels, then it shifted with a speed controller and a uprated motor.
 
Some really cool stuff there, excellent workmanship (Y)

Many many moons ago this was born in a pile of festering bike carcasses...
 

Attachments

  • 15-07-05_1553.jpg
    15-07-05_1553.jpg
    42.4 KB · Views: 1,812
Well I haven't got anything as good as that but here's some stuff I've made from Mega Blocs, lol.

Johnny 5 with my son.

n668668267_2490440_4697290.jpg


Spitfire

n668668267_2490441_820713.jpg

n668668267_2490442_284217.jpg


A Bull

n668668267_2490443_7683395.jpg


BullDozer

n668668267_2490444_957879.jpg


Titanic

n668668267_2490447_5222438.jpg


Rocket with a launch pad.

n668668267_2490448_6690492.jpg
 
No Probs Micras.

pjg, those mega blocks creations are fab! It takes a good eye to fit such unco-operative shapes together like that. Liking the SNOT* (studs not on top) technique as well.


*Lego geekery
 
Nothing I've made is really very interesting haha, but thought I'd share anyway.

Directors chair for AS DT. Taken before it was actually finished, so looks a bit crappy.
spa0119.jpg


TV/xbox stand for GCSE.
54351640.jpg


Small projects
Bowl I made on the lathe.
bowlthing.jpg


Desk gadget thing.
spinnything.jpg


DVD rack.
rackthing.jpg
 
Hey they are cool, makes me feel right at home. I particuarly like the turned bowl. Very theroputic a bit of wood turning. The desk gadget is ace too.
 
Thanks Mark! Wood turning is awesome, not sure if you can tell from the picture but the bowl is about 3mm thick in places, which I managed to do accidently :)
I also made a screwdriver but don't have any pics of it. So used the laser cutter and the metal lathe then. Good times.

I actually really like your chopper, was thinking about doing something similar for my A2 project but didn't in the end :(
 
Bugsy and Dandy Dan's cars

Every year I get roped into set construction by the drama department for their yearly whole school production. This year Its Bugsy Malone. Unfortunately the drama department know someone from another school who has done it and are borrowing the Splurge Guns that I was hoping I'd get to make.

They have asked me to make them some cars though for the Bugsey/Dandy Dan chase scene . So I set about comming up with a plan. I settled on a flintstones style car, rolling on castors rather than the actual wheels, to ease constuction and manouverability. The cars are assembled from a frame work of 32mm square spruce spar clad in hardboard.

I spent a day in school last week (it's half term!) getting the first part of the building done, I had four kids helping and another teacher. It was harder work keeping everybody else involved than it would have been to do it myself but the kids need to do some set construction as part of their BTEC course.

I started with some drawings, CAD and the old school sort.

DSCI0017-1.jpg


Planned out the frame,

DSCI0018-1.jpg


Then got building.

The basic frame,

DSCI0678-1.jpg


Nearly Finished

DSCI0681.jpg


There's a door on each side,

DSCI0680.jpg


I just need to add some fenders and head lamps. The plan for the headlamps is to use a small pyrex bowl as a vacuum forming former, and make the headlamp bowls from thin plastic sheet. I might use some clear acrylic as a lense.

Day 2:

Got the first car finished this morning, fenders and headlamps. If the drama dept want I'll put lenses in the bowls, but as the material is expensive I've left them out for now.

DSCI0015-2.jpg


DSCI0016-2.jpg


I'm pleased with how much like the original sketch it looks. I'll grab a couple of pics when its in paint. Some year 8's (12-13 y/o's) are painting it.

Onto the 8"x4" flats with doors, then the other car.[/quote]
 
/Just got into Carbon fibre with quite smart results..

Heres a recent JDM 2-slat Grill for the N15 Almera / Pulsar..

ONLY one in Europe, or even world as far as im aware...

dsc00481bf.jpg

dsc00482f.jpg


Im on to a bonnet for my K10 but thats a secret anyway.
 
man that cars sik, our one was made from the local news paper. lol, i was in bugsy malone in our school show we were "the very best at beaing baaaaad guys", dont worry im no a ravvin actress, we were breakers back in highschool and any excuse the teachers could get had us in a show.

For laffin purposes the video.... :D
http://www.youtube.com/user/BBoyWilber#p/u/16/dxaV4XPHeoA

this was more what we really done....
http://www.youtube.com/user/BBoyWilber#p/u/26/D1F0GXoVUGs

ur stuffs nuts man, ill try get some pics of my old inventions tomorro off my mates comp. lol :D
 
That grill looks good Kristian, be great to see it in place.

Get some pics of yer stuff up shero, Its always interesting to se what folk get up. I'm very intregued by yer "inventions" :grinning:

Here's what I've been up to over the last week or so,

Well I got the second car finished eventually, they are now in paint, I'm a bit dissapointed by them but the art department are massively hard pressed for time, and reliable kids. Getting the rest of the props, the flats (8x4 sheets for the background) and of course their normal teaching has meant the jobs were a bit rushed.

There's not be much teacing going on in my room for the last week and a half!

Between finishing the cars I made two (working - not painted on!)doorways in 8x4 flats. On finishing the cars I got given to make two A-board signs, and an 8x8 secret doorway bookcase. This I've had to design so that it comes apart for moving around the school, but is still strong enough to be free standing, and light enough for the kids to use.

Here's the cars:

DSCI0039-2.jpg


DSCI0040-3.jpg


The door ways, both much the same, but right and left handed.

DSCI0041-1.jpg


A-board signs, looked great bare, look a bit rubbish in paint. Bloomin' kids.

DSCI0042-1.jpg


Credit to the kids painting it, the secret doorway bookcase is looking awesome!

DSCI0043-2.jpg


From the rear,

DSCI0044-3.jpg


After all the big stuff I thought I'd done, but after an hour and quarter long production meeting last night - god can these theatrical types go on! - I sort of got volunteered for a candle stick phone, traditional cone megaphone and some trunchoens.

The phone came together rather nicely today, bit of old dowel, some lazy cuttered MDF, a raid of the scrap bin and a bit of wood turning resulted in this;

DSCI0038-2.jpg


I got the megaphone finished as well but I've already given that to drama and now can't find it to take a pic.

I'll finish this thread off with some pictures of everything up together on the set.
 
Few I had to seach 5 or 6 pages of my "Posts Made By: PJG1979" because I couldn't find this thread by search, lol.

Anyway things I've made for free, lol.

4151249404_8929cbf49c.jpg


4151249264_9b0ac06328.jpg


4150489555_7a55c0cd40.jpg


4151248938_cdc83f207c.jpg


4151248842_1088e0352e.jpg


4150489099_76556ef579.jpg


4151248620_e5fa8d2127.jpg


4151248490_5bd8071122.jpg


4150488707_097bbe921f.jpg


4151248156_182a5cc44d.jpg


4151247914_eeacd8efd6.jpg


4150488213_697a1e76e3.jpg
 
Hey pjg, I missed this post, they are cool. Is that Forza motorsport? I like the pontiac gto.

Here's some simmilar stuff from the guys over on RR.
 
Nah it's Need For Speed Undercover, lol.

But here's two from Forza 3.
 

Attachments

  • Forza - Yaris Suped.jpg
    Forza - Yaris Suped.jpg
    95.4 KB · Views: 365
  • Forza - Yarisuped.jpg
    Forza - Yarisuped.jpg
    76.4 KB · Views: 373
thats very cool! there are some talented people on this site!

here is what i have made:
ultra mini PC
20140_1329637886587_1400161509_30950331_3817340_n.jpg

12" panel PC
20140_1329637926588_1400161509_30950332_8337262_n.jpg

ceramics
20140_1329637966589_1400161509_30950333_2936387_n.jpg

NES controller MP3 player
20140_1329638006590_1400161509_30950334_5246489_n.jpg

NES controller MP3 player 2
20140_1329638046591_1400161509_30950335_6495091_n.jpg

Snes in a gameboy
20140_1329638086592_1400161509_30950336_4925293_n.jpg

wood work
20140_1329638126593_1400161509_30950337_4246300_n.jpg

chainsaw
20140_1329638206595_1400161509_30950338_2278056_n.jpg

Gear clock
20140_1329638246596_1400161509_30950339_1811930_n.jpg

Blue laser
20140_1329638286597_1400161509_30950340_3368555_n.jpg

Carbon and silver necklace
20140_1329638326598_1400161509_30950341_4164587_n.jpg

hovercraft
20140_1329638366599_1400161509_30950342_4193688_n.jpg

Mopecycle
20140_1329638406600_1400161509_30950343_3993910_n.jpg

small PC
20140_1329638446601_1400161509_30950344_7167597_n.jpg
 
Excellent stuff Nex, particuarly liking the NES controller MP3 player and hover craft.

thanks mate!

the nes controller i built twice, this is the second generation one, and i use it kinda often, its 2gb, the A and Right buttons skip the track forward, B and Left skip back, up and down are volume, select is equlizer, and start is play, pause and power. i went to upload my idea to the net, thinking i had been all smart only to find that loads of people have turned nes controllers into MP3 players.....

and the hover craft i made ages ago, me and my dad were sitting down to watch the first ever episode of scrap heap challenge. the task was to build hovercrafts. my dad said they had to be very clever to just make this stuff out of junk, and i said making a hovercraft is easy. my dad didn't belive me so i made a hover craft from a flymo engine i found in a hedge, a ford radiator fan and a car innertube. it worked pretty good but the fan wasn't perfect so it didn't hover very high, its gone to the scrapyard in the sky now.
 
As some of you guys probably know I teach D&T/Engineering in a secondary school, for the last couple of years I have run an extra-curricular club to enter the Greenpower Formula 24 competition to work with a group of students to design and build an electric racing car. I put up a thread on RR for the 2010 car here but never really finished the thread. The same might happen with this one for the 2011 car however we are a lot further through this season.

The cars run on 24V, using motors and batteries supplied by GreenPower, there are a set of build regs to which all cars must comply. As long as the regulations are met design and constructin methods and materials are free.

Before any of these photo's were taken there were some lengthy periods of three blokes stood round a white board drawing things and talking about them - while trying to explain what it was all about to a small group of increasingly bewildered engineering students. The broad design is mine, as is the majority of the fabrication with the students helping with the prep, cutting to size (before I then mark it out again and cut it to the correct size etc).

Once a general design had been decided on - semi monocoque construction from 4mm ply, with a framework to the rear supporing the motor and drive train I set to work ordering the components.

Then the build began.....

The tub starting to take shape, 4mm marine ply with 25mm square beach strip joining the corners. The four mounting points for the rear subframe can be seen on the rear panel, these from 12mm ply.

DSCF2961.jpg


Setting out some of the other components to see the design in real life,

DSCF2962.jpg


Steeing columb crossmember mocked up,

DSCF2966.jpg


Rear sub fram arrives - built to our design by a friend of one of the other guys.

DSCF3050.jpg


Soon after the axle got mounted,

DSCF3051.jpg


The front end is suspended from a double whishbone type set up, with rigid joints where you might expect to see coilovers. These turnbuckles can be used to adjust the ride height, the rose joints to set camber and then the whole wishbone shimmed forward or back to set castor.

DSCF3066.jpg


DSCF3044.jpg


Each of the threaded section on the wishbone was tuned and the thread cut by the students, along with the spacer peices cut from flat bar. I made a jig then (badly) welded the parts together.

DSCF3181.jpg


Standing on its own four wheels for the first time,

DSCF3067.jpg


The steering is much like a go cart, but with the bell crank on top of the steering columb, for leg clearance for the driver, and to bring the track rods in front of the axle line, again to aid clearence for the driver.

DSCF3069.jpg


Control wiring going in, and the data logging and instant display computer.

DSCF3180.jpg


Dennis and Laurence handle the technical stuff, calculations and electrickery. The car has a 4AD speed controller and fixed gearing using 8mm pitch industrial chain. The pinion gears were comercially available parts, the spur gears were laser cut from 4mm steel plate using plot paths that I produced.

DSCF2427.jpg


The chassis starts to get filled out using styrofoam and a removable rear section was made to enclose the rear wheels - inspired by the 80's Jaguar Le Mans cars.

DSCF3187.jpg


Lots of white emulsion paint get spread arrouind my classroom, some stickers got made and we carted the whole lot down to Goodwood for the regional heat.

DSCF3196.jpg


The team performed well on raceday, though it has since been calculated that we only used about 2/3 capacity in two of the three sets of batteries. We might have done just enough to qualify for the national final in September.

DSCF3351.jpg


[/quote]
 
? you built a time machine out of a delorean ? top marks mark . eh? that didnt sound right,, er change your name mark:laugh::laugh:

tidy looking car built their, whats the weight of it?
 
It's the time of year that I get roped into set building again. This year the production is Grease, and I was asked if I'd like to make the front half of a car. Yeah OK. Thoughts along the line of fabricating something from scratch were dismissed when I discovered that a full GRP flip front from Honeybourn mouldings was actually reasonably priced - just under £250, other now fronts had been loads more. I couldn't find a second hand one anywhere.

So one Morris Minor flip front purchased - it is afterall a 2/3 scale 40's yank! and a couple of 5.5 slots and I have the bare bones of the project.

Photo0144.jpg


I'll be extending the "doors" with flexible MDF. the whole thing will be mountyed on a frame on castors so that it can be move around the set. Some sort of Duvall style windscreen will be created.

I'll keep the updates comming as more progress is made.

Part 2.

The set centre peice has been coming on. The front is now mounted on a wooden frame and the body extensions have been made, they are not very long but I worked around the material I had - 4mm flexi-ply. It got fitted up with a Minor bumper and headlights, kindly loaned by my dad (yes he does know I've got them).

Some of my Y9 students have had a go at polishing the slots, which haven't come out too bad.

The grill is a peice of DIY store mesh that was in the store, backed with black painted ply to hold it in place.

The windscreen centre post is in position, this will be cut down to the correct length one I have cut the clear acylic for the windscreen.

I did have pics of various stages, but I accedentaly deleted them from my camera ::)

Here it is.....

DSCF0133.jpg


DSCF0134.jpg


DSCF0136.jpg
 
Lol, it looks like a mod has been through here and tidied the thread. There was a russian spammers post up there - I was just suggesting better things he could do with his time.

Thanks for the comments chaps.
 
Today I made a Lego me, to accompany another little project I'm working on.

I've not really done a great deal, I started with this chap, who is somewhat hairier than me.....

LegoMe.jpg


With a little careful use of Brasso and some gentle scraping with a scalple I have.....

DSCF0539.jpg
DSCF0537-1.jpg
DSCF0538.jpg


And from the opening post in this thread, this is me....

DSCI0485.jpg


What a likeness :)
 
My fixie conversion still needs a front brake but ive ridden it to work and back without one before. Anyone thas ridden a fixie will know how awesome and relaxing that are to ride, especially at 5:45 in the morning when theres no traffic.
56137437-b038-a26f.jpg

56137437-b04f-f1ca.jpg


Better pic when im on my computer
 
Now finished (even though the back wheel is dragging grr)

And the back brake needs bleeding
 

Attachments

  • ImageUploadedByTapatalk1328808889.465373.jpg
    ImageUploadedByTapatalk1328808889.465373.jpg
    33.3 KB · Views: 306
hey some clever stuff there fellas........the only things av made...well was a joint effort with wor lass was me four young lads.....;)
 
We ended up completing last years (GreenPower F24) final with a car running, in position 37. We were pretty pleased with ourselves, but also a little disappointed, another lap, lost when a driver decided we needed a random extra pit stop in the closing stages probably cost us quite a few places.

So on to 2012....

At the begining of March there was a test day at Goodwood so in preparation for this we began work on prepping and modifying Eco-2.

It seems our drivers have got taller since last year, the first job was to extend the body tub by 200mm, so we didn't have to chop their feet off.

The gearing was also altered and special ceramic bearings installed, that apparently have 30% lower resistance.

DSCF0791.jpg


At the test day the cars performance was very promising. If it had run as well in the 2011 final we would have been in the top 20.

Our team has also just secured funding for this year, to build another car (Eco-1 has been scrapped and pillaged for parts) unfortunately this confirmation didn't come until Monday, so we have six weeks to build the car, including whatever lead time there is on the parts that need ordering!

We have been discussing ideas for the car for a while, but obviously it was time to get something down on paper. I produced some drawings over the weekend and yesterday afternoon a couple of the team and I cobbled together a 1/10 model of what will become Eco-3.

DSCF0950.jpg


DSCF0945.jpg


DSCF0946.jpg


DSCF0947.jpg


It's going to be constructed in a similar fashion to Eco-2 but will be an open wheeled design, reducing frontal area, and will have the plywood tub formed into a more aerodynamic shape.

More as the materials arrive and the build starts....
 
So, less than a week to go and Eco-3 is still a pile of parts in the corner of my classroom. The rear sub-frame/roll bar has taken longer to get back from the welder than expected, but it is of course a spare time job. I've been doing a bit of fabbing for the front end.
One of the lads fish-mouthed the stub axles, Dennis and I set up the mill with a 20mm end cutter, then a student did the machining.
DSCF1070-1.jpg

Which then got turned down to size and the bore taking out to 12mm (for an M14 thread), so that they would fit in the jig which holds them at the correct angle for welding to the king pin tubes.
DSCF1071.jpg

These were tacked and then popped out for the rest of the welding. The jig is four layers of 4mm thick MDF cut on the laser cutter.
A tool which also came in handy jigging up the rest of the front axle. The rear axle acts as a backbone, with the stub axles located parallel with MDF cut outs slotted over the ends, and bolted through the wheel bolt holes. The front axle tube sits in half height saddle pieces to keep it parallel to the rear axle. The U brackets are bolted through the kingpin tubes to keep them in the correct position.
DSCF1113.jpg

DSCF1111-1.jpg

DSCF1112.jpg

Again, these were tacked in place and then stripped down to weld up properly. No close up pics, it's not pretty.
The stub axles have since had flanges welded onto to act as a rear stop for the 20mm through hubs that are the basis for our wheels. All but one of the wheels have been built up from scratch by our students, I did the first one so I could teach them - that one was the first time I'd built one! It's a very satisfying job I which we'd built our own wheels from the start, it would have saved us £££!

DSCF0951.jpg


Wheel truer knocked up for the job.
Next up will be the tub - but that will have to wait 'till Wednesday. The subframe should be assembled by then with the motor mounted and rear axle in position.
 
Subframe arrived with Dennis over the weekend, so he got that fitted up with the electrickery, and drive train.

DSCF1202.jpg


DSCF1204.jpg


DSCF1203.jpg


The mounting boss for the freewheel needed welding to the axle so it was all stripped down for that. While the axle was getting dismantled I got on with cutting out the body tub parts.

Here's one side bing fitted, epoxy adhesive and lots of screws...

DSCF1212.jpg


Once both sides were on the base was cut to shape,

DSCF1214.jpg


Then stitched together with cable ties, ready for a fillet of epoxy adhesive/filler to be applied,

DSCF1223.jpg


DSCF1230.jpg


The rear tapers in to where the brake light is mounted,

DSCF1219.jpg


One of the lads also got on with machining the disk brake mounting boss',

DSCF1220.jpg


They will be drilled and fitted to the axle with roll pins.

I'm heading back in in the morning to fit the front axle and steering. Then all the kids are back in again on friday for finishing off and practice for race day. It'll be tight for getting it up and running!
 
We got a bit more done this morning. Not as much as I'd hoped, but I slowed us down a bit first thing by knocking the argoshield bottle over and smashing the gauge on the regulator. A fair bit of gas escaped, but fortunately the bottle was fairly full. Once one of the guys had been out to get a new regulator we were back in action again.

The front axle was clamped in position with the load spreading mounting plates and tacked in place, before removal for welding fully.

DSCF1233.jpg


DSCF1234.jpg


I also attached the steering arms to the kingpin tubes, another mdf template cut on the laser cutter got them positioned correctly.

Finally the car was able to stand on it's own four wheels for the first time.

DSCF1232.jpg


DSCF1231.jpg


There's a great article on the team in today's (07/06/12) Portsmouth Evening News too.

DSCF1237.jpg


More tomorrow....
 
Back
Top