DIY - Pillar Gauge Pods

CMF_Danvillan

» CMF Member
Member since:
Posts:
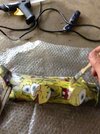
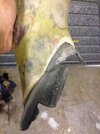
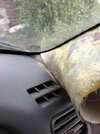
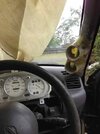
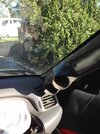
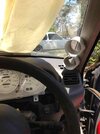
So I was bored today and I'm waiting for everything to re-open after new year to continue with my turbo conversion. So I decided to have a go at making a pillar gauge pod for the boost and wideband gauges. I have never used fiberglass before so it will be a bit of a learning experience.

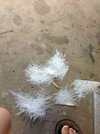
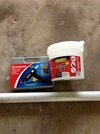
So I basically bought a fiberglass kit from bunnings for $40, there were smaller ones which were cheaper and would probably be enough to do this job but I figured if this works out well I may try some other things, so I got a big kit.

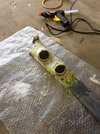
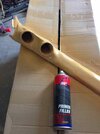
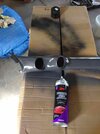
A hot glue gun $20. There are cheaper ones, I suppose you could use araldite but hot glue sets quicker. It will be enough to hold it till you fiberglass and then the fiberglass should make it pretty solid.

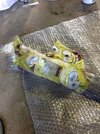
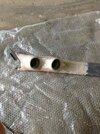
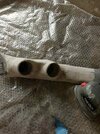
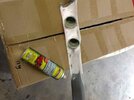
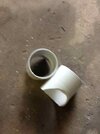
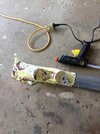
2 x 50mm PVC joiners which have an ID of about 55mm. I decided to use these instead of the 50mm PVC pipe because it is a bit of a tight squeeze for the gauges as they are 52mm and the ID of the PVC is 51mm. Decided to fiberglass the inside of the PVC joiner to reduce the ID.

If you already had this stuff you could make one pretty cheap.

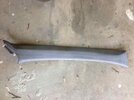
Down the track I guess I'll need some bog, sandpaper, primer (which I have). Also some type of texture paint to get the factory look back and some vinly/plastic paint to match the original plastic.
 

Attachments

  • 81873.jpg
    81873.jpg
    26.8 KB · Views: 35

CMF_Danvillan

» CMF Member
Member since:
Posts:
I forgot the most important thing required for this job. Some old Spongebob pants to wrap around the pillar. I used small dabs of hot glue to hold the stretched cloth.

Spongebob should add at else an extra 10kw's.
 

Attachments

  • 81878.jpg
    81878.jpg
    28.3 KB · Views: 36

CMF_Danvillan

» CMF Member
Member since:
Posts:
Resin is applied to the cloth, once dry it gives a base for the fiberglass.

RTK.. The picture probably looks that way but when seated they point directly at you.
 

Attachments

  • 81881.jpg
    81881.jpg
    32.6 KB · Views: 34

CMF_Danvillan

» CMF Member
Member since:
Posts:
Tear fiberglass into small pieces and I suggest using some smaller pieces than I did to get in all the grooves. I found that when trying to mould to a few different directions the fiberglass would lift up and not stay down.
 

Attachments

  • 81883.jpg
    81883.jpg
    27.9 KB · Views: 32

CMF_Pierce

» CMF Member
Member since:
Posts:
looking good mate, coincidentally I'm working on this right now as well haha :D

Kudos for posting a guide, the more knowledge we all have here, at our fingertips, saves us from annoying Google searches.

I have bought quite a bit of fibreglass mat and resin, hoping to go the same route as Marshall from this forum.

Seems like so many of us on here have a daily micra and a 'sky's the limit' micra as well :D

Out of curiosity, which gauges did you end up with?
 

CMF_Danvillan

» CMF Member
Member since:
Posts:
So 2 coats of fiberglass seems to be enough. Run into a bit of a problem, had to cut back the bottom part of the pillar so it could match the dash and slot into the side of the dash. A die grinder was handy to help with shaping the cut out.

I also did a layer of fibreglass on the inside of the gauge holder to reduce the inside diameter, it's now about 54mm and i'll probably use some foam tape or something to wrap around the gauge to make a tight fit.
 

Attachments

  • 81900.jpg
    81900.jpg
    28.1 KB · Views: 34

CMF_Danvillan

» CMF Member
Member since:
Posts:
Patience and a few coats is needed to get it smooth. A palm sander was definitely a big help while sanding. This step is not much fun and took a fair few hours to get it nice.
 

Attachments

  • 81904.jpg
    81904.jpg
    41.6 KB · Views: 33

CMF_Danvillan

» CMF Member
Member since:
Posts:
I was going to use rubberised under carriage spray to get some texture on the pillar but when I tested it, it was not uniformed enough so I just decided spray it without the texture. Got a 3M can of trim spray for SCA for $4 (bargain) its a little darker than original but not too noticeable. Again did about 3 coat starting light and gradually heavier.
 

Attachments

  • 81907.jpg
    81907.jpg
    23.8 KB · Views: 29

CMF_Danvillan

» CMF Member
Member since:
Posts:
So basically finished and fitted. Not 100% happy as I can still see a couple of scratches in the paint from the sanding but I might sand it back later and re-paint it (i'm a bit of a perfectionist, I think it look pretty good though).

I might also use the primer/filler on the other pillar and re-spray so both sides match.

Will post a final photo once I have the gauge fitted.

Overall it's a pretty easy job to do with a bit of patience and a little bit of know-how. It took probable 5 hours over 2 days to complete.

Total cost was about $80 but a lot of the stuff can be used for other jobs. Would be a lot cheap if you had most of the stuff already. You could buy a cheap one from eBay and mount it to the pillar for cheaper but I don't think it would look as good.

Anyway I always get more satisfaction from making things myself rather than buying them. Hope this helps anyone who was thinking of doing something similar.
 

Attachments

  • 81908.jpg
    81908.jpg
    32.5 KB · Views: 37
Back
Top