Rally car Prep blog

I thought I would would start my blog. Bought the car during the bad snow in March 2013, snapped up for just over £300 from ebay. Brought the car back down from Chester, which was a little way from my home of Bromsgrove. Always fancied a White one for rally prepping so this was just perfect. Since the car is a 1.0lt then I will prepare it for the 1.0lt Rallyfirst clas, hoping to do it as a father son project, so my lad can have a go as well as his dad. Don't know much how the rallying works these days as I used to race a Mk2 Escort around 1990, but what I have found out is they have tightened up on regs regarding time you can use seats, belts, fire extinguishers. When I rallied it was just helmets that needed checking!

$(KGrHqFHJC8FFF2qm+SmBRR3lFVohw~~60_57.JPG


I decided that I should project manage the project, so first job was to get my son to strip the car out, which didn't take him long. Unfortunately the project has hit its first hurdle! My son has to get his A level exams done so I have lost my apprentice.

922279_443596432391215_1621914029_o.jpg


In the meantime I decided to blow all of the £2,000 project money I borrowed (interest free) on the parts ready for the big push when the apprentice is back to it. The purchases so far are:

475952_443596435724548_1385983591_o.jpg


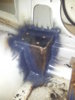
My son has a habbit of taking pictures of the back of my grey haired head!! (just wanted to show standard engine bay before mods)

NEW

JJC race and rally
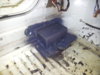
OMP Bucket seats & Mounts & RSS 6 point Harness's £510.31 inc del

Navigator alloy footrest, Bonnet pins, Budget on/off switch £29.40 inc del
RRS pull cable £6 inc del
Four MSA approved mud flaps £23.59 inc del
Window film £21.81 inc del


Balance motorsport
OMP MSA approved bolted rollcage £580 inc del (3 to 4 week wait)

Gaz direct
Gaz coilovers & lowered uprated springs, Gaz rear adjustable dampers £498.30 inc del (3 to 4 week wait)

Peter Lloyd rallying Ltd
2.25 Fire extinguisher package £130.20 inc del

Torques
FIA approved fuel sampling kit £71.98 inc del

Thornycroft
Black suede 13" racing steering £35 inc del

Unknown suppliers

brake pipe clips 10pk £4.95 inc del
Racing steering hub adaptor £8.98 inc del
Alu mudflap brackets pk 8 £13


SECOND HAND
Spax front & rear lowered uprated springs (as new) £70 inc del
Sparco race/rally pedals (as new) £11.90 inc del
Front top strut mount £33.01 inc del
Matt Humpris GRP airbox £103 inc del


PURPOSE MADE

Noddy
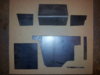
Rear top strut mount & Panhard Rod (unpainted) £113 inc delivery

TOTAL AS OF 12/05/13 £2,254 (have been able to claim £317.70 vat back)

PARTS STILL TO BUY/MAKE

Rally exhaust system
Sump guard
Tank guard
Seat mount rails
braided fuel lines
seat bolts
Anti roll bars
Poly bushes
Tyres
Helmets/suits

And much more!! (please let me know if there are parts I have forgotten about to make/buy)

Next blog should be the photo shoot of all the parts just before the fabrication starts, but still waiting for roll cage and Gaz suspension to turn up.
 
I plan to build it for Gravel/forest spec and maybe do tarmac now and again. I am mainly building it for my son, but would like to share the driving if possible, since I find I haven't lost the bug and need to channel my driving into a track rather than using my normal car and putting others at risk.

Regards

Peter

Sent from my GT-I9100 using Micra Sports Club mobile app
 
Yeah i get you! If you find the right set up the car can work well on both....mine is set up for both and works well with only a change of tyres and it can go from Forest to Tarmac. Its brilliant fun and the Micras are so reliable its perfect!
 
Part 2 of my blog:

Picture taken of all the parts purchased. Now the fun starts, well so I thought, I have already hit another stumbling block, Roll cage! I purchased the latest 6 point OMP cage after it was re designed so it could be up to MSA standards, and as far as I know not many people have fitted these yet. I have fitted a couple of cages in my past but never a bad a fit as this one. It is as if it is for another car. I have tried contacting OMP but they never respond, so I am out on a limb.

20130525_093623.jpg


Forgot to place strut braces and panhard rod in this pic so will show next time.

20130525_114540.jpg


It may be me but at first the cage looks ok until you look at the feet positions and think "If it is purpose made to suit a Micra k11 why is that middle foot where it is. Most feet are back by a couple of inches so you can make a nice box on the upper seat area for strength. If I try and take it back further then the top rail above the front window ends up about three inches from the roof.

20130525_114340(1).jpg
This is going to be a pig to fabricate!
20130525_114417.jpg
As you can see the top bar at the moment is in a good position any lower on the front feet which would allow the middle feet to go back would move the bar in front of the mirror!

PLEASE, PLEASE if anyone out there has fitted this cage or its previous model could they take some pics so I can see if the feet can be placed better. I would hate to fabricate and then find a better position.
 
Welcome to the trying to get an OMP cage to fit game Sharman, i can take pic's of the box section / modified areas of my cage if you like.

Front legs: http://s1199.photobucket.com/user/Skins_Micra/media/DSCF0003.jpg.html?sort=3&o=93

Hi again Skinner

Yes please the pic's would be great. I have already started the fabrication, but it would still be good to see how yours was fitted, plus I hope this blog helps others with the similar problems in the future. By the way I did need to remove the dash as you pointed out before it must be because mine haven't got the extra bend. OMP were useless when they finally got back to me after my second email all they said was "Yes you will have to remove it". I am practising my mig welding at the moment, not done any for about twenty five years since I prepared my MK2 Escort.

I will upload my fabrication pics when I have finished.
 
looking forward to seeing the build come together! No problem bud il get a few snaps as soon as i can.. i think it may be a case of each cage they made was a ruddy different size! good luck in the mean time :)

OMP as helpful as ever i see!
 
Hope these help mate

Thanks Skinner for the photo's. The cage has changed quite a bit. I see yours has a flexible connection from the front section to the back which has allowed your mid feet to be positioned on the upper seat deck. If I try and do that to mine the front comes down the screen too much, as far as I am concerned OMP have welded the spigots which stick out from the rear cage to join the front, at too much of a down ward angle.

Thanks again brilliant pics.
 
No problem hope they help a bit, I noticed your main centre hoop was at an angle when the front feet were flat!

Think OMP need a serious look at there jig's!
 
Making reinforcement plates for cage

Made cardboard templates out of cardboard and then purchased a £5.00 off cut of 3mm steel and set to work cutting and then bending the steel to suit.

20130530_093512.jpg


Mig welded all sections together, not happy with quality of welding, but it has been around 25 years since I last welded my previous rally car!
20130601_163953.jpg


Welding got even worse, but what do you expect from a cabinet maker with one eye! I am OK in right hand corners but left hand I am working blind.
20130617_184335.jpg


20130617_184346.jpg


Ran out of gas on this one but didn't realize till too late.
20130617_184353.jpg


Seat Rails

Welded drivers side in place and now working on exact place of navigator (allowing for hand held fire extinguisher in front of seat). I have removed rear bracket of the drivers seat, but thinking of keeping the front cross rail for strength even though the new seat mounting bars should also add strength. Unfortunately set fire to my pit! It seems that the two millimetre gap I left in the end of the pit boards wasn't small enough, since a spark went down it and set fire to my socket box and rubber matting on my bench!!!
20130617_184319.jpg
 

Attachments

  • 20130617_184335.jpg
    20130617_184335.jpg
    2.2 MB · Views: 799
  • 20130617_184346.jpg
    20130617_184346.jpg
    3 MB · Views: 766
  • 20130530_093512.jpg
    20130530_093512.jpg
    2.9 MB · Views: 783
Unfortunately I scared him off, I think the prospect of all the welding was too much (and my anger management problems with that dam OMP cage fit!). Hopefully I can encourage him back with the more easier jobs!
 
Seats and harnesses. There's a good job to pass on :)
I know what your saying with the anger management... I could do with it at times
 
Just thought it has been a while uploading any pics, as I have been stuck on loads of little projects to get the car done. Anyway here are a few of the cars development.

Noddie's Panhard Rod and rear Strut Brace all painted up and stickered ready to fit.
20130801_193544.jpg


20130801_193533.jpg


New Gaz coilovers fitted and MSA approved mud guards, and a quick lick of Hammerite smooth bought cheap from home base £29 for 5lt (old stock)

20130630_114915.jpg

Red Rocker, you've got to haven't you!

20130726_195406.jpg


Stripped back the silver foil and repainted air box with a little indulgence!

20130726_195855.jpg


Rocker cover bolted back on with new allen key bolts, Air box tested for fit, new fuel sampler fitted and ebay bargin strut brace fitted.
20130731_203935.jpg


Starting to remove some excess metal, may keep the original front seat crossrail to keep a bit of strength.

20130729_201452.jpg


Floor during first phase of stripping, now ready for a second go with the blow torch to get the last bit of sticky mess off.

20130720_183909.jpg

Hopefully next pics will be of the rear set up, and petrol tank guard.
 
Painted inside and cage with white hammerite smooth (sprayed). Everything now covered in over spray, even my wife's new Dyson, whoops!!

P1070630.JPG


Fitted Nod's rear Strut brace and Panhard Rod, with Peter Lloyd exhaust not fully fitted yet. Unfortunately pit sides looks like I need to repaint when I have finished!

20130908_181542.jpg


Fitted fuel lines, bought 25mm gromets and and used rubber tube to sleeve braided hose as it went through the twin wall rear seat base. (looks like I need to touch up paint work when I have finished).

P1070636.JPG


Fitted window film (thanks for all those who replied to my cry for help when I had creases to remove in applying the film, the wife's hair dryer worked a treat).

P1070640.JPG
 
It has been a long time since my last blog but now the car is finished ready to be MSA Log booked! Something I have never had to do before so will have to find out who I can contact to do this for the Midlands. The decal company got a bit carried away and stuck the number on which was only meant to show the position!
Micra1.jpg
Micra2.jpg
20131223_195843.jpg
20131222_134404.jpg
20131222_134250.jpg
 
Because it is my son who is going to drice it I was to go with the BTRDA rally first but not sure now. I am wondering about re joining my old club - Quinton Motor Club and doing some single venue's because the Rally First events don't seem to be the ideal ones for getting the hang of it. What do you think?
 
Because it is my son who is going to drice it I was to go with the BTRDA rally first but not sure now. I am wondering about re joining my old club - Quinton Motor Club and doing some single venue's because the Rally First events don't seem to be the ideal ones for getting the hang of it. What do you think?

Rally first is pretty blooming competitive in my opinion, I'd just start off by entering into any old single venue things (in either 1000cc or 1400cc classes) just for the experience.

An old airfield would probably be the best for the first event just due the simplicity of them, and personally I've only ever done tarmac rallies, albeit I train on gravel/dirt.

Really, any small'ish club rally will be good to start with and just hope it's a well organised event :) good luck
 
Because it is my son who is going to drice it I was to go with the BTRDA rally first but not sure now. I am wondering about re joining my old club - Quinton Motor Club and doing some single venue's because the Rally First events don't seem to be the ideal ones for getting the hang of it. What do you think?

Hi mate,

The car looks great! I think rally first is a good place to start if you are wanting to get started in gravel rallying, but if you want experience on smaller single venue events before moving to forestry then it might be worth a look at the Formula 1000 Tarmac championship - basically the same car specs as rally first 1.0 but on tarmac single venues with cheaper entry fees. The first round is the Roskirk Stages on March the 2nd at Three Sisters circuit in Wigan which would be a good venue to start rallying at. I'm entering it as my first rally.
www.formula1000.co.uk
www.bssmc.com

Hope this helps,
Tommi Meadows
 
I wouldn't recommend moving onto forest rallies from tarmac ones. They're two different animals. As a starting place though they're brilliant :)
 
And forest tends to be infinitly more expensive due to the higher wear and tear it causes :)

But as Andy says, choose one discipline or the other really if you want to be fast, or do both and have a laugh ;)
 
I know people who have done 3 years of juniors all tarmac and done rally first as soon as they turn 17 and have found the transition fine.
 
I know people who have done 3 years of juniors all tarmac and done rally first as soon as they turn 17 and have found the transition fine.
Aa Alex says its a different ball game.
The way the car us built is dramatically different :)
Tarmac to gravel is fine. As is dirt. But a full forest stage is extremely demanding on driver and car
 
1393802059754.jpg
Car now MSA log booked.Took 8 calls to find a MSA scrutineer, who was able to check the car over, but glad to say found one and it passed with flying colours. My son will be driving it in the future but since he still needs to pass his test I will take it for a test drive I was pleased to find out since I rallied in the late 80's I have grandfather rights so have saved about around £200 not having to take my BARS test and not needing a medical.View attachment 28638 Just purchased a fab trailer that was previously used for motorsport with tyre rack. So just need to book up practice run, thinking of doing the Disis Rally, since I have rejoined Quinton Motor Club.
 
Last edited:
Now the car is finished I thought I should show the final costs, hopefully it maybe of help for those thinking of preparing a basic rally car. There is a 2nd stage of the build planned, which includes Disc braked rear axle (purchased), alloys wheels, Anti roll bars, poly bushes, and spherical bearing top mounts (purchased).


Remaining prep parts


Rally exhaust system £ 155
Exhaust clamps and Various Grommets £5.03
Harness Plates x4 & Eyebolts x4 £7.15
Sump guard (home made 5mm thick) £40
Tank guard (old petrol tank cut in half) £15
Braided Teflon fuel lines 6m £57.99
Braided Hose ends £2.30
Pipe clips £3.20
Yellow tape £0.99
Spill Kit & Harness Seat Belt Cutter £8.74
Red 170amp Battery leads £10.75
White synthetic enamel/Thinners/Body filler/Stone chip £44.17
White Hammerite 2.5lt x 2 £30.54
Thinners £11.88
Hammerite Red spray £7.45
Blue Spray Paint £2.99
Poundland white spray paint £6.00
Brake Fluid £7.99
Air Breather Filter £4.45
Nylon Cord/Foam Filler £11.94
Nuts, Bolts & Washers £13.50
Stickers £1.39
Tow stickers x2 £2.00
Blue Cage Padding £15
Micra Tailgate Stickers £4.89
Decals & fitting £240

Total £555.34
+ £2,254 (Parts bought at start of blog)

Car build total £2,809.34


Race wear
2 x Second Hand Suits (both less than twelve mths old) £240
2 x Hedtec Rapido Open Face Motorsport Helmet Snell SA2010 £225.18

Paperwork
MSA Log book £38
MSA Driver & Co driver Licences £100
Quinton Motor Club Family Membership £20

Grand total ready to compete £3,432.52

Extra's required ready to compete on the D'Isis 26th April - Entry Fee £285 & Trailer £420

Thanks for all the nice comments during the build which I hope is going to give me and my son some great bonding time.

Peter
 
Last edited:
Back
Top