hi everyone
i finally got around to starting my blog was messing about trying to find best way to do pics but ill just out links to dropbox in which is probly easiest.
ok so a bit about me, im currently 23, im a full time machinist, previous to that i reconditioned starters and alternators at a small place near red scar. im currently working through my HND through work which i should be done with by julyish.
my previous car have been a ford ka which i got when my mum went up to a sport ka, was first car and lasted the longest, loved it rly was a nice little car.

i got a few others while i had the ka, mk4 fiesta, basically took apart then scrapped, learnt a lot about how they went together etc tho so not a complete loss, then i got a 1l saxo with a few niggly bits, cracked front plate +bumper, missing a trim from behind door and generally messy, found about £4 and 100's of the twisty bit off the ends of joints scattered around the car lol, but sold that to a mate, never planned to keep it just move it on better than i got it.
i got an rs125 for a bit cause i had a ped (piagio nrg water cooled one) before i could drive and kinda missed it in summer but found that i like bikes but only in perfect weather and condition otherwise i rly dont have the balls for it if im honest, used to let off instead going hard to get the grip etc, just not for me lol.
back to cars i got a vectra ls t reg, that was a very nice luxury compared to the small cars, i had rly big plans for this but i moved out for a while and that car suffered s a result, it stayed at my mums in preston while i were in blackburn, i just couldnt get down enough to do the work, an i messed up because i bought all the stuff i wanted first and then had no money for the things i needed to do it, ended up selling most of it but took a big loss and was upset with my self for ruining it. cant find any pics of it atm but im sure theres some about somewhere,
after the vectra i got another saxo but this time i got a 1.6 VTS i rly liked it and the engine ran well, had load of problemswith the body though, first thing i asked the garage was does it need welding and they basically told my dont worry about that yet your wheel bearing are all .... dangerous etc, so i spent a load of money and got axle rebuilt, a new wheel bearings, and i did all track rod ends wishbones pads discs etc then they told me it needed welding. ended up losing that one cause of insurance issues blah blah that one upset me cause i was without car for 3 month and couldnt afford to get one. ended up cycling to work
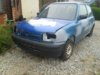
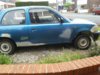
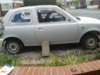
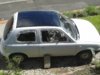
then the good bit, housemates brother got a new car and was only gonna get £250 of them for his micra so i offered him £300, £100 a month and that how i got this micra
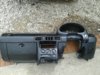
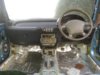
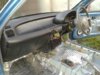
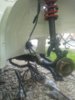
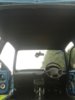
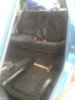
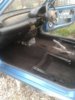
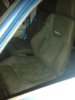
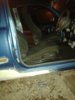
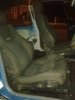
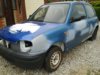
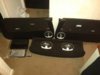
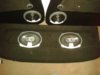
that was in end of february 2012 by christmas 2013 it had had a few changes, the exhaust had been fully replaced, mostly just standard but better midpipe an backbox, due to the hoopy bit rusting and snapping off the original backbox. i changed the dash because i cracked the plate on the first, new headlights, just standard because one cracked but they look better because there fresher, remote central locking kit fitted, was just a cheap £15 kit off ebay but it works well, i painted the steel wheels with some gloss white i had lying about had to fix the return spring at same time as exhaust, spring was still there so was nice and easy the last thing that got done around then was both rear sills got rebuilt as they had been repaired badly, just had a patch over, the support structure was just cut and left. was only my second attempt welding but mot said hes seen better and worse so ill take that as good going
https://www.dropbox.com/sc/z40k3vzmn8cvk0v/dEifqiOO9Z
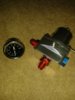
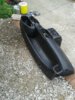
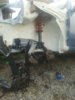
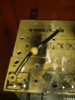
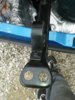
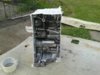
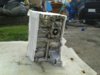
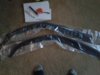
got a burner thing for free from someone just round corner off freecycle, that was pritty cool, pic of welder only cheap but its not too bad tbh, better than 2 carr bats a charger jump leads and arc sticks anyways :/
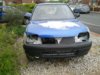
so we were all good for a while then apart from mot guy saying he thinks that was it last mot and it would be wubed next time but then in may i got done for speeding and that took me up to 12pt by the time it had gone through it was 20th of november and a prize of 6month holiday from driving
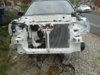
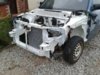
that left me with a decision of get rid of car to pay fines or do it up while its off the road, i went for the later it was cold over winter so didn't do much, but the target date for completion is 1st of june as i should have license back by then, that keeps the presure on to keep working my aim is to have touched up every area either replacing with stock or improved if it is easy/cheap enough or cleaned up. i ant the mot guys jaw to hang open next time he sees it im around halfway through now but times running low so pressure is on
https://www.dropbox.com/sc/vtyjo7rj0b5ac5o/Dha1GnRGw0
next post will show more detail of whats been happening since i started the overhaul
i finally got around to starting my blog was messing about trying to find best way to do pics but ill just out links to dropbox in which is probly easiest.
ok so a bit about me, im currently 23, im a full time machinist, previous to that i reconditioned starters and alternators at a small place near red scar. im currently working through my HND through work which i should be done with by julyish.
my previous car have been a ford ka which i got when my mum went up to a sport ka, was first car and lasted the longest, loved it rly was a nice little car.

i got a few others while i had the ka, mk4 fiesta, basically took apart then scrapped, learnt a lot about how they went together etc tho so not a complete loss, then i got a 1l saxo with a few niggly bits, cracked front plate +bumper, missing a trim from behind door and generally messy, found about £4 and 100's of the twisty bit off the ends of joints scattered around the car lol, but sold that to a mate, never planned to keep it just move it on better than i got it.

i got an rs125 for a bit cause i had a ped (piagio nrg water cooled one) before i could drive and kinda missed it in summer but found that i like bikes but only in perfect weather and condition otherwise i rly dont have the balls for it if im honest, used to let off instead going hard to get the grip etc, just not for me lol.


back to cars i got a vectra ls t reg, that was a very nice luxury compared to the small cars, i had rly big plans for this but i moved out for a while and that car suffered s a result, it stayed at my mums in preston while i were in blackburn, i just couldnt get down enough to do the work, an i messed up because i bought all the stuff i wanted first and then had no money for the things i needed to do it, ended up selling most of it but took a big loss and was upset with my self for ruining it. cant find any pics of it atm but im sure theres some about somewhere,
after the vectra i got another saxo but this time i got a 1.6 VTS
i rly liked it and the engine ran well, had load of problemswith the body though, first thing i asked the garage was does it need welding and they basically told my dont worry about that yet your wheel bearing are all .... dangerous etc, so i spent a load of money and got axle rebuilt, a new wheel bearings, and i did all track rod ends wishbones pads discs etc then they told me it needed welding. ended up losing that one cause of insurance issues blah blah that one upset me cause i was without car for 3 month and couldnt afford to get one. ended up cycling to work then the good bit, housemates brother got a new car and was only gonna get £250 of them for his micra so i offered him £300, £100 a month and that how i got this micra
that was in end of february 2012 by christmas 2013 it had had a few changes, the exhaust had been fully replaced, mostly just standard but better midpipe an backbox, due to the hoopy bit rusting and snapping off the original backbox. i changed the dash because i cracked the plate on the first, new headlights, just standard because one cracked but they look better because there fresher
, remote central locking kit fitted, was just a cheap £15 kit off ebay but it works well, i painted the steel wheels with some gloss white i had lying about had to fix the return spring at same time as exhaust, spring was still there so was nice and easy the last thing that got done around then was both rear sills got rebuilt as they had been repaired badly, just had a patch over, the support structure was just cut and left. was only my second attempt welding but mot said hes seen better and worse so ill take that as good going https://www.dropbox.com/sc/z40k3vzmn8cvk0v/dEifqiOO9Z
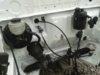
got a burner thing for free from someone just round corner off freecycle, that was pritty cool, pic of welder only cheap but its not too bad tbh, better than 2 carr bats a charger jump leads and arc sticks anyways :/
so we were all good for a while then apart from mot guy saying he thinks that was it last mot and it would be wubed next time
but then in may i got done for speeding and that took me up to 12pt by the time it had gone through it was 20th of november and a prize of 6month holiday from driving that left me with a decision of get rid of car to pay fines or do it up while its off the road, i went for the later
it was cold over winter so didn't do much, but the target date for completion is 1st of june as i should have license back by then, that keeps the presure on to keep working my aim is to have touched up every area either replacing with stock or improved if it is easy/cheap enough or cleaned up. i ant the mot guys jaw to hang open next time he sees it im around halfway through now but times running low so pressure is on https://www.dropbox.com/sc/vtyjo7rj0b5ac5o/Dha1GnRGw0
next post will show more detail of whats been happening since i started the overhaul