• Please only use these forums for blogs, they are not a discussion forum

Me Micra K10

Micra 110

Site Supporter
Thought i'd put up some info on our little 1991 1.0L K10.

We aquired this car off an old couple when the lady decided to stop driving. The Micra had 43000 miles from new and apart from a Coil problem it was practically in fine fettle. It has a standard Engine with the only mod being a K&N air filter found at a scrappy and itonly cost me £2.50 :)

I have a thing about all the cars i own being clean as possible as i hate getting oil all over the place. It's also so i can see where/what the problem is.

First on the list was the Undersealing, by hand, although a bit messy this can obviously save the underside from rot and can be left for at least 18 months before touching up bits that have been rubbed off from when the car has been Jacked up.

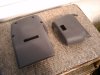
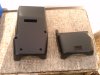
In this shot i've removed the front plastic wing guard and as you can see there isn't much in the way of protection....

http://i2.photobucket.com/albums/y11/argieandfee/P1010110-1.jpg


http://i2.photobucket.com/albums/y11/argieandfee/P1010109.jpg

http://i2.photobucket.com/albums/y11/argieandfee/P1010113-1.jpg

http://i2.photobucket.com/albums/y11/argieandfee/P1010111.jpg
...and after the underseal has been slapped on. :)

Some pics of my cleaning fetish... :laugh:

http://i2.photobucket.com/albums/y11/argieandfee/P1010015-2.jpg

http://i2.photobucket.com/albums/y11/argieandfee/P1010091.jpg


http://i2.photobucket.com/albums/y11/argieandfee/P1010018-1.jpg Cut-out showing the K&N filter in situ.

http://i2.photobucket.com/albums/y11/argieandfee/P1010012.jpg

http://i2.photobucket.com/albums/y11/argieandfee/P1010011.jpg

In the last couple of weeks we've had a CAT1 alarm system installed and powerflex bump stop rubbers and 4 new Avon tyres, no expense spared! :cool:

Looking at getting some new springs for the front as it tends to be a bit squidgy going into corners, ie diving.

There are a few issues with the paint on the rear wheel arches as someone did a bit of a bodge job on it. Will also have to replace the rear plastic stone guards as they aren't there..... o_O

Will update as we go!

Thanks for taking the time to have a look at our 'Baby'.. :)


Micra 110 :k10:

images too big, converted to URL's
 
Thanks

cheers James :)

where did you get your bump stops from and what part nos are they?
i cant for the life of me get any!

I can't find the paperwork but it looks like sfc017 but just to be on the safe side....does anyone know the thickness of the Stainless Rod on the suspension unit?

I found them here :) http://www.powerflex.co.uk/products.asp?cat=0041&catalog=0141&submit1.x=19&submit1.y=18&submit1=GO

Give the guys a ring and they'll give you a part number. You should get within a kit 2 x Bumpstops, 2 x Rubber covers + 4 x Ripties for fixing to the top of the strut to keep out the Dirt etc :cool:

I thought they were Spax at first too Arnold! lol! :)

cheers Speedie, a lot to do yet....like fitting a front badge as the other one is totally...er...not quite the same as a new one! lol!
No interior shots as yet!
onwards and upwards!
icon12.gif
 
Aww, isn't it nice to see the good old K10's still getting rescued :)

Keep up the good work :)

Oh and welcome btw :D
 
Tailgate opener fitted

Bought a Tailgate opener from Fleabay for a tenner and it works like a dream. The only thing i didn't like about it was the fact that i had to cut a hole in the carpet! :down:

I'd like to get a rear wiper fitted sometime in the future...that'll be good fun no doubt.

Didn't get any pics but i did get some sent as a guide so if anyone wants the fitting guide please let us know :)

The other little job i did this weekend was to replace the Drivers side Door Pins and bushes,
so the door now shuts and opens without dropping...splendid! :)
 
The other little job i did this weekend was to replace the Drivers side Door Pins and bushes,
so the door now shuts and opens without dropping...splendid! :)

Hiya,
Where did u get the bits to do this as mine drops quite a bit everytime I open it :( lol.
Cheers
Joe
 
Hiya,
Where did u get the bits to do this as mine drops quite a bit everytime I open it :( lol.
Cheers
Joe

I managed to aquire some off fleabay. But they should be quite cheap at your local Nissan dealers. You'll need 4 Fozzy-Bronze bushes, 2 pins and 2 clips. It shouldn't cost more than a tenner....hopefully :)

Doorpinbushes.jpg

The Bushes need to be pressed in with a vice, if you can get the hinges off then it makes the job easier.
The Hinges can be bent out of shape if hit with a hammer as i've found out in the past.... :down:
The edge of the wing did get in the way of the Bolts holding the Hinges on but i sorted that by just pushing back the inner flap on the wing half an inch or so...
The Bushes are slightly bulged (see pic) so when they fit in the hole they squash slightly making a it a nice snug fit for the pin.

It can be a bit fiddly...all good fun tho' :)
 
Door Cards re-covered

On with the Show! :grinning:

Decide to re-cover the K10 Doorcards from the original Grey to a lighter colour.

NewlycoveredDoorcard.jpg


After that came the obligatory Hole cutting.....

Doorcardwithholescutout.jpg


...and fitment of said re-covered Doorcard...without the speakers...i had bought some speakers earlier on in the year, very nice 'Fury' ones but found that they don't go into the speker Hole as the fins that hold the Speaker up are too wide.... :doh:

So i found some more speakers, this time they were from that white Micra i had (now gone)...went to fit them and found that they were too small!!! :doh: :doh: :doh:

(Mark on the Seat is from the reflection from the Camera Flash bouncing off the Window)
http://i2.photobucket.com/albums/y11/argieandfee/Nissan MICRA K10/MICRAk10Doorcard.jpg

....decided to spruce up the plastic cover on the outside of both Seats...

K10seatmechanismcover.jpg


....more to follow... :)
 
looking good at the moment hope you are going to spray the door bits as well

Cheers, Hopefully i'll be doing the rest as long as this weather holds out cause at the moment it's wonderful! :)

just gotta get some more paint :rolleyes:

How did you clean the engine bay up that well? (Unless it was already that clean...)

When i first saw the bay i noticed that it was covered in this hard grease stuff...so through a bit of hard work, replacing old for new Bolts and lots of time thus the result ...so far... :)
It is in no way perfect as i've to replace all the Rubber Pipes and Clips, get the Carburetter polished, re-paint the Bracket just behind the bottom of the front Bumper, front and rear Strut Braces and also getting a few bits Anodised and generally keeping everything neat :cool:

I think the Engine bay gets dirty quickly especially if you don't have the plastic guards in place.
 
New addition

After reading the Figaro strut brace thread i felt compelled to get one....so i did! :laugh:
It fits perfectly and the handling has improved the 'squishiness' in the corners :) Bloody quick delivery too....2 days :wow:

NewStrutBrace.jpg


sexyStrutbrace.jpg


Plenty of room to remove the Air-box Lid :)

plentyofroomtoremovtheAirboxLid.jpg


.......
 
that engine looks brand new!! what did you change when you got it....


luckily i had some sort of protectant covering the engine bay...in fact it was everywhere! lol! So to get it all off i used Gunk, Brasso, Poorboys SS1, Barkeepers cleaning powder, Meguiers(sp), Autosol, Petrol, Autoglym, Wheel cleaner and...er....some Furniture Polish.....also i got through alot of Rags...oh and you find one arm gets bigger than the other! :laugh:

Having the New Clutch, Thrust Bearing, New clips and Fork Pins changed along with the rear Crankshaft Oil seal which is leaking badly.....
...but i'll keep it topped up until then :upside:

I gotta try and fit some speakers soon, the doorcards look a little silly without them :blush:
 
update

looking good :) keep it up

Cheers :)

Some updated piccys :)

Centre Console painted in Toyota Red and Laquered

P1010081.jpg


Petrol pipe off Ebay, Nissan Fuel Filter and Rocker Cover nuts and washers :)

P1010074.jpg


P1010075.jpg


Things to do
Fit another carb
Get some Red speakers that actually fit without a spacer ring and aren't too wide and deep at the back.
Gaiter for the handbrake
Replace Gearkernob
Replace Peddle Rubbers
Replace offside rear Shock
Paint front Engine Mount
Buy the correct Red Paint for general touching up....ooer missus :p
Paint Engine bay
Repair and paint area below Drivers side Mudflap
Buy Red HT Leads....any Leads to these anyone?....any Leads! get it?
lol3.gif


....er, i can't think of anymore...i think that should keep me going for a while :laugh:
 
More bits added

I havn't done this for a while so an update is in order.

Carrying on from the Console i decided that the back Brakes were on the low side so i replaced them. Cost was approx £20

Then the Water Pump and Timing Belt was changed which cost £90


We had a recon Gearbox fitted which looks very nice :) a New Clutch, New Clutch Cable, even though it bites a little early on take off i'm sure we'll get used to it as it wears in over time...cost of Fitting inc VAT

Also delivered yesterday were the Triple Silicone Red HT leads which cost £7

P1010014.jpg


I still havn't replaced the rear shocks yet...sometime, sometime...lol!
Must get some speakers that fit in the door and i've got to make the Drivers window winder stay on. Both Doorcards are the same thickness, the Passenger side winder stays on but not the Drivers side one....o_O

and last but not least we have a new Keyfob......snice :love:

P1010002.jpg


Anyway, till next time peeps....(Y)
 
Micra 110, tis a lovely looking car you've got there! The only thing I'd say (and this is just my taste I suppose) is try to avoid colour coding everything, it can make a decent car look a bit cheap.
 
Micra 110, tis a lovely looking car you've got there! The only thing I'd say (and this is just my taste I suppose) is try to avoid colour coding everything, it can make a decent car look a bit cheap.

I know what you mean, i am trying to keep it conservative honest! :laugh:

I think that's the problem with modding, keeping it in perspective and not going OTT. :grinning:
 
Seeing as my last posting was rudely removed by the Hackers i shall do it again...

As i said before it's been a while since I've done anything on the Car but last week I decided to Paint something a little different to the norm.....

ExhaustShroud2.jpg


I've also replaced the Bumpers with a colour coded 525 paint job. :)

I still have the Clock and Boot light to fit.... :doh:
 
Cheers m8 :)

Just found out that we've got a small Head gasket leak....actually a Head gasket leak is a big thing regardless of the the size of the Hole :(

So that's 2 Cars to sort out... :down:

I've also noticed that the Head is bolted down by some funny looking Bolts...:glance: which I don't have a Socket for.fwn

Also in 2 minds whether to paint the lower Black bits on the Bumpers, keep it Black or Paint it Red???
 
Go red!!! Will look so much better! ;)

Thats the head bolts, you need a special tool, have a search on the internet, if not then they should do them at halfords etc...
 
Im got told it was a special tool by halfords...:doh:

Im never believeing them again lol not that i do most of the time

Listen to Frank lol not me :p
 
Flamin' eck! i hadn't realised how long it's been since the last post! :eek:

...Anyway, I've been doing a few things over the last couple of months, I finally fitted the rear Top 'Super S' Spoiler after overcoming a few problems.
Replaced the Wipers with the Bladed ones and polished the Wiper Arms.

After salvaging the Speedometer Housing I decided to turn it from the Grey to Black. I did the usual sanding down, washing, sanding down, washing thing and got to work on the painting.

PICT0026.jpg


PICT0025.jpg


PICT0028.jpg


The finish isn't too bad, looks a little like imitation leather but the photo's don't show the colour, it is Black I can assure you ;)

I'll get some more pics up later when I can find some...lost in my comp somewhere :doh:

I've still to acquire some Wheels, preferably 14" with low profile Tyres, Lowering Springs which would make a 35mm drop and some side skirts. I need to replace the exhaust sometime in the future (4-5 months) so I'm thinking Stainless downpipe and straight through to the back with twin outlet (£350) ?

The exterior could do with a look at too so I'm booking in a bloke to give it the works (£100) for total clean and polish. the swirls on my Bonnet are horrendous! :eek:

...and there's more...
 

Attachments

  • Column Cowel Top and bottom before painting.jpg.JPG
    Column Cowel Top and bottom before painting.jpg.JPG
    630.4 KB · Views: 379
  • Column Cowel Top and bottom after painting.jpg.JPG
    Column Cowel Top and bottom after painting.jpg.JPG
    635.6 KB · Views: 397
Ideas sound on the right track ;)

Good job with the housing (Y)

That £100 clean should do it good, Is that just a t-cut thing or more?
 
Back
Top