Although i'm not on this forum a great deal, I take great care in my Micra as it is my daily car, and I do about 20k a year in it. Amoungst servicing it every 6k as opposed to Nissans 18k reccomended interval, I like to ensure that it wont rot before my eyes. I've had experience with older Nissans and rust has allways been their main downfall, and with my experience of other Jap cars, I thought its best I protect my Micra from the dreadded tin worm. So I hope this thread can help some other fellow K12 owners.
As I use the car daily, I cannot be without it for any more than a weekend. So this method I have taken I found to be sufficient enough to solve the problem, whilst not getting too far involved to leave me on my bike for a week etc.
The main tools I used where a compressor, die grinder with wire brush attachment, wire brush, shutz gun with extended 360 degree nozzle for interior sections.
I used hammerite Krust, Tetra Schutz Underseal, and Dinitrol Corromax 3125 for all the interior sections. (Most cars rot from the inside out, so this is probably more important than the underseal.)

The Dinitrol Cavity wax goes a very long way, I used about a litre and a half and did all inside the rear 3/4's/arches, took all the bungs out of the sills including the one inside the rear arch and filled both sills. I also did all the rear chassis legs, the chassis box sections around the rear beam mounting points and petrol tank, the chassis box sections that run along side the 'transmission tunnel' and the two chassis points at the front behind the front wheel arches.
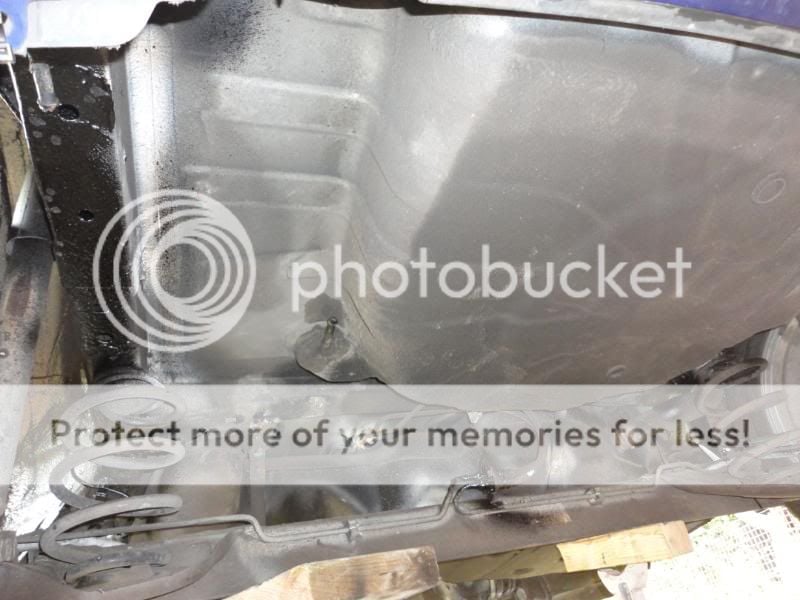
First of all I did the rear arches. This included removing the filler pipe from the drivers side arch. I then cleaned it all down and used an air die grinder with a wire wheel attachement to get rid of any rust that was starting to form.
Before and During:
Notice how alot of area under the arch isnt actually sealed from factory. Also the worst part was where the fuel filler goes under the chassis leg, this along with the seam sealer trapps water and dirt.
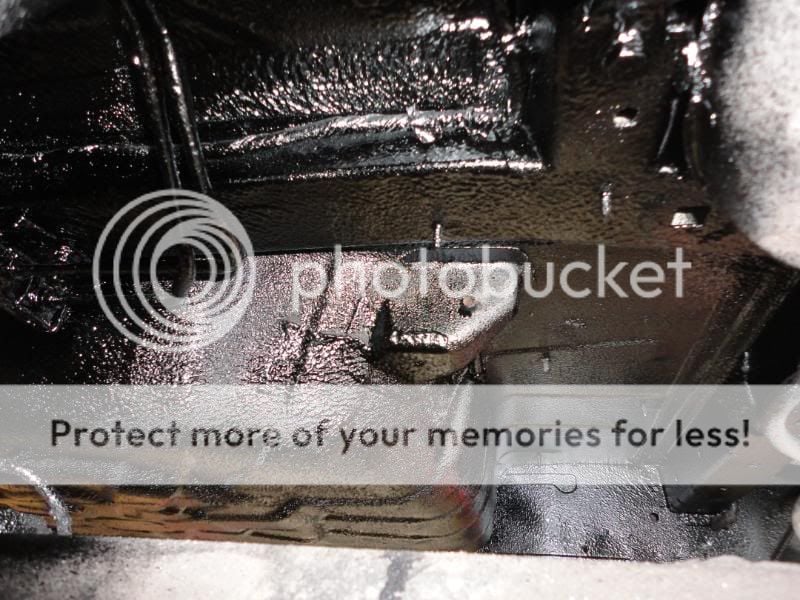
After:
After the rear arhces, I removed the rear lights, and bumper. I was astonished at how much mud there was behind the rear bumper, and although I found no rust I thought it'd be best to do this area. Also whilst doing this, I removed the rear end caps from the chassis legs and sprayed inside the legs. I also removed the interior inside the boot and with the help of the extended 360 degree nozzle I managed to get the Dinitrol inside all of the rear 3/4/Arch area rite the way down to the sill at the front of the arch. There are plenty of seams around this area where rust can form, and the Dinitrol seaps into these seams preventing such occuring. (My camera battery went flat at this piont so couldnt get any pics of the interior cavity waxing, however it is also difficult to get pics as its all internal lol)
I have some more info with pictures of doing the rear/underside of the car which i'll add shortly.
As I use the car daily, I cannot be without it for any more than a weekend. So this method I have taken I found to be sufficient enough to solve the problem, whilst not getting too far involved to leave me on my bike for a week etc.
The main tools I used where a compressor, die grinder with wire brush attachment, wire brush, shutz gun with extended 360 degree nozzle for interior sections.
I used hammerite Krust, Tetra Schutz Underseal, and Dinitrol Corromax 3125 for all the interior sections. (Most cars rot from the inside out, so this is probably more important than the underseal.)

The Dinitrol Cavity wax goes a very long way, I used about a litre and a half and did all inside the rear 3/4's/arches, took all the bungs out of the sills including the one inside the rear arch and filled both sills. I also did all the rear chassis legs, the chassis box sections around the rear beam mounting points and petrol tank, the chassis box sections that run along side the 'transmission tunnel' and the two chassis points at the front behind the front wheel arches.
First of all I did the rear arches. This included removing the filler pipe from the drivers side arch. I then cleaned it all down and used an air die grinder with a wire wheel attachement to get rid of any rust that was starting to form.
Before and During:


Notice how alot of area under the arch isnt actually sealed from factory. Also the worst part was where the fuel filler goes under the chassis leg, this along with the seam sealer trapps water and dirt.
After:


After the rear arhces, I removed the rear lights, and bumper. I was astonished at how much mud there was behind the rear bumper, and although I found no rust I thought it'd be best to do this area. Also whilst doing this, I removed the rear end caps from the chassis legs and sprayed inside the legs. I also removed the interior inside the boot and with the help of the extended 360 degree nozzle I managed to get the Dinitrol inside all of the rear 3/4/Arch area rite the way down to the sill at the front of the arch. There are plenty of seams around this area where rust can form, and the Dinitrol seaps into these seams preventing such occuring. (My camera battery went flat at this piont so couldnt get any pics of the interior cavity waxing, however it is also difficult to get pics as its all internal lol)


I have some more info with pictures of doing the rear/underside of the car which i'll add shortly.